
How to Enable Mobile Hotspot in Windows 11/10
Laptops usually support creating mobile hotspots for other mobile devices to connect due to their own wireless network cards. Here's how to do it on Windows 11, 10.
By Delia Updated on December 10, 2024
Laptops usually support creating mobile hotspots for other mobile devices to connect due to their own wireless network cards. Before Windows 10, creating a mobile hotspot was more troublesome and difficult for most users, but in Windows 10 and Windows 11, the system provides a direct setup portal, so users just need to follow the prompts to set the hotspot name and password without typing those commands again. You can follow this guide to share your Internet connection easily.
How to create a mobile hotspot in Windows 11/10
The following tutorial takes Windows 11 as an example.
1. Open the Start menu and select "Settings" to open the Settings app.
2. Select the “Network & Internet” tab on the left sidebar.
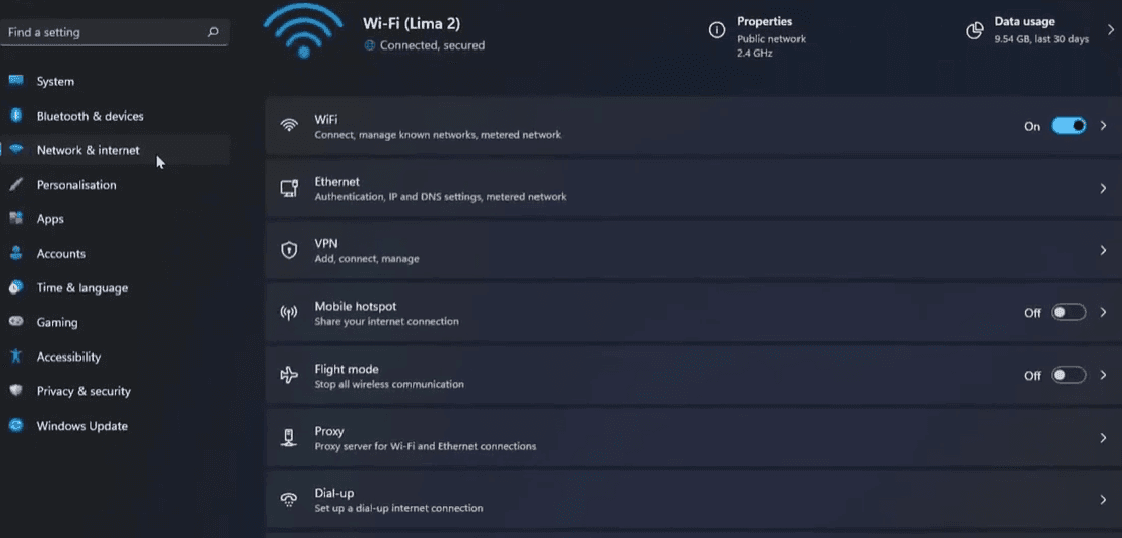
3. On the right side of this interface, find the "Mobile hotspot" option. Before enabling Mobile hotspot, it’s suggested to configure how it works. First, click on the drop-down menu labeled "Share my Internet connection from" and then select the Internet source you want to share. Some examples are "Ethernet" and "Wi-Fi".
4. Turn on the “Mobile hotspot” switch, and then click the "Edit" option below to set your wireless hotspot name and password. To ensure that the hotspot is stable and can be found by other devices, you can choose 2.4GHZ frequency (if you are given the option).
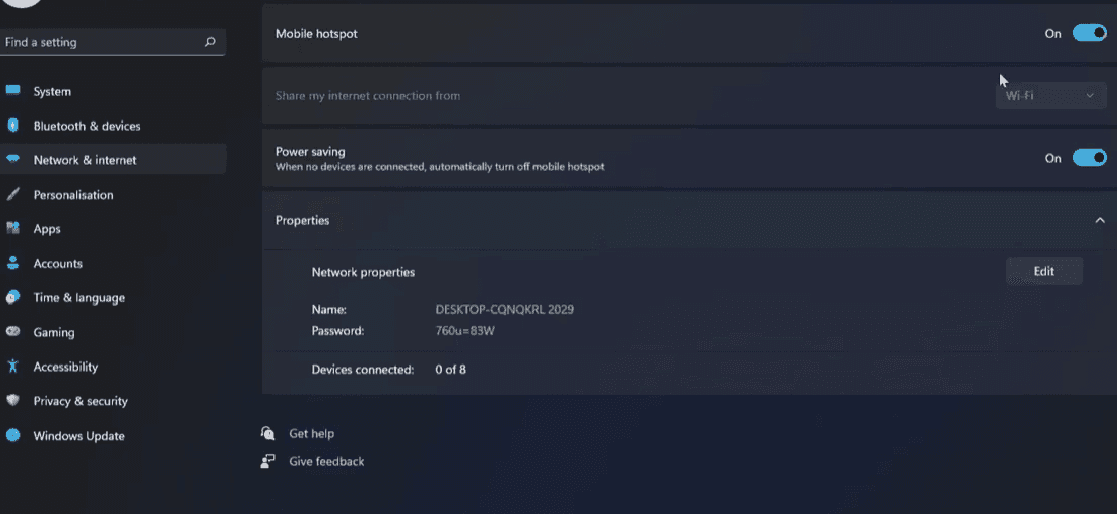
5. Click "Save" to confirm the settings. Now you’ve enabled the Mobile hotspot to share your Internet connection.
Note: by the wireless card manufacturer driver writing rules, you may not be able to successfully create mobile hotspot on some computers.
