
How to Enable Hyper-V on Windows 10 and Install OS
If you don't have high requirements for virtual machine features and don't want to download third-party software and take up extra memory, then maybe you can try Hyper-V, the virtual machine that comes with Windows 10.
By Delia Updated on December 10, 2024
In some usage scenarios, we need to work in different system environments for testing, debugging, development, etc., and this is the time to use virtual machine.
Among all the virtual machines, the most famous one is probably VMware, but if you don't have high requirements for virtual machine features and don't want to download third-party software and take up extra memory, then maybe you can try Hyper-V, the virtual machine that comes with Windows 10.
The conditions for installing Hyper-V
1. Windows 7 and above (desktop operating system); Windows Server 2008 R2 and above (server operating system)
2. Intel or AMD 64-bit processor
3. memory not less than 2G
4. Win10 Home Edition does not come with Hyper-V components, you need to use the key to upgrade the system, or download and install other versions of Windows 10.
How to enable Hyper-V in Windows 10
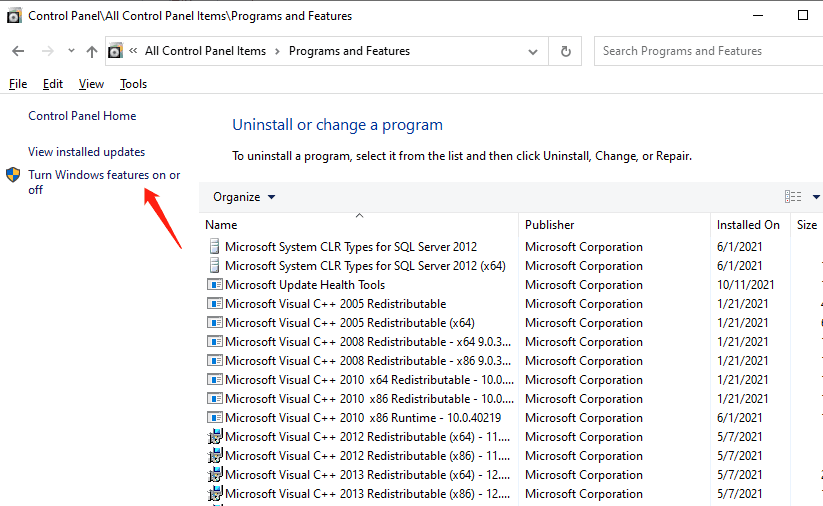
1. Open "Control Panel" and select "Programs and Features" and then "Turn Windows features on or off".
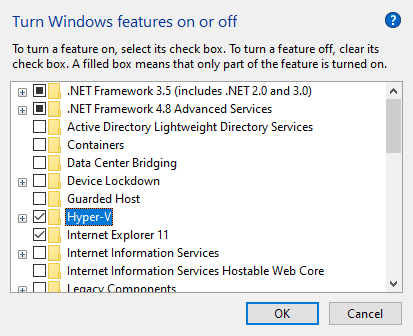
2. In the pop-up window, then find option of "Hyper-V", and check it.
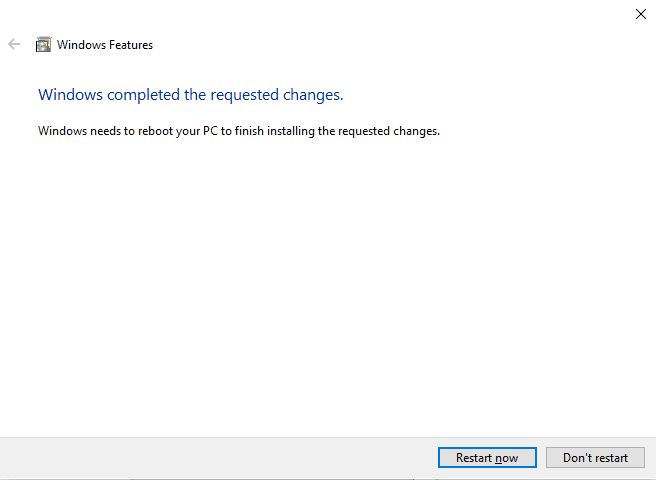
3. Wait for a few seconds and Hyper-V will finish downloading, restart your computer.
4. After restarting your computer, the menus for Hyper-V will be added to Windows Administrative Tools in Start menu. This means you have successfully installed it.
How to install a system on a virtual machine
You need to prepare the following materials: an ISO image file or any kind of system installation media.
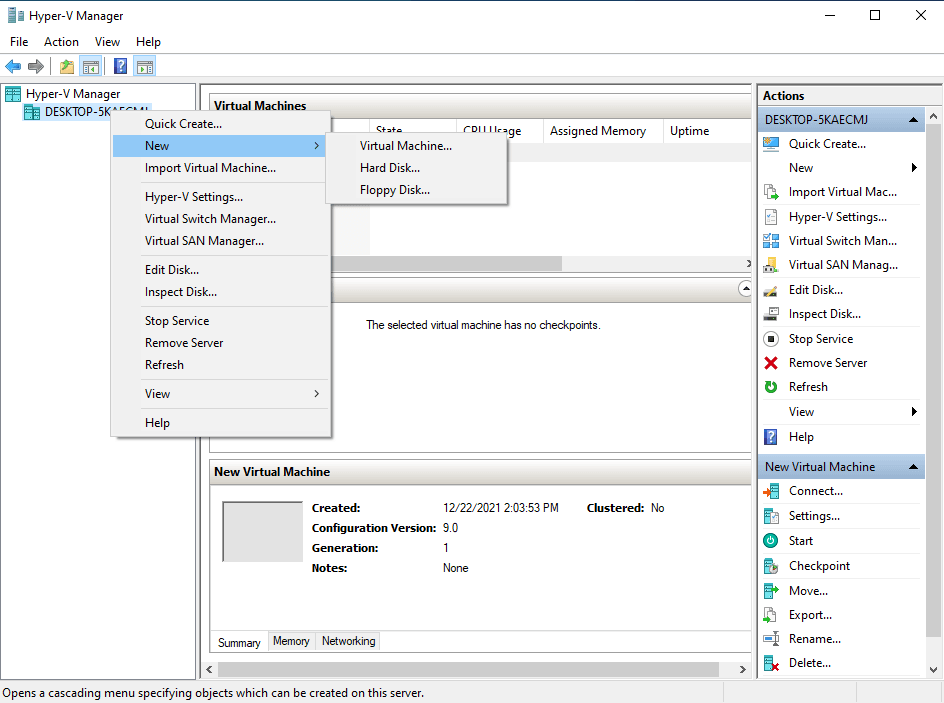
1. Open Hyper-V Manager and enter the main interface of the program, you will see the name of your current computer in the left menu bar, right click it and choose New → Virtual Machine.
2. Enter the New Virtual Machine Wizard and fill in the virtual machine name and storage location as needed.

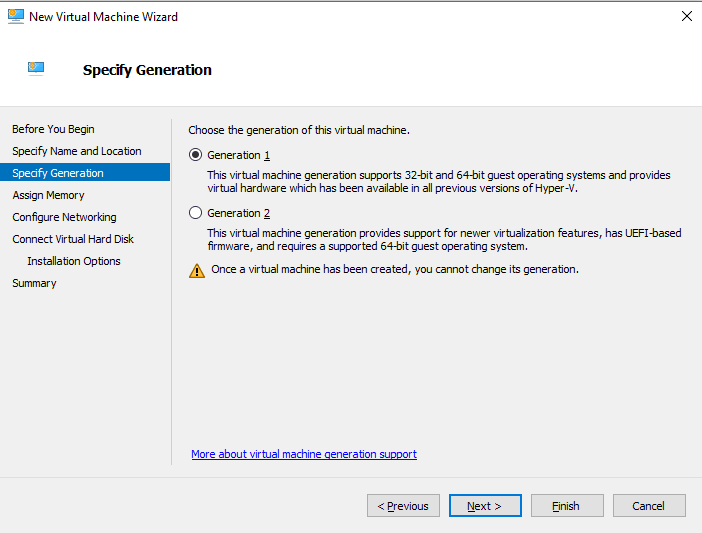
3. Specify the generation selection according to the actual situation. Note that once the virtual machine is created, you cannot change the version.
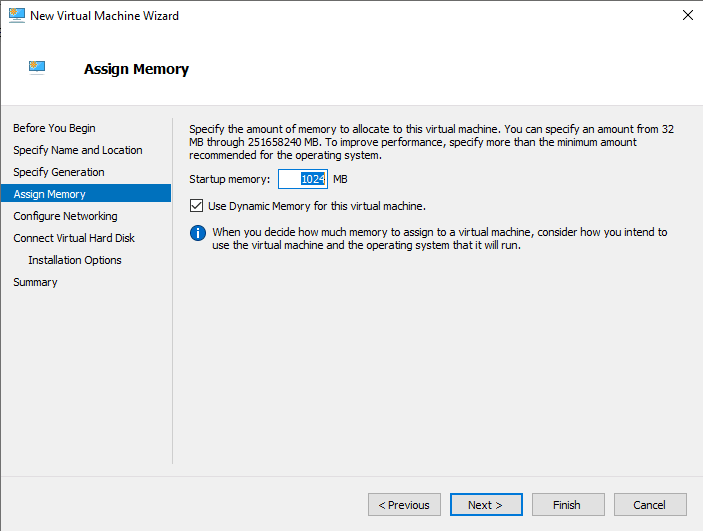
4. Assign memory. If you need to use the virtual machine to run large software, you can allocate a little more.
5. Configure the network, here you can choose “Default Switch”, that is, the virtual machine uses the local network.
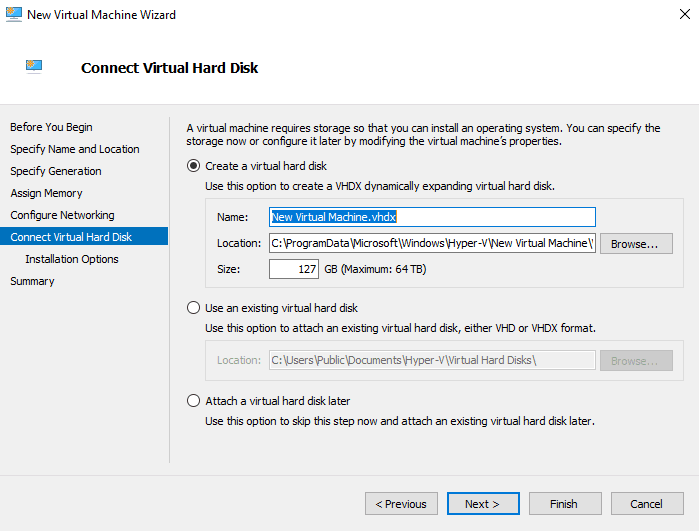
6. Connect the virtual hard disk, which can be simply understood as adding a hard disk to the virtual machine.
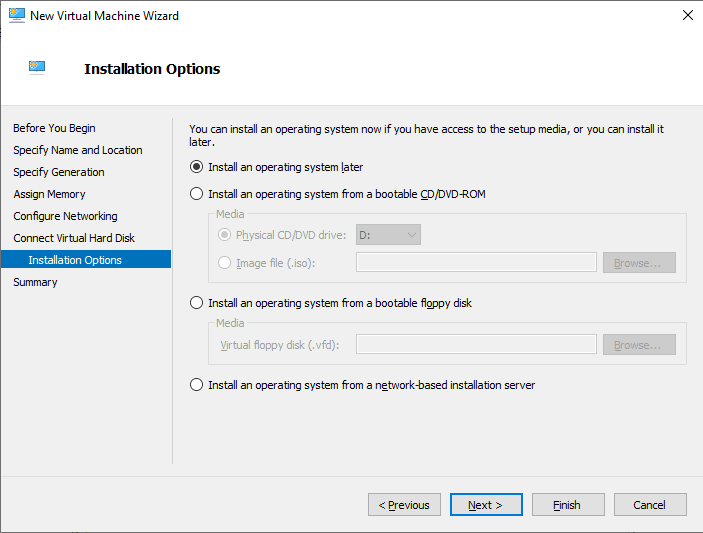
7. If you have already prepared the ISO file, you can choose to Install the operating system from a bootable image file, or if you don't have an operating system in hand, you can choose the first option to install the operating system later.
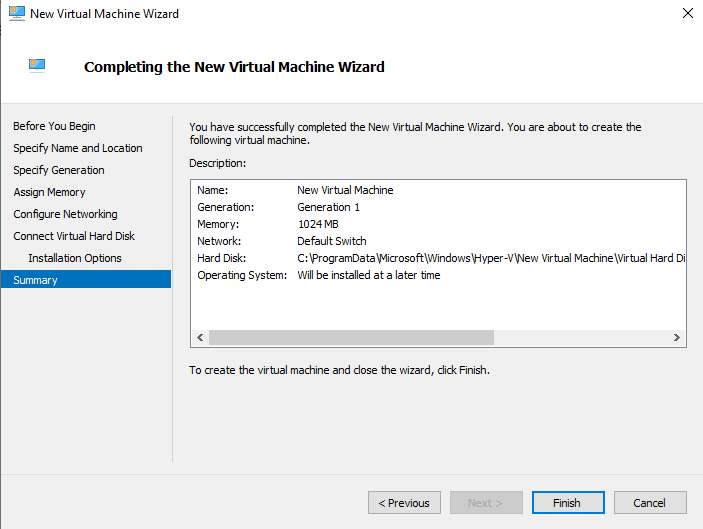
8. Finally, you can see the basic information of the virtual machine, click "Finish" to create the virtual machine.
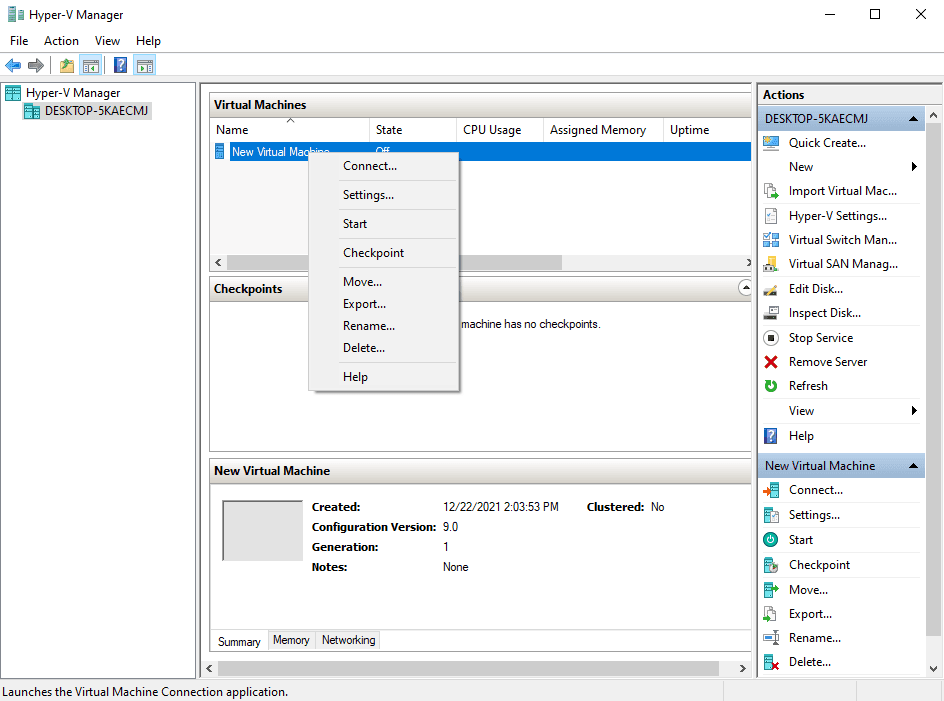
9. After the creation is complete, go back to the main interface of Hyper-V Manager, then you can see the virtual machine just created, right-click and select "Start" to run it.
After the virtual machine starts, the Windows 10 image file will be installed automatically.
Summary
Hyper-V virtual machine is embedded in Windows 10 system, it is very easy to install, with it you can test various software, experience different systems, equivalent to have more than one computer, which is very useful for computer enthusiasts.
