
How to Disable Camera in Windows 10
Windows 10 has a camera feature that is on by default. If you are concerned about privacy and security issue, you can consider turning off the camera when you don't need to use it.
By Delia Updated on December 10, 2024
Windows 10 has a built-in camera feature that can be used for chatting and taking pictures, etc., but it also poses certain privacy and security risks. It is on by default, and if it is maliciously monitored or controlled by hackers and others, the consequences are unthinkable. For the sake of privacy and security, you can consider turning off the camera when you don't need to use it, here's how to do it.

Steps to disable Win10 camera
1. First, click the Start menu, and then click the "Settings" button in the pop-up Start menu to enter the Win10 system settings interface.
2. In the system settings interface, click the "Privacy" option to open the privacy settings interface in Win10 system.
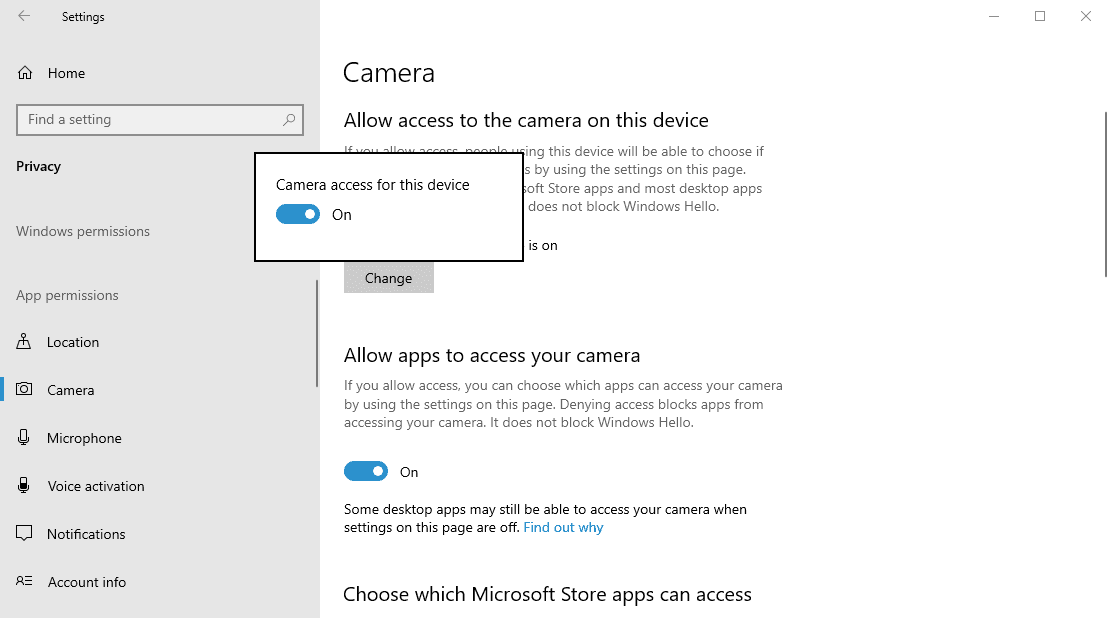
3. Then, click the "Camera" option on the left side of the page to set the camera app.
4. You can see the prompt on the right side as "Camera access for this device is on", click the "Change" button at the bottom and drag the slider to close it in the small window that pops up. This will disable the Camera app on that computer.
5. If you only want to disable camera access for a specific app, then just click on the app list below to set it up individually.
Tip: If Windows Hello is enabled, Windows Hello will still be able to use the camera even if its app access is disabled. For these users, you can turn off the Windows Hello sign-in feature by going to “Settings” > “Accounts” > “Sign-in options”.

You sometimes need the Camera app for work and play, but when the camera is not applicable, you can actually disable it to better protect private information.
