
How to Clone SSD to Larger SSD without Unused Space Left
Cloning a smaller SSD to a larger SSD can improve both storage capacity and overall performance. This guide provides detailed steps on how to clone SSD to larger SSD on Windows 11/10.
By Lily Updated on January 19, 2026
When your computer is running low on storage space or the C drive is full, it may slow down your computer considerably. How much SSD storage space is right for my needs? For the average user, a 250GB or 500GB SSD will be sufficient for the operating system, applications, and future updates. For gaming or design users, 500GB to 1TB is highly recommended.
When space is scarce, we need to upgrade our SSD. Upgrading storage can dramatically improve system performance, and one of the most effective ways to do this is to clone your existing SSD to a larger SSD. In this article, we'll give you a detailed guide to cloning an SSD to a larger SSD.
🌟To check different SSD cloning scenarios, please refer to this complete guide: Clone SSD to New SSD.
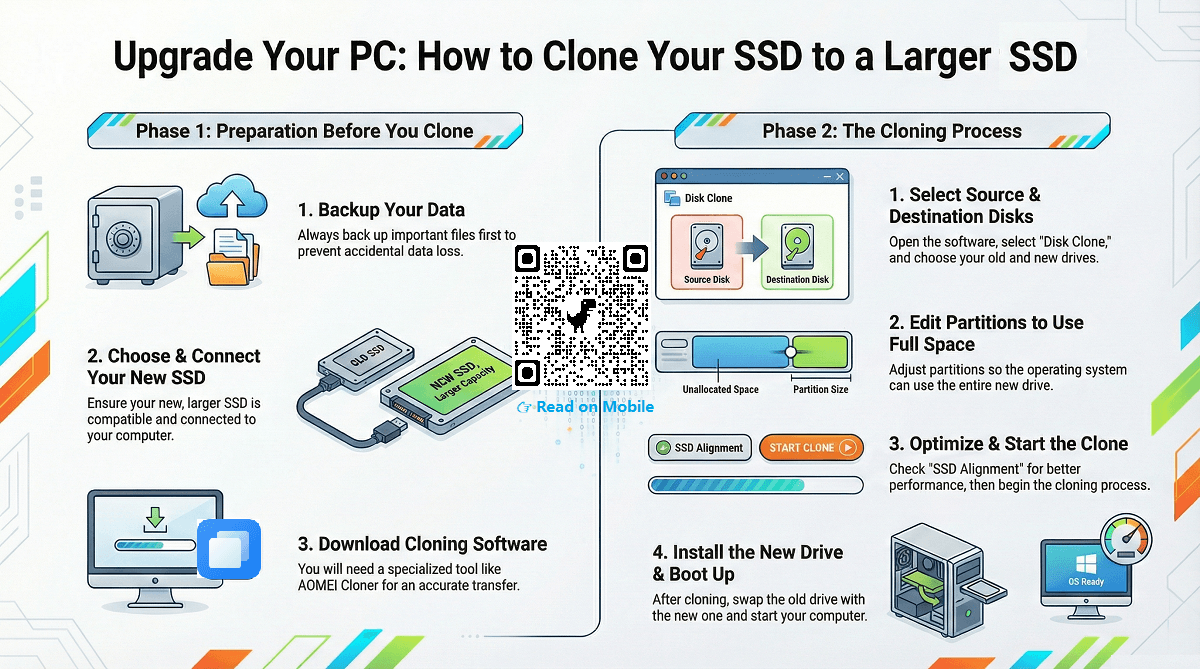
Prepare for Cloning a Smaller SSD to a Larger SSD
Before you begin the cloning process, proper preparation is essential to avoid data loss and ensure a smooth transition. Here are the steps you need to take before cloning your SSD:
1. Back up your data: While cloning software is generally reliable, it is always a good habit to back up your data in case something goes wrong during the cloning process.
2. Choose a reliable SSD: Choose a larger SSD with enough space to store all your current data and any future storage needs. Make sure the new SSD is compatible with your computer interface (e.g., SATA, NVMe).
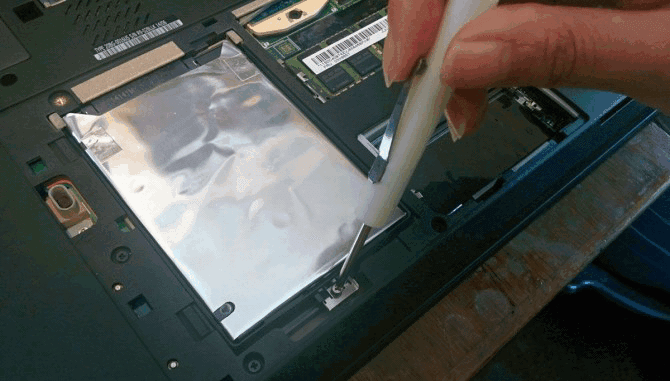
3. Connect the SSD: Install the new SSD internally via an M.2 or SATA port, or connect it externally using an adapter/enclosure. Use a SATA-to-USB adapter for 2.5-inch SATA SSDs, and an M.2-to-USB enclosure for M.2 NVMe or SATA drives.
4. Choose cloning software: To clone your SSD effectively, you need specialized software. AOMEI Cloner is a reliable and high-performance tool that can assist in this process, ensuring that your data is transferred accurately and efficiently.

- Multiple cloning options: Supports disk cloning, system cloning, and partition cloning to meet different migration needs.
- Optimized cloning function: Provides SSD alignment and sector-by-sector cloning to improve SSD performance and data integrity.
- Partition editing: This feature allows you to clone smaller SSDs to larger SSDs without unallocated space left.
- Wide compatibility: Compatible with a variety of storage devices and operating systems, including HDD, SSD, NVMe drives, and Windows 11, 10, 8, 7 & Server OS.
How to Clone Smaller SSD to Larger SSD Step by Step
With all-around cloning features, AOMEI Cloner can effectively clone smaller SSDs to larger SSDs, ensuring data integrity and seamless system migration. Follow the steps below to successfully clone boot drive to a larger SSD:
Step 1: Download SSD cloning software
Download and install AOMEI Cloner. This tool is known for its user-friendly interface and reliable cloning capabilities.
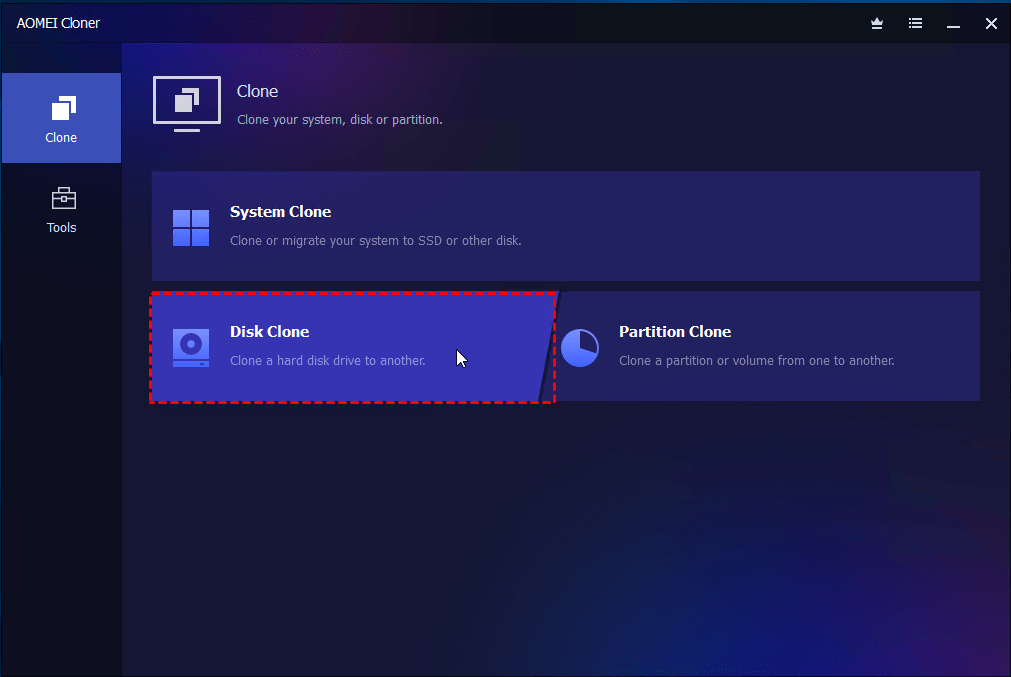
Step 2: Navigate to the Disk Clone option
Open AOMEI Cloner, click the "Clone" tab on the main interface, and select "Disk Clone".
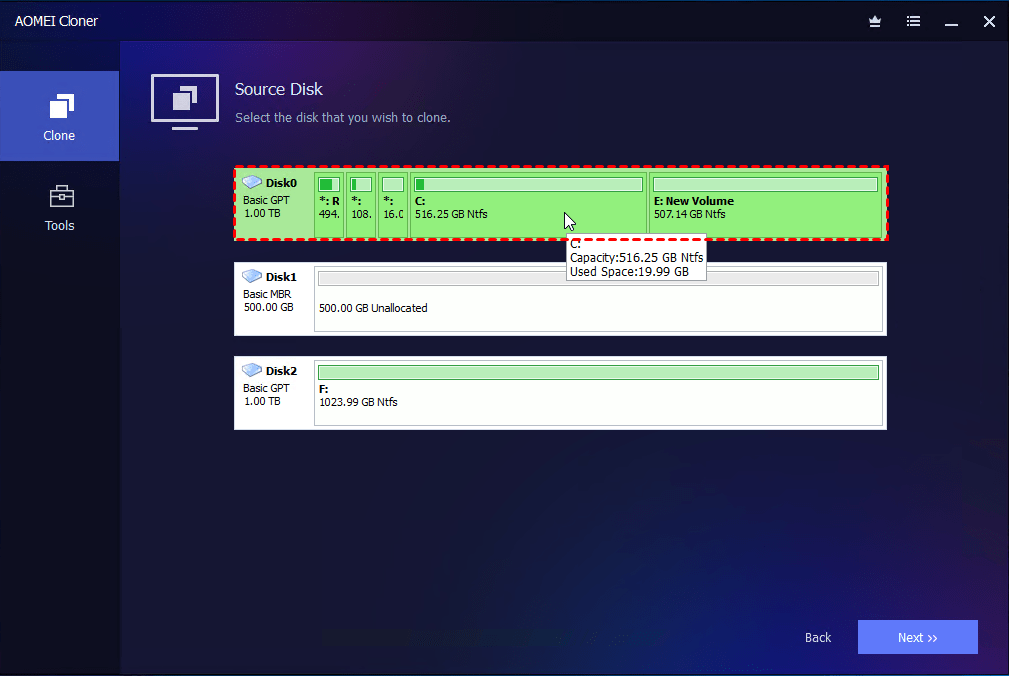
Step 3: Select source and destination disks
- In the window that appears, select the current smaller SSD as the source disk and click "Next".
- Select the new larger SSD as the destination disk and click "Next".
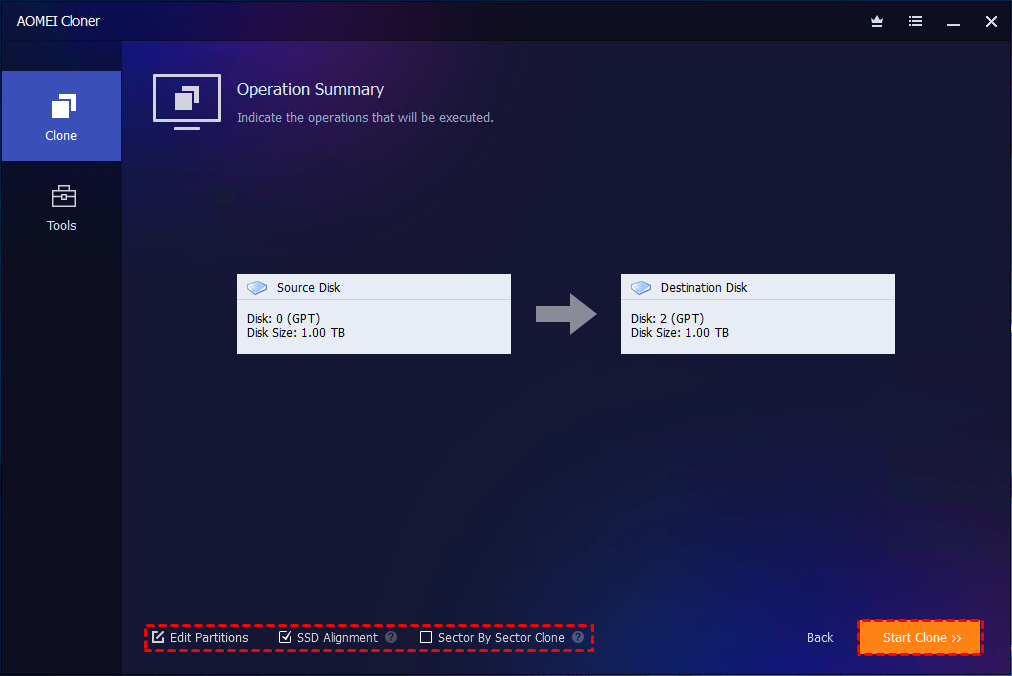
Step 4: Make full use of disk capacity
Click “Edit Partitions” to make full use of the space on the larger SSD. You have two choices:
- Add unused space to all partitions: It will reallocate the unallocated space to each partition of the target disk, appropriate for the disk size.
- Manually adjust partition size: Add unused space to any partition on the destination disk as you want. For example, you can add more space to C: drive.
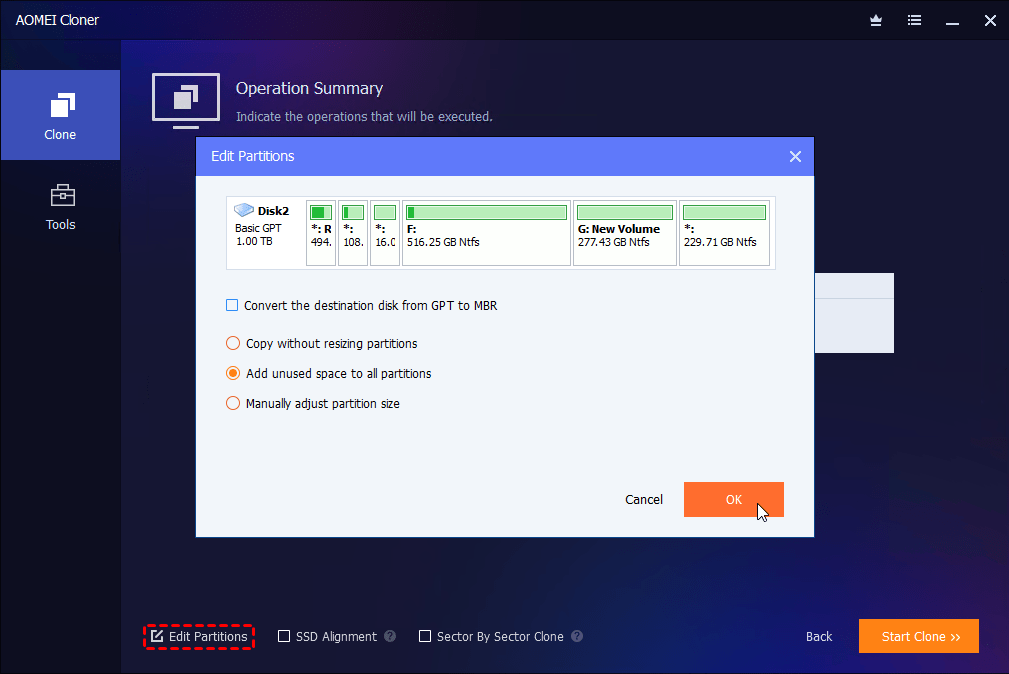
Step 5: Optimize SSD performance and start clone
Check the "SSD Alignment" option to optimize the performance of the new SSD. After confirming that all settings are correct, click the "Start Clone" button. This step may take some time, depending on the amount of data being transferred.
Step 6: Complete the cloning and boot the system
After the cloning process is complete, shut down the system. Swap the old SSD with the new one if you haven't already. Boot the system and verify that the cloning was successful. Make sure all files are intact and that the operating system can boot properly from the new drive.
FAQs about Cloning SSD to a Larger SSD
1. Can I clone SSDs of different sizes?
Yes, you can copy SSD to larger SSD or smaller SSD as long as the target SSD has enough capacity to hold all the data from the source drive. AOMEI Cloner enables you to adjust partitions to fit the new disk.
2. Do I need the same type of SSD for cloning?
Not necessarily. You can clone from SATA to NVMe or vice versa, but make sure your system supports the new drive type and you use a compatible enclosure or port if connecting externally.
3. What happens to the old SSD after cloning?
The old SSD remains intact and can be repurposed for extra storage or backups, but avoid erasing the old SSD until you confirm the new drive works properly.
Potential Challenges of Cloning an SSD to a Larger SSD
While cloning is generally a simple process, there are some challenges you may encounter:
Alignment Issues: In some cases, partition alignment can cause issues with SSD performance. Make sure the cloning software properly aligns the partitions during the process.
Boot Issues: Sometimes, your system may not boot from the new SSD. If this happens, you may need to enter the BIOS and select the new SSD as the primary boot device.
Data Corruption: Although rare, data corruption is possible during the cloning process. Backups ensure that your data can be recovered if problems occur.
Conclusion
Cloning boot drive to larger SSD is an effective way to increase storage space and improve system performance. By following the steps outlined in this guide and using reliable cloning software, you can upgrade your SSD with minimal downtime and without having to reinstall your operating system or software.
Remember to back up your data before beginning the process, select a compatible SSD, and make sure you follow the correct steps during the cloning process for the best results.
With the right tools like AOMEI Cloner and careful execution, cloning your SSD to a larger one can significantly enhance your computing experience, making it an investment in the life and performance of your system.
