Instructions for Turning Off Autoplay in Windows 10 And Windows 11
In this article, you will learn how to turn off Autoplay in Windows 10 and Windows 11.
By Dervish Updated on December 10, 2024
When you insert the USB or disk into the Windows PC, a window pops up to prompt you to operate the file.
This is caused by autoplay, which is a component provided by Windows 98. It checks the recently connected removable drive for information and provides you with options, such as playing video, sound, opening the manager, etc.—according to your removable Files in gadgets.
No matter how helpful this component is, for another explanation, some people don't like this prompt window popping up. If you are one of them, please relax. Just follow the sections below, and you will know how to turn off autoplay without any impact.
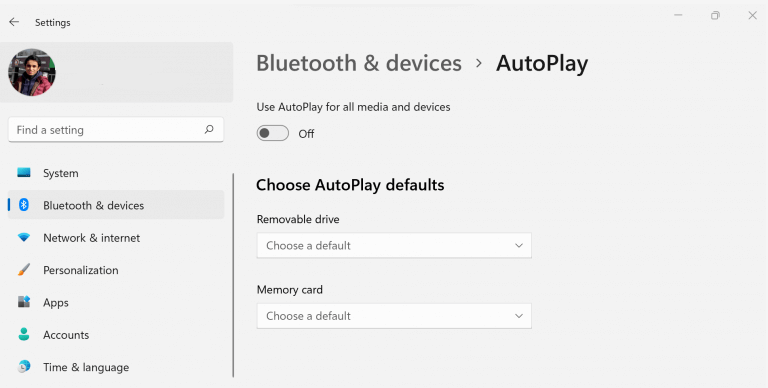
Instructions for turning off autoplay in Windows 11
Turning off autoplay in Windows 11 is very simple. Follow the steps below and you will be done immediately.
1. Press Windows + I.
2. Select Bluetooth and device.
3. Select autoplay.
You will enter the autoplay settings, where you can disable or adjust the autoplay settings.
Turn off autoplay in Windows 10
The process of turning off autoplay in Windows 10 is the same as in Windows 11.
Here is how you can turn off the autoplay feature included in Windows 10:
1. Press the Windows key + I shortcut key to open the settings.
2. Select Device> AutoPlay.
3. In the autoplay setting, change on to off.

After these operations, you no longer need to worry about the prompt window appearing after inserting the removable disk.