How to Query Wi-Fi Password in Windows 11
What should I do if I forget the Wi-Fi password in Windows 11? This article will provide two methods to help you retrieve your password.
By Dervish Updated on December 10, 2024
Sometimes, you may have forgotten what the Wi-Fi password of the computer is connected to. In this case, you cannot connect to the network with a new device. Fortunately, this article will show you how to find the Wi-Fi password in Windows 11, including two ways through settings and command prompt.
Find Wi-Fi password in Windows 11 through settings
To find the Wi-Fi password in Windows 11 through settings, follow these steps:
1. Click the Windows icon on the Windows 11 desktop, and then find "Settings". Or, directly press and hold "Windows + I" to open Settings.
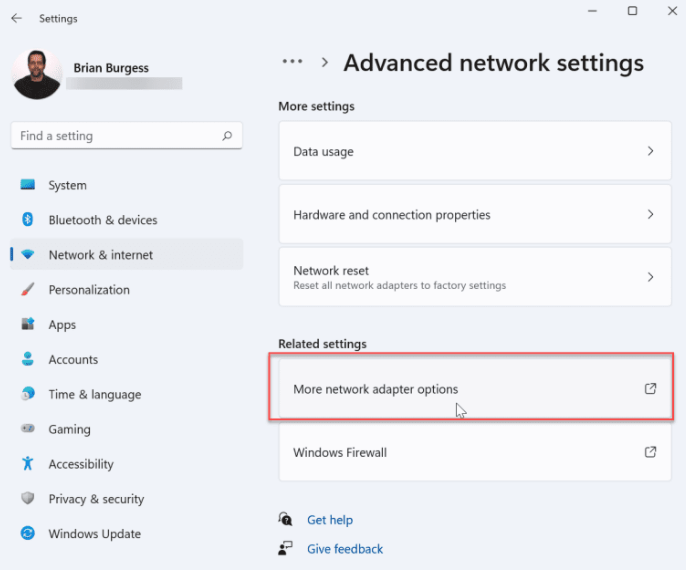
2. After opening, click "Network & internet" on the left, and then click "Advanced network settings".

3. Click "Network Adapter Options" again.
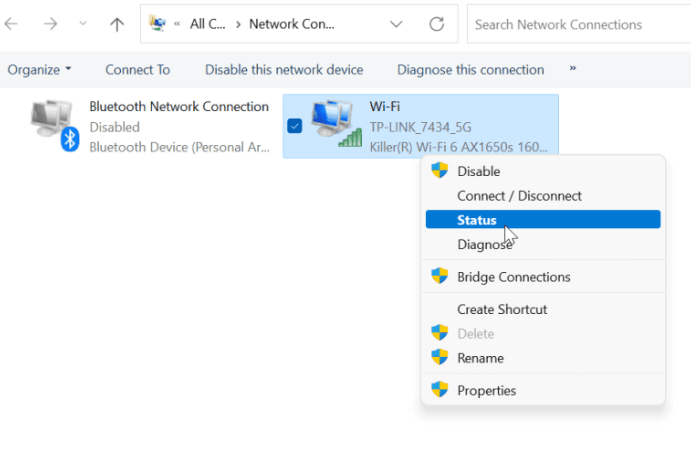
4. Here, right-click Wi-Fi and select Status.
5. On the Wi-Fi status screen, click the "Wireless Properties" button.
6. On the following screen, click the Security tab at the top. Under the Network Security Key field, check the Show characters box.
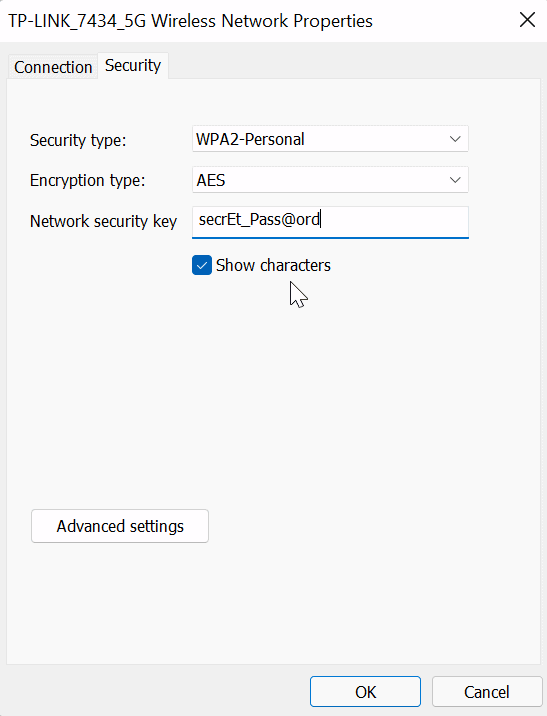
After that, you can see that the Wi-Fi password will be displayed.
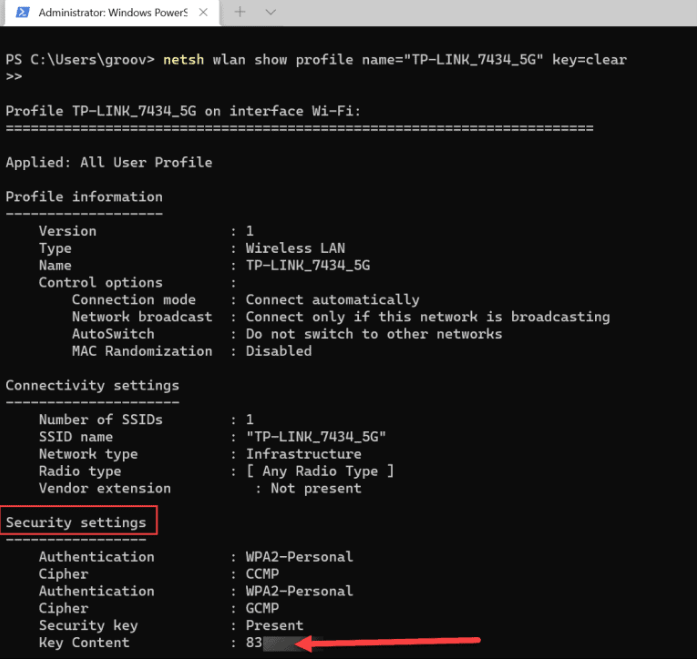
Query Wi-Fi password through PowerShell
For some advanced users, we also provide a way to find the Wi-Fi password in Windows 11 through PowerShell. You can do this:
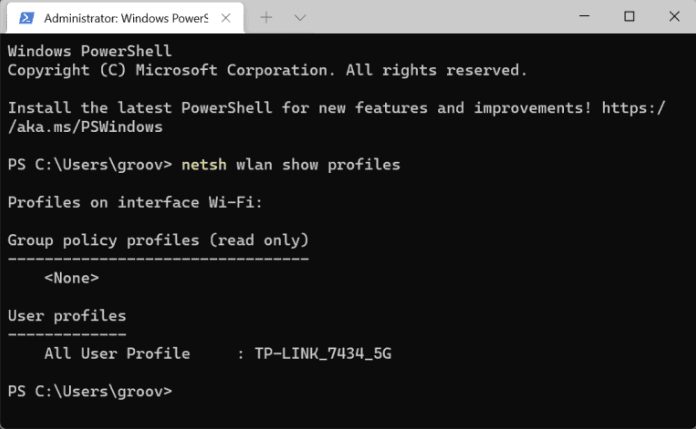
1. First open PowerShell.
2. Then type the following command: netsh wlan show profiles
3. Next, type netsh wlan show profiles="WiFi-Profile" key=clear to determine the Wi-Fi password for a specific network. Please note that "WiFi-Profile" is where you enter the name of the network you want to password.
4. After inputting, you can see the Key content under the security settings, this is the Wi-Fi password.