Instructions for Enabling and Using Night Light in Windows 11
Enable night light in Windows 11 can better filter the radiation that the computer brings to you, reduce the damage the computer brings to you, and let you work more efficiently.
By Dervish Updated on December 10, 2024
Here is how to enable and use night light in Windows 11
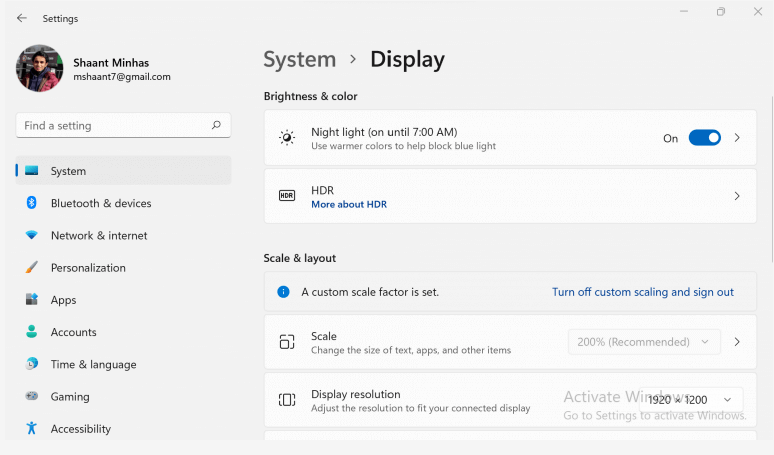
1. Press and hold Windows + I at the same time to open Windows Settings.
2. Select System> Display.
3. Slide the night light button to turn it on.
As office workers in the 21st century, we will face computers most of the day.
Nonetheless, fortunately, there is a way for you to get your work done efficiently without disrupting your plan to wake up and rest. That is flux, an application that works by eliminating the blue light radiated by electronic devices, which is the root cause of the long-term decline in human health.
However, Microsoft is aware of this need of users and has formulated their solution to this need. This tool is called night light, which allows you to filter blue light manually.
In the following content, we will discuss how to use night light on your Windows 11 PC.
Step-by-step instructions for enabling Nightlight in Window 11
Using Window's Night lights is a really simple task.
1. Press and hold Windows + I at the same time to open Windows Settings.

2. Select System> Display.
3. Slide the night light button to turn it on.
That's it. In addition to these, you can see that you may also make some personalized settings according to your personal needs.
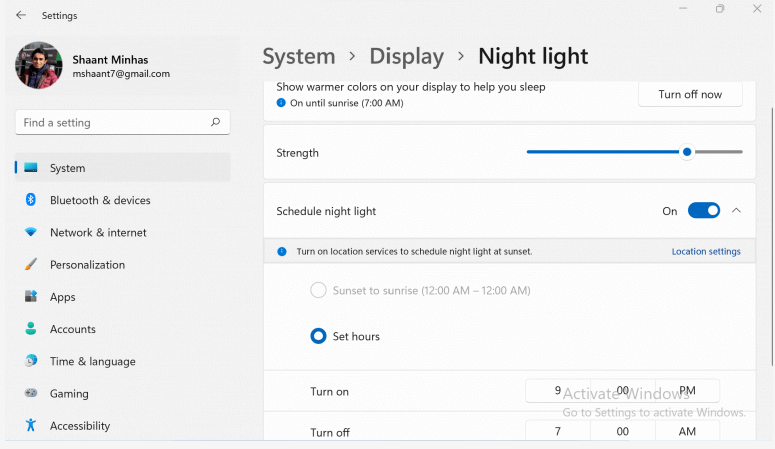
From here, you can change the intensity of the blue light filter, just slide the blue light button.
There is also an option that allows you to automate the blue light filtering process by setting specific on and off times for the night light. This gives you the flexibility to set your own work-rest schedule, because the default night lighting time setting may not be suitable for everyone.
Summarize
Through the methods provided in this article, you can better filter the radiation that the computer brings to you, so as to adjust your sleep cycle. This is not only better for your health, it will not delay your work efficiency.