
4 Ways to Check Installed RAM and Available RAM Slots on Windows
Do you know how to check installed RAM and RAM slots on Windows? This article will give you some professional suggestions.
By Dervish Updated on December 10, 2024

Do you know how much RAM your PC has? Do you know how many RAM sticks you can install on your PC? This is how to check RAM on a Windows device.
The maintenance of laptops and desktop computers is very troublesome for most ordinary users. Computers have so many parts, it is very challenging to be familiar with each part. But RAM is an important part of PC, and upgrading RAM is an effective way to further improve PC performance. Therefore, the understanding of PC specifications is crucial. Read on, how to check RAM specifications on Windows.
What is RAM and why is it important?
Random Access Memory (RAM) is the main data storage component of the PC. It is temporary, that is, when the PC is turned off, it does not retain any information, so it is also called temporary storage. The larger the RAM, the smoother your PC will be when running multiple programs at the same time. Therefore, many users choose to add RAM sticks in order to make their computers have better performance.
Step-by-step instructions for viewing PC RAM on Windows
There are multiple ways to check the amount of RAM on your Windows PC, including using third-party tools that are completely free.
1. Use Task Manager to view the actual RAM
The task manager is a very important tool that allows you to understand the complex internal activities of the PC. In addition to tracking application execution, startup time, and memory usage, it can also provide you with a lot of data about RAM.
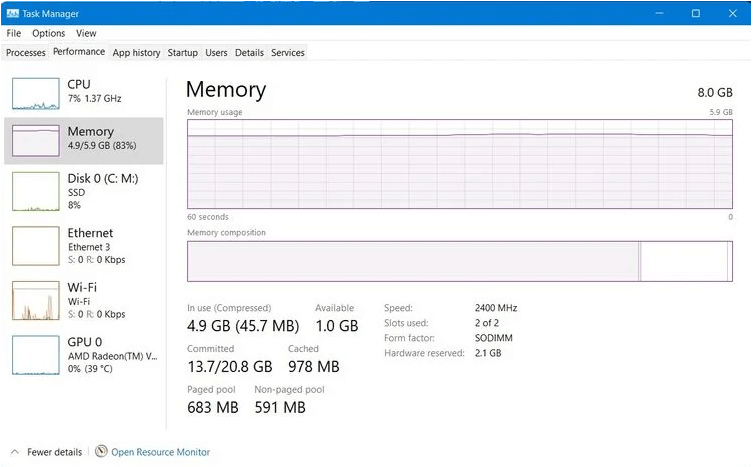
On Windows 10, open the "Start" menu, find "Task Manager" and click "Best Match". In Task Manager, click the Performance tab, and then click Memory to view the specifics of RAM.
You should see the total available RAM at the highest point of the screen. Other itemized details are also displayed here, such as RAM speed, amount of available RAM, and RAM model.
Old-fashioned computers often have multiple RAM slots, but some new computers now have only one slot, so it is necessary to understand the RAM specifications before buying a computer.
2. Use the system information window to view your RAM
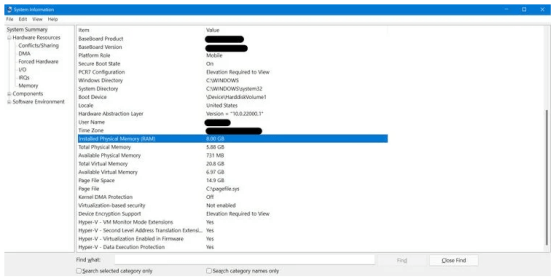
A faster way to view RAM is through system information. Press "Windows + R" on the desktop, enter "msinfo32", and hit enter. In the opened system information window, you can also see the basic data of the PC's RAM.
3. Use CPU-Z
Third-party system analysis software can usually provide more detailed hardware performance indicators and system specifications. CPU-Z is a free-to-use software that can display detailed information about hardware components (such as CPU, RAM, motherboard, etc.).

After downloading and installing CPU-Z on your PC, find the program (probably on the desktop) and double-click to start it. Click the "Memory" tab to get a detailed classification of the installed RAM.
4. Disassemble your PC and check the RAM stick
If the above method does not work for you for some reason, or you want to adopt a more traditional method, you can always disassemble your PC and laptop to find the required RAM specifications for installation.
If you want to do this, please make sure you have a certain understanding of computer assembly, because disassembling the wrong parts or not being able to restore the parts may make your PC unable to start.