The Methods to Add A Local User Account in Windows 11
Do you want to know how to add a local account in Windows 11? This article will give you some professional suggestions.
By Dervish Updated on December 10, 2024
Because Microsoft is heavily promoting Windows 11 online accounts, users can only log in to Windows 11 through their own Microsoft account by default. But sometimes logging in with an online account isn't the best option, such as when you're on a public computer, or you don't want to log in online.
So, how do you use Windows 11 without logging in? This article will give you some professional advice.
Add local account via settings panel
This method is relatively complicated, but very useful, you can follow the steps below:
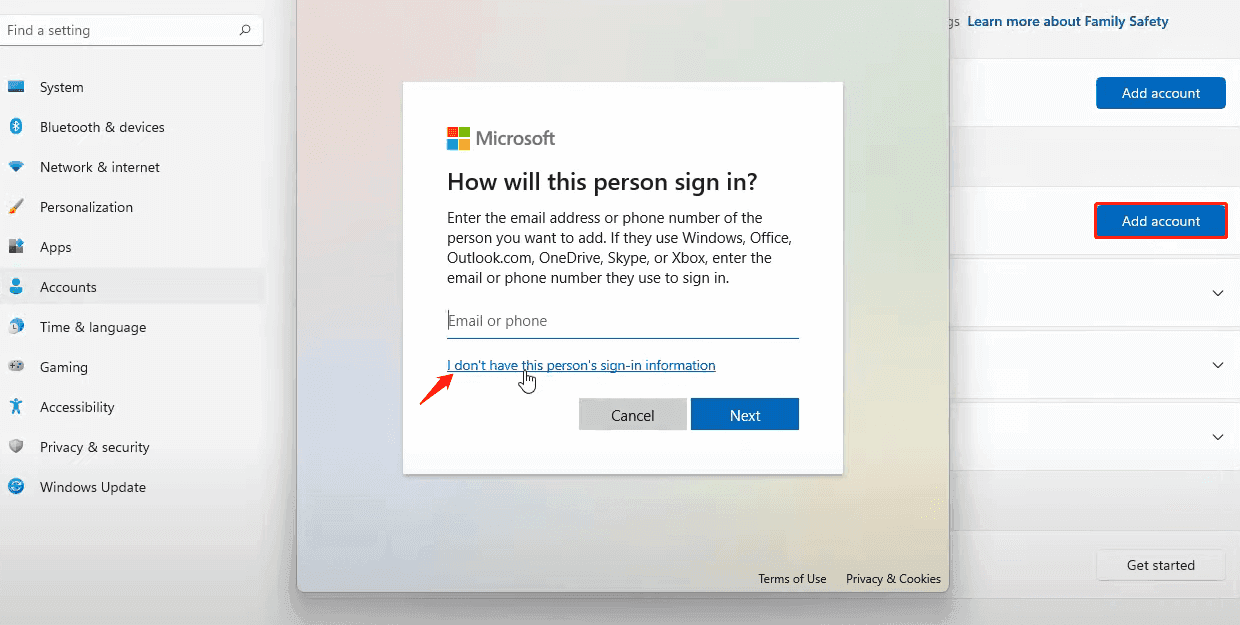
Open the settings panel in the Windows 11 interface and find the "Accounts" option. Select the Home & other users > Other users > Add another user section and click Add Account.
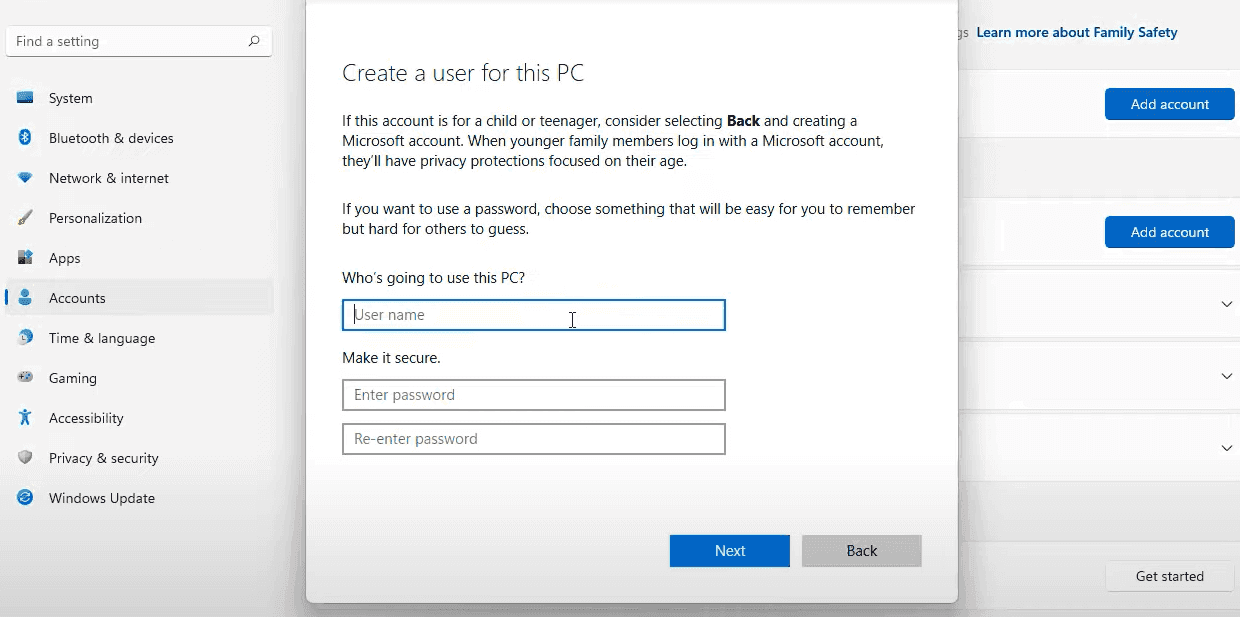
Windows 11 will ask you how to log in to the system, here select "I don't have this person's login information". Next, go ahead and select "Add a user without a Microsoft account" and set up authentication.
After all the steps, you can go back to the settings panel, where you will find the local account.
Add local account with CMD
This method is simpler than the previous method. You need to search for "CMD" on the desktop and open a command prompt as an administrator.
You need to enter the following commands in the command prompt window:
net user username password /add
Tip: You can set the username and password by yourself. After confirming, press Enter to create a local account.
Add a local account using User Account Management
Here is another method. Again, we need to use CMD. Press Windows + R on the interface and enter CMD to open a command prompt, then enter: netplwiz.
Next, we can see the user account management page. Here, we can see the current user account of the system, of course, you can also add your own account. Click "Add" below to enter the process of adding a new user.
On the pop-up interface, select "Sign in without a Microsoft account", and then fill in the corresponding information, and we have successfully created it.