



How to Transfer Data from iPhone to iPhone with Different Apple ID
This guide explains how to transfer data from iPhone to iPhone with different Apple ID using Quick Start, AOMEI FoneBackup, a computer backup, or AirDrop without losing important files.

By Ivy Updated on September 3, 2026


You have a new iPhone ready, but it uses a different Apple Account from your old phone. Now you need to move years of photos, contacts, messages, and other important data without mixing accounts or deleting files already on the new device.
Fortunately, you can transfer data from iPhone to iPhone with different Apple ID. If both phones belong to you, transfer everything first and switch accounts afterward. If the phones belong to different people or the new iPhone is already in use, a selective transfer is safer.
Can You Transfer Data from iPhone to iPhone with Different Apple IDs?
Yes, but the correct method depends on where the data is stored.
An Apple Account controls iCloud data, backups, purchases, and Apple services. However, some photos, contacts, messages, and files may also be stored locally on the iPhone. Local content can often be moved without keeping both devices signed in to the same account.
Before you begin, decide which situation applies to you:
-
You own both accounts: Switching to a new Apple Account and want to keep as much content as possible.
-
Someone else's account: Want to share selected files without copying private data or account settings.
-
New iPhone already set up: Want to keep existing data instead of erasing it.
-
Need a complete copy: Want settings, messages, apps, photos, and other data from the old phone.
Remember that personal data and purchased content are different. Moving an app to the new iPhone does not automatically transfer its App Store ownership to the new Apple Account.
Choose the Right Method to Transfer Data to New Apple ID
| 🧩 Your situation | ✅ Recommended method | ❌ Key limitation |
|---|---|---|
| You own both iPhones and are changing accounts | Quick Start, then switch accounts | Best when the new iPhone is not set up |
| You need selected photos, contacts, music, or other files | AOMEI FoneBackup | Requires a Windows PC |
| You want a complete local backup and restore | Apple Devices, Finder, or iTunes | May replace data on the target iPhone |
| You need to send a small number of files | AirDrop | Does not transfer the entire iPhone |
Before using any method, back up the old iPhone and make sure you know the password for its Apple Account. Do not erase the old device until you have checked the transferred data.
Method 1. Move Everything Before Changing Apple Accounts with Quick Start
👍 Best for: Moving most data to a new, unconfigured iPhone when both Apple Accounts belong to you.
Quick Start can transfer apps, settings, and content directly from an old iPhone during setup. The simplest approach is to complete the transfer with the old account first. After checking the result, sign out without erasing local data and sign in with your new account.
Transfer the Old iPhone with Quick Start
Step 1. Connect the old iPhone to Wi-Fi, turn on Bluetooth, and plug both iPhones into power.
Step 2. Turn on the new iPhone and place it near the old one. When the Quick Start prompt appears, tap Continue on the old iPhone.
Step 3. Scan the animation shown on the new iPhone. Enter the old iPhone’s passcode on the new device and set up Face ID or Touch ID.
Step 4. Choose Transfer from iPhone to continue.
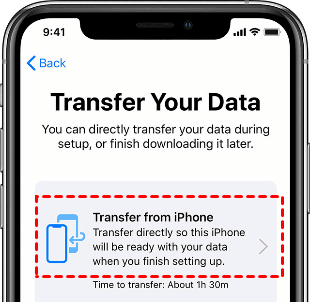
Step 5. Keep both iPhones close together and connected to power until the transfer finishes.
Transfer time varies according to network conditions and the amount of data. Do not interrupt the process even if the new iPhone becomes usable before all iCloud content has downloaded.
Switch to the New Apple Account
First, open several recent photos, check your contacts, and confirm that important messages are present.
Step 1. On the new iPhone, open Settings and tap your name. Scroll down and tap Sign Out.
Step 2. Follow the prompts and choose Sign Out But Don’t Erase when available. Review the data that will remain on the iPhone.
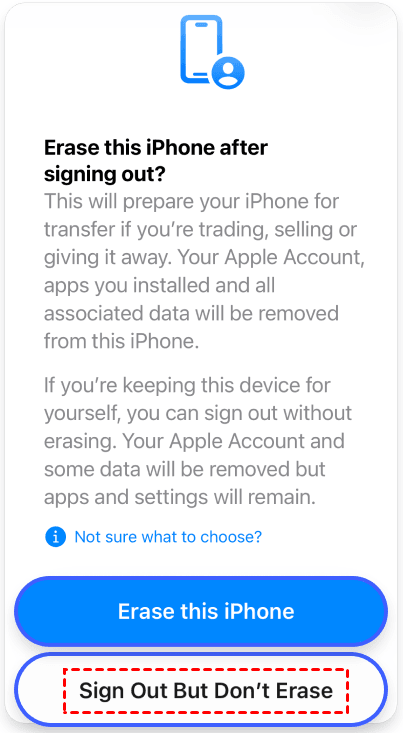
Step 3. Return to Settings, tap the sign-in option, and enter the new Apple Account information.
Step 4. If the iPhone asks whether you want to merge local content with iCloud, review the choice carefully. Merging can upload retained contacts, calendars, and other supported data to the new account.
Method 2. Transfer Data Between Different Apple IDs with AOMEI FoneBackup
👍 Best for: Selectively transfer data between iPhones with different Apple Accounts, especially when the new iPhone is already set up and you do not want to erase the existing iPhone data.
If your new iPhone is already set up, or you want to select what you want, try iPhone data transfer software - AOMEI FoneBackup. It can transfer files between two iPhones through the computer - without signing both devices in to the same Apple Account.
 AOMEI FoneBackup
- 🔌 Direct transfer: Connect both iPhones with a USB data cable and transfer data from iPhone to iPhoneinstead of iCloud account syncing.
- ➕ Add, not replaced: The iPhone-to-PC and PC-to-iPhone method adds new data without erasing new iPhone.
- 🎯 Flexible selection: Preview and select only what you want - photos, videos, music, contacts, and more.
- ⚡ 1-click full backup: Fully back up photos, videos, contacts, messages, app data, settings, and more - completely free.
- 💰 Free boundary: Transfer up to 30 files per day. Go Pro for unlimited transfer or direct iPhone to iPhone transfer.
 100% Secure
Before you start, download any iCloud‑only photos or data to the old iPhone first. AOMEI FoneBackup cannot transfer items that exist only as iCloud placeholders and haven't been downloaded locally.
Export Data from the Old iPhone
Step 1. Download, install and open AOMEI FoneBackup on your Windows PC. Connect the old iPhone with a USB data cable, unlock it, and tap Trust if prompted.
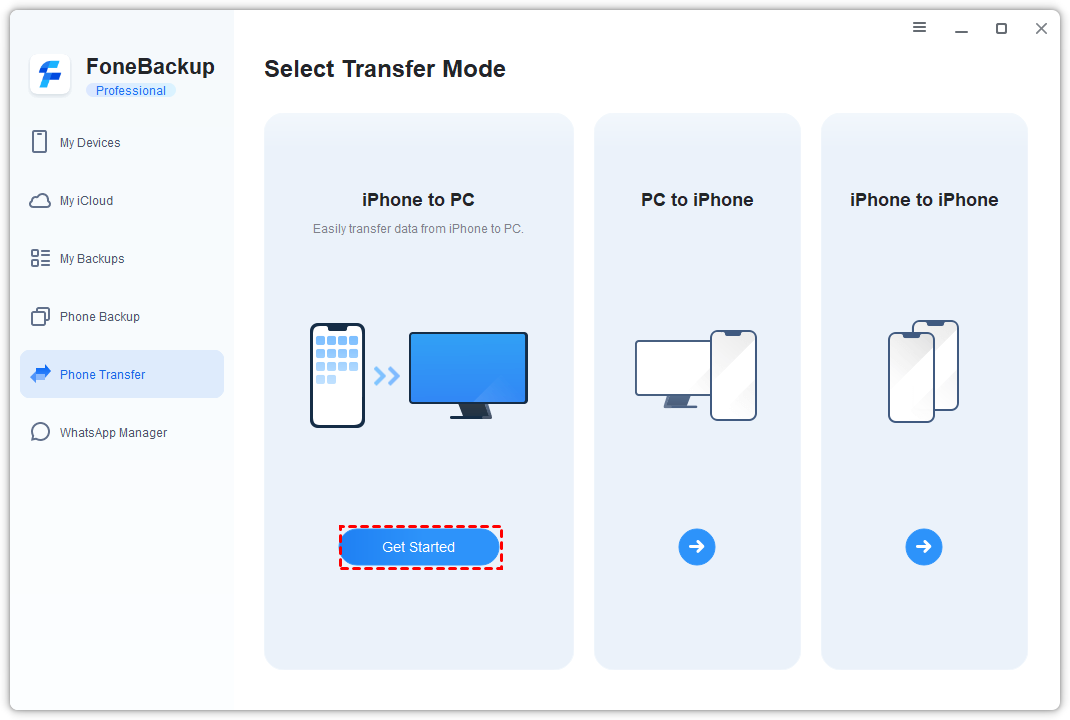
Step 2. Select Phone Transfer, point to iPhone to PC, and click Get Started.
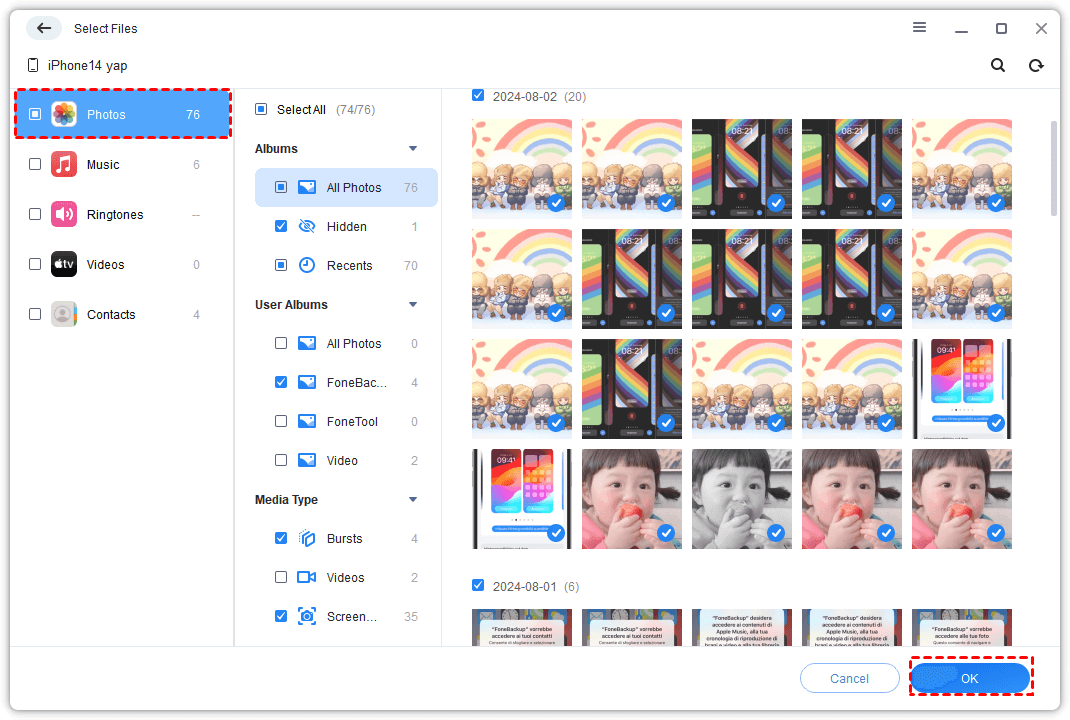
Step 3. Click the plus icon. Preview the available categories, select the items you want to move, and click OK.
Step 4. Open Transfer Settings, choose where to save the exported files, and click Save to confirm this.
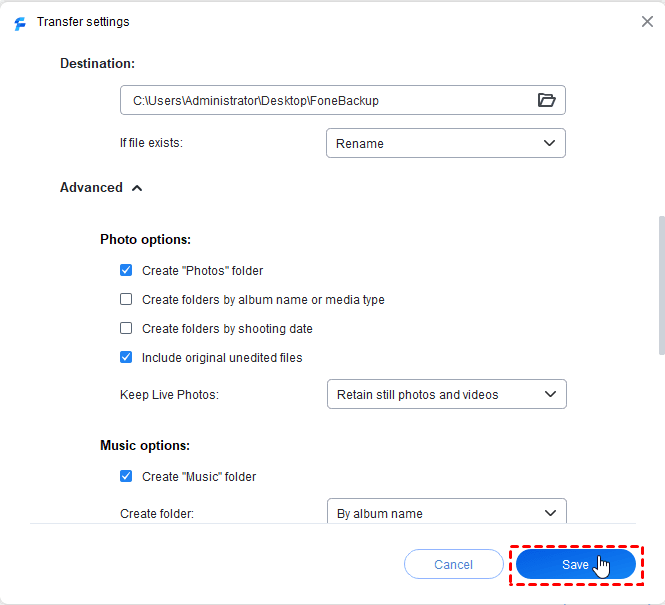
Step 5. Click Start Transfer and keep the iPhone connected until the export finishes.
Import Data from Old iPhone to New iPhone
Step 1. Disconnect the old iPhone and connect the new iPhone. Unlock it and tap Trust if necessary.
Step 2. In AOMEI FoneBackup, select Phone Transfer, point to PC to iPhone, and click Get Started.
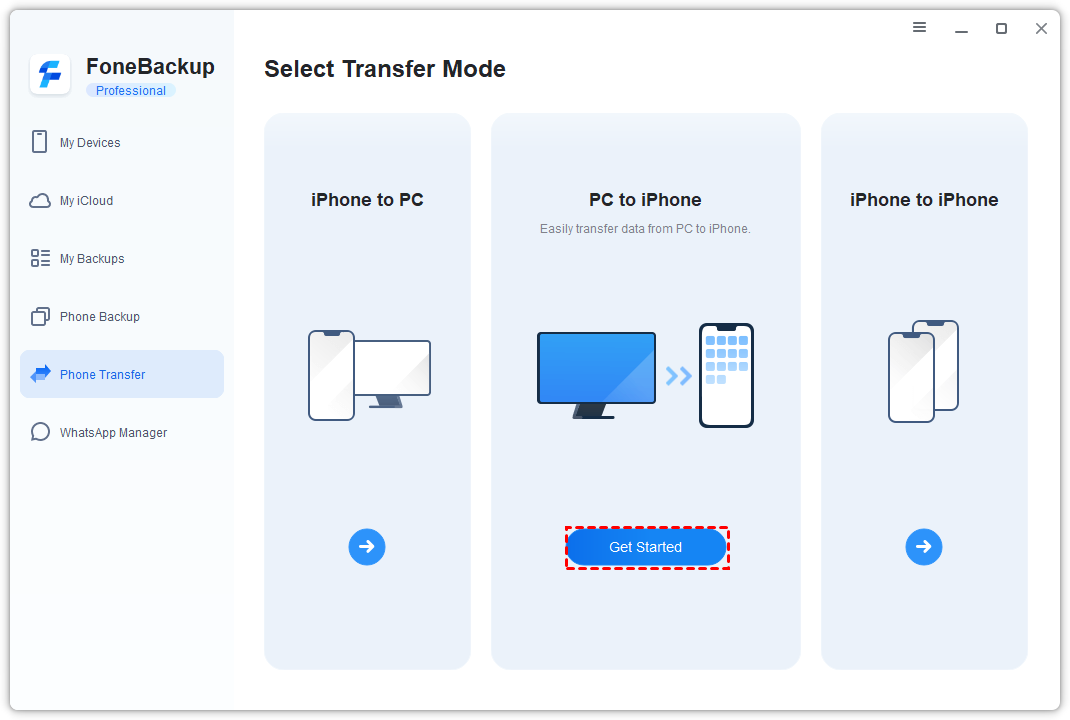
Step 3. Click Photos, Videos, Music, etc., and then the blue folder icon to add what you want to transfer. You can also drag the items into the transfer window.
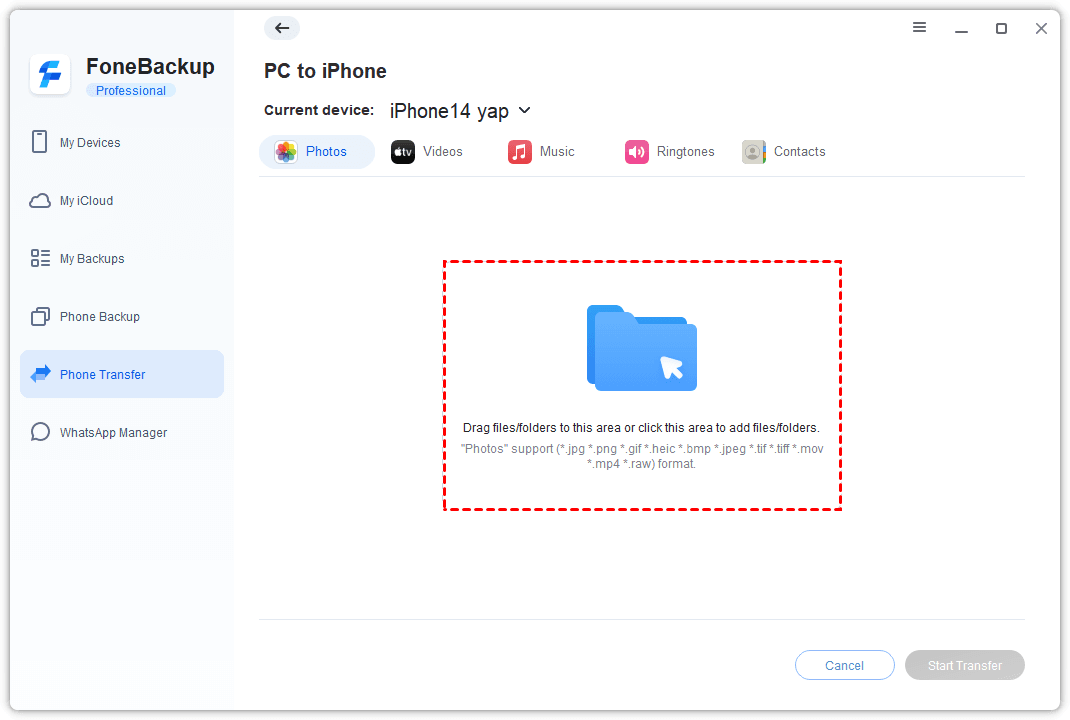
Step 4. Click Start Transfer. Keep the iPhone connected and its screen available until the process completes.
Method 3. Transfer All iPhone Data with a Computer Backup
👍 Best for: Creating a full local backup of the old iPhone and restoring it to a new or erased iPhone.
On a current Windows PC, use the Apple Devices app. On a Mac, use Finder. iTunes is mainly for a Windows PC without Apple Devices or a Mac running macOS Mojave or earlier.
Back Up Data on the Old iPhone with Apple Devices
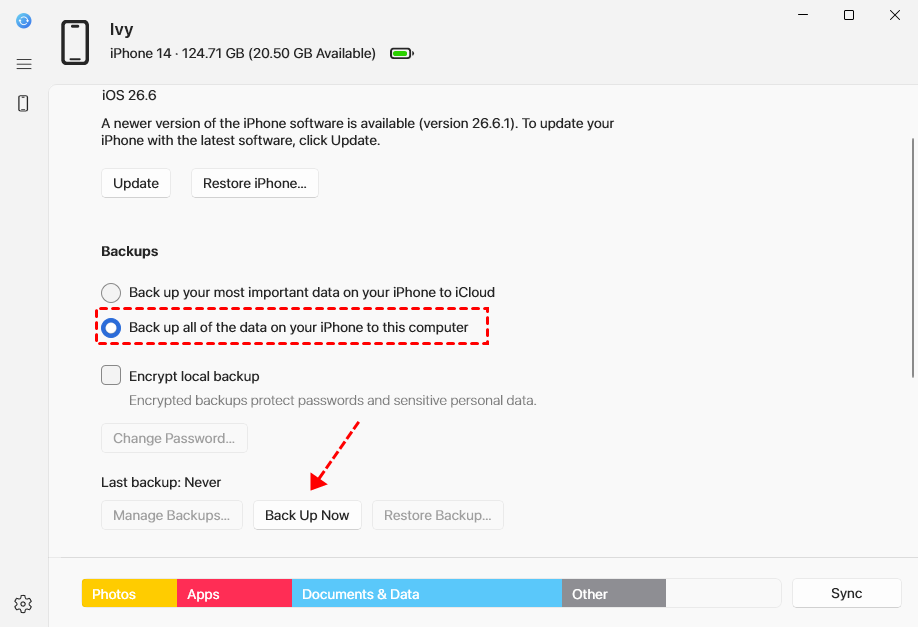
Step 1. Open the Apple Devices app. Connect the old iPhone to the PC. Unlock the phone and tap Trust if prompted. The General tab will appear by default.
Step 2. Under the Backups section, select Back up all of the data on your iPhone to this computer. To include Health, Activity, and other protected data, check Encrypt local backup and set a password you'll remember.
Step 3. Confirm your backup settings and clickBack Up Now. When it finishes, open Manage Backups and check the date of the new backup.
Restore Backup to New iPhone
Step 1. Disconnect the old iPhone. Then, connect the target iPhone, unlock it and tap Trust to authorize your computer.
Step 2. Go to Backups, then choose Restore Backup.
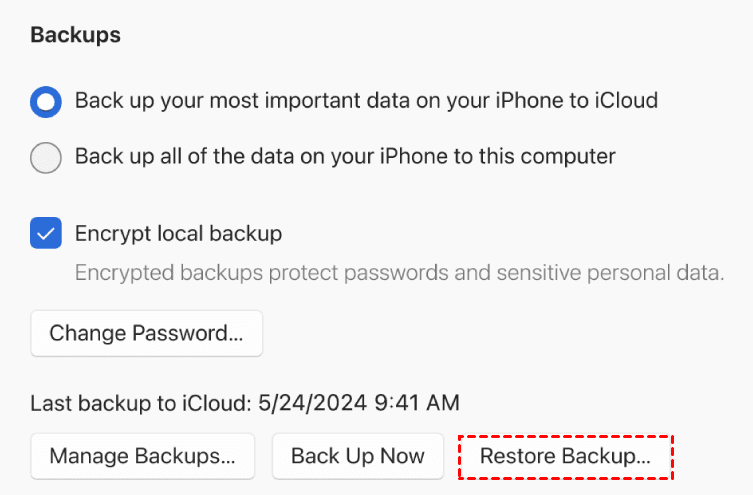
Step 3. Select the backup you just created and click Restore. Enter the encryption password if required.
Keep the iPhone connected until the restoration is complete.
Method 4. Transfer Photos and Files Between Apple IDs with AirDrop
👍 Best for: Sending a small selection of photos, videos, contacts, or documents without a computer.
AirDrop does not require the devices to use the same Apple Account. However, the recipient must accept the transfer when different accounts are used.
Step 1. Turn on Wi-Fi and Bluetooth on both iPhones. Keep the devices nearby.
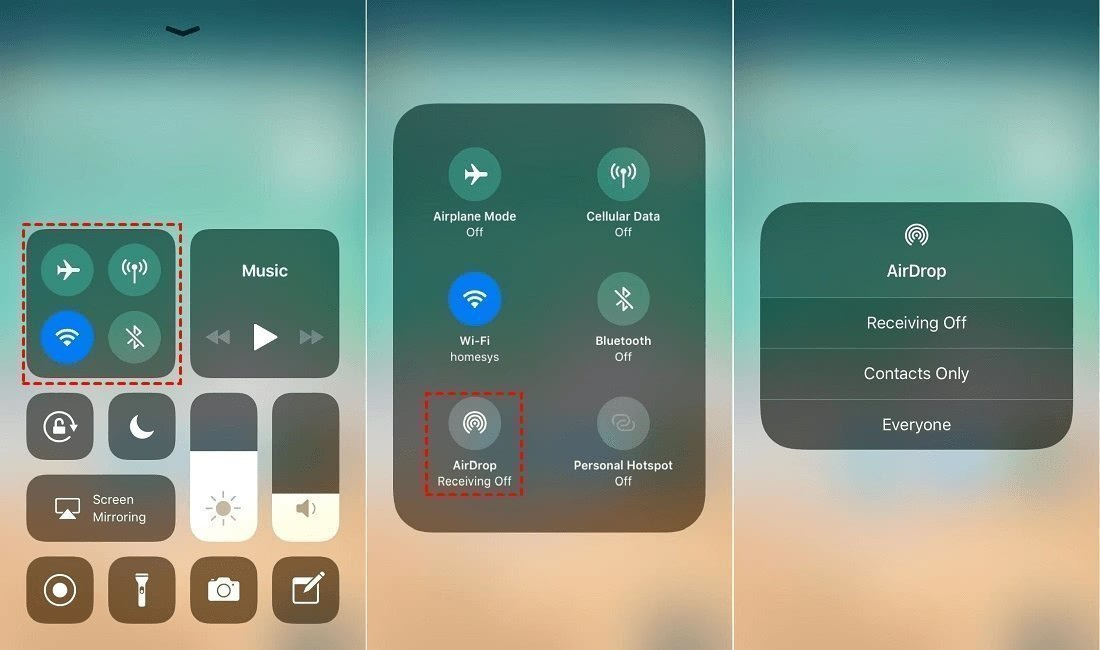
Step 2. On the receiving iPhone, open Control Center. Touch and hold the network controls, tap AirDrop, and choose Everyone for 10 Minutes.
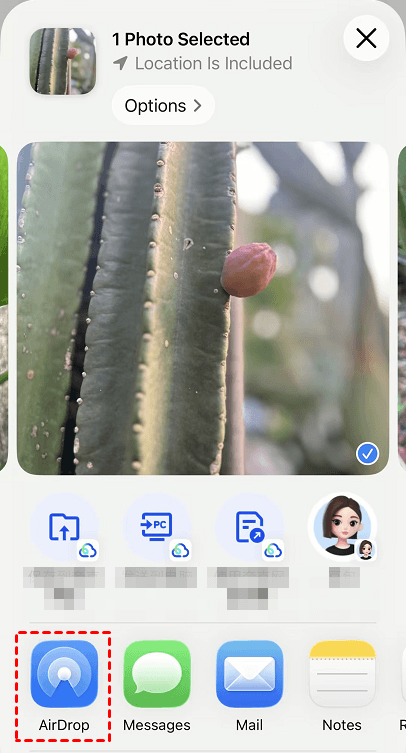
Step 3. On the source iPhone, open Photos, Files, Contacts, or another supported app and select the items you want to send.
Step 4. Tap Share > AirDrop, then choose the target iPhone.
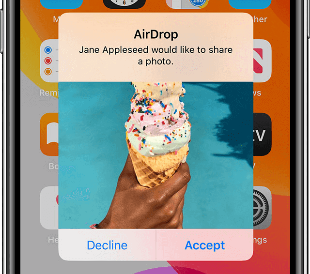
Step 5. Tap Accept on the receiving iPhone. On newer systems, the devices may ask you to use an AirDrop code when the sender is not in the recipient’s contacts.
AirDrop is convenient for a few items, but it does not transfer complete settings, message history, app data, or the full contents of an iPhone.
What Will Not Automatically Move to the New Apple Account?
Changing Apple Accounts does not combine everything associated with the 2 accounts.
Pay attention to these items:
-
Apps and media purchases: They normally remain connected to the account used to buy them. An app may later request the old account password when it needs an update.
-
iCloud data: Signing in to a new account does not automatically move all information out of the old account.
-
Subscriptions: Check which account owns each subscription before signing out.
-
Apple Pay: Payment cards generally need to be added again.
-
Face ID and Touch ID: Biometric settings are not transferred as reusable credentials.
-
App accounts: Banking, social media, and other apps may require you to sign in again.
-
Apple Watch: You may need to unpair, transfer, or pair the watch again.
-
eSIM: Cellular transfer depends on the carrier and device setup.
Apple offers Migrate Purchases for eligible accounts. It can move certain App Store, music, and other Apple purchases from a secondary account to a primary account. It does not move iCloud data, and availability depends on factors such as region, account status, Family Sharing, balances, and two-factor authentication.
To check the feature, open Settings > [your name] > Media & Purchases > View Account and look for Migrate Purchases. If the option is missing, your accounts may not be eligible.
Check the transfer before erasing the old iPhone:
-
Open recent and older photos.
-
Compare important contacts.
-
Search for key messages and notes.
-
Open essential apps and check their local data.
-
Confirm that passwords and Health data are available if needed.
-
Check Apple Watch and cellular service.
-
Confirm that the intended content is syncing with the new account.
If anything is missing, keep the old iPhone unchanged. Reconnect it to Wi-Fi, verify whether the missing content is stored locally or in the old iCloud account, and try a more suitable transfer method.
Compare the 4 Transfer Methods
| Method | 👍 Best for | Keeps existing target data | Main limitation |
|---|---|---|---|
| Quick Start, then switch accounts | Same owner moving nearly everything | New iPhone should be unconfigured | Account data may merge after sign-in |
| AOMEI FoneBackup | Selected data and an already-set-up iPhone | Yes | Requires Windows; edition limits apply |
| Computer backup and restore | A complete local restore | Usually no | Can replace target iPhone content |
| AirDrop | A small number of photos or files | Yes | Cannot transfer an entire iPhone |
Here is the simple rule:
- Use Quick Start when both phones and accounts belong to you and the new iPhone is still at the setup screen.
- Choose AOMEI FoneBackup when you need selected content or must preserve the new iPhone’s existing files.
- Use a computer backup for a full local restore, and use AirDrop for a small number of items.
FAQs
1. Can I use Quick Start and then sign in with a different Apple ID?
Yes, if both accounts belong to you. Complete the Quick Start transfer first, check the new iPhone, and then use Sign Out But Don’t Erase before signing in with the new account. Review any option to merge local data with the new iCloud account.
2. Will I lose photos after signing out of my old Apple Account?
Photos stored only in iCloud may not remain on the device. Before signing out, confirm that the original photos have downloaded or make a separate copy on a computer. Do not assume that every image visible as a thumbnail is stored locally.
3. Can I transfer apps purchased with another Apple ID?
The apps may appear after a device migration, but their ownership generally remains associated with the account that purchased them. Eligible account holders can check whether Apple’s Migrate Purchases feature is available.
4. Can I transfer data without erasing the new iPhone?
Yes. Use AOMEI FoneBackup for supported selected data or AirDrop for a small number of files. Full backup restoration and setup-based Quick Start are not designed to merge 2 complete iPhone installations.
5. Can I transfer only contacts to a different Apple ID?
Yes. You can export and import supported contacts through AOMEI FoneBackup. You can also retain locally stored contacts when switching accounts, but review the merge prompt carefully because they may sync to the new iCloud account.
6. Should I erase the old iPhone immediately after the transfer?
No. Keep it until you have verified photos, contacts, messages, notes, important apps, passwords, Health data, Apple Watch, and cellular service on the new iPhone.
Summary
Transferring data between iPhones with different Apple IDs is possible, but there is no single method for every situation.
-
Use Quick Start followed by a careful account switch when you own both accounts and want to move nearly everything.
-
Use AOMEI FoneBackup when you want selected files, use a Windows PC, or need to keep the target iPhone’s existing data.
-
Use Apple Devices, Finder, or iTunes when you need a full computer-based backup and accept that the restore may replace target data.
-
Use AirDrop when you only need to share a small number of photos, contacts, or documents.
Whatever method you choose, keep the old iPhone until you have opened and checked every category of data that matters to you.

 as a preferred
source on Google
as a preferred
source on Google