How to Disable OneDrive in Windows 10, 11
How to disable OneDrive in Windows 10/11? Check the methods to remove OneDrive on computers and recover missing files after OneDrive is disabled.
By Ivy Updated on July 6, 2026
OneDrive is a cloud storage service offered by Microsoft. It enables you to upload files to the Cloud. Its storage size ranges from 5 GB to 1 TB. You can rapidly and securely share files with others by simply emailing a link across Android, iOS, Windows, and macOS devices. Users can save any files at any time from any location.
OneDrive offers 5 GB of free storage space only. You can pay for additional space. You can use OneDrive to sync images automatically. Besides, you can upload, edit, and share Microsoft documents and OneNote directly online. Users can edit and save files in real time to protect data better.
If you are running Windows 10 or 11, you don’t need to download and install OneDrive. It can help you sync files or folders. However, in some situations, users want to disable OneDrive.

Why should you disable OneDrive?
Although OneDrive is useful in some ways, there are times when you will wish to disable or remove it from your computer.
You want to disable OneDrive, because you may want to keep your sensitive or personal files outside of cloud servers. Besides, OneDrive will run automatically after you boot your Windows operating system. It will take up the system and network resources in the process. Sometimes, OneDrive files could be missing after sync.
It’s good to disable OneDrive if you have other storage devices for backup, or if the system is low-spec. There are kinds of methods to pause or disable OneDrive.
3 solutions for disabling OneDrive in Windows 10/11
How to disable or uninstall OneDrive in Windows 10/11? There are several methods for turning off OneDrive on your system. You can stop the service from starting automatically, disable it through the Group Policy Editor, or unlink your account from it. Follow the detailed steps to turn off OneDrive.
Method 1. Disable OneDrive via Settings
Step 1. Select the OneDrive icon in the taskbar. Right-click it and open OneDrive. If you can’t find it in the taskbar, you can search OneDrive in the search bar to open it.
Step 2. Click the gear icon and then click “Settings”.
Step 3. Go to the Account tab, and click “Unlink this PC”.
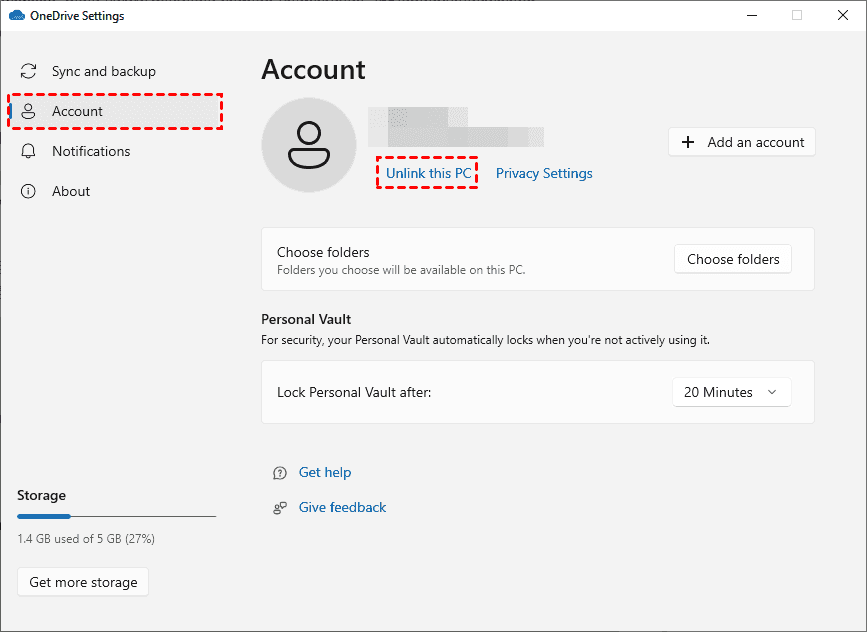
Step 4. Confirm to unlink the account. You will see a window asking you to enter your email address. Waiting for a moment, disabling OneDrive process will be completed.
Method 2. Turn off OneDrive via Group Policy
If you want to stop OneDrive syncing in Windows 10 or 11, you can use this method.
Step 1. Press “Win +R” keys to open “Run”. And then type “gpedit.msc” in the Run window to open the local group policy editor.
Step 2. Go to the option “Computer Configuration” > “Administrative templates” > “Windows Components”. Then you can find OneDrive.
Step 3. In OneDrive, select “Prevent the usage of OneDrive for file storage” and then double-click it.
Step 4. In the pop-up box, select the option enabled from the left pane to prevent the usage of OneDrive for file storage. Select Apply, then click OK to save changes.
Method 3. Disable OneDrive via Registry Editor
Users can set the errors in different system utilities and programs by changing registry values. This is an effective way to disable OneDrive.
Step 1. Press “Win + R” to launch the Run window. Type “regedit” and click “OK” to run the registry editor.
Step 2. Follow the path to locate the Windows folder.
HKEY_LOCAL_MACHINE\SOFTWARE\Policies\Microsoft\Windows
Step 3. Right-click the Windows folder and select “New” > “Key”. Name the new key “OneDrive”.
Step 4. Locate the OneDrive key and right-click in the space, and select “DWORD(32-bit) Value”.
Step 5. Click the key and change its value. Input “1” and click “OK” to confirm the change. Restart your computer to take effect.
If the methods above can’t solve your problem, you can uninstall OneDrive permanently. Go to Control Panel and select “Programs” > “Programs and features”. Then, find OneDrive in the list of programs. You can click OneDrive and confirm “Uninstall” to remove OneDrive from your computer.
How to restore deleted files or folders in OneDrive
Microsoft OneDrive provides users with Recycle Bin and second-stage recycling bin to recover deleted files or folders online. You can also recover deleted OneDrive files locally.
Method 1. Recover Deleted files or folders using built-in tools
If you accidentally deleted files or folders in OneDrive, go to the Recycle Bin first. OneDrive has a built-in Recycle Bin. You can go to the OneDrive website and log in to your OneDrive account. You can find the Recycle Bin in the left panel. Deleted files in the Recycle Bin can be restored easily.
If you are unable to locate your deleted OneDrive files in the Recycle Bin, there is a second-stage recycling bin. It will restore files deleted from the Recycle Bin. As a result, you may be able to recover your deleted OneDrive files here.
Method 2. Recover deleted OneDrive files from the local folder
OneDrive always creates a OneDrive folder on your computer, which allows you to automatically sync all of your OneDrive files and make them available offline.
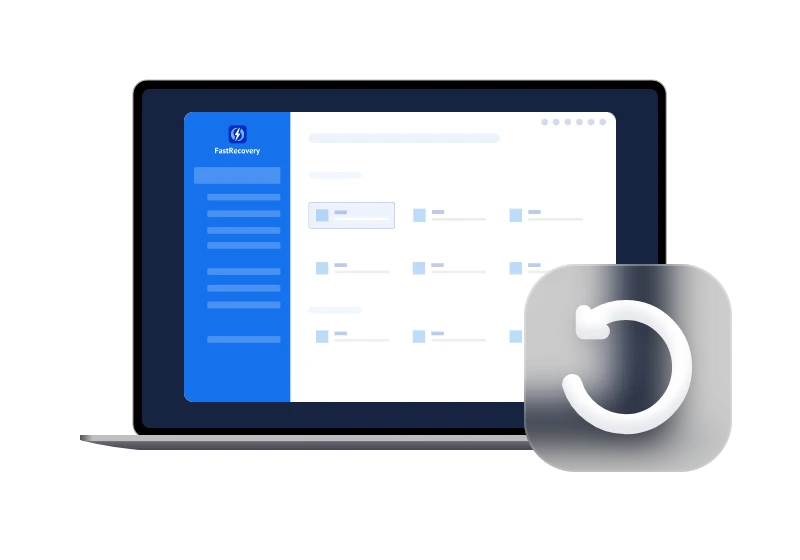
In this case, you can rely on professional data recovery software - AOMEI FastRecovery to recover permanently deleted files in Windows 11/10/8/7 and Windows Server without backup.
It supports recovering 1000+ data types, along with a complete suite of recovery features, such as search, filter, preview, etc., and is compatible with different storage devices, such as HDDs/SSDs, external drives, USB drives, etc.
What's more, it offers users 500MB of free data volume, especially useful for recovering specific files or folders.
Step 1. Launch AOMEI FastRecovery. Hover the mouse over a partition where saved deleted files and click Scan.
Step 2. The software will automatically perform a Quick Scan to find deleted or lost files and display them by Type or Path, allowing you to sort across multiple options. For a specific folder, type the name in the search box and press Enter.
Step 3. Once found, double-click to preview and confirm. Select the desired files and click Recover.
🌟Tips:
✅ Please choose a new location to save your recovered folder, avoiding data overwriting.
✅ AOMEI FastRecovery supports you to recover files for free, up to 500MB. To recover unlimited files, please consider upgrading to the advanced edition.
Conclusion
To sum up, this post offers three different ways to solve “how to disable OneDrive”. Besides, you can remove OneDrive via the Control Panel directly. But have to say OneDrive is a good way to back up important files.
If you are worried about data security, it’s recommended to use Windows backup freeware - AOMEI Backupper. It provides automatic, incremental, and differential backup methods to back up OS, entire hard drives, or personal files to local or external hard drives.
