By
Maggie
![]() / Last
Updated November 11, 2025
/ Last
Updated November 11, 2025
The benefits of backing-up Dell computer
A lot of users are curious of how to backup Dell computer to external hard drive, which is crucial to protect your data from various threats such as data loss, system breakdowns, and unforeseen events like fire or theft. While manually selecting and copying files can be time-consuming, there are 5 useful methods you can consider for backup:
- Backup and Restore: Use the built-in Backup and Restore feature in Windows to create a full backup of your system. This can help restore your laptop to a previous state in case of system failure or data loss.
- Backup Assistant: Take advantage of Windows Backup Assistant, another built-in tool, which allows you to back up and recover your data efficiently after system crashes or breakdowns.
- File History: Utilize the File History feature integrated into Windows, which enables you to perform timely backups of your files and folders. This can be set up to automatically backup your data to an external hard drive, providing an additional layer of protection against data loss.
- AOMEI Backupper: Consider using AOMEI Backupper, a comprehensive backup software solution that offers various backup options, including system backup, file backup, disk backup, and more. With its user-friendly interface and advanced features, it provides an efficient way to safeguard your data and protect your Dell laptop.
- AOMEI Cyber Backup: It provides a comprehensive enterprise backup solution. It enables users to back up multiple Windows computers, whether they are laptops, desktops, or servers, to various storage devices such as external hard drives and NAS (Network Attached Storage) drives.

So now you have a general understanding of the methods. Then how to backup data on Dell laptop? Please refer to the below methods.
Method 1. Backup Dell laptop via Backup and Restore
Backup and Restore is an embedded tool in Windows that allows you to create a complete backup of your operating system. This backup can be used to restore your laptop to an earlier state in case of system accidents. Follow the steps below to learn how to backup files on Dell laptop:
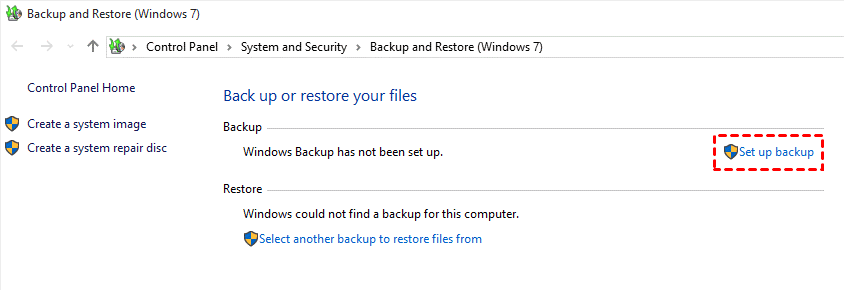
Step 1. Go to the Control Panel and select Backup and Restore (Windows 7), and click Set up backup.
Step 2. Select a location to store your backup. You can also choose to backup to an external hard drive with sufficient storage space. And click Next.
Step 3. Select the Let Windows choose (recommended) option and hit Next.
Step 4. Lastly, confirm your options and click Save settings and run backup to finish the task.
Method 2. Backup Dell laptop through Windows Backup Assistant
Windows Backup Assistant is a helpful tool provided by the Windows operating system for backup and recovery purposes. It enables users to back up their systems, files, and folders, recover data following system crashes or breakdowns, and manage their backups efficiently.
To utilize Windows Backup Assistant, simply sign in to your Microsoft account, click on the Start menu, and then proceed to execute your desired operations related to backup and recovery.
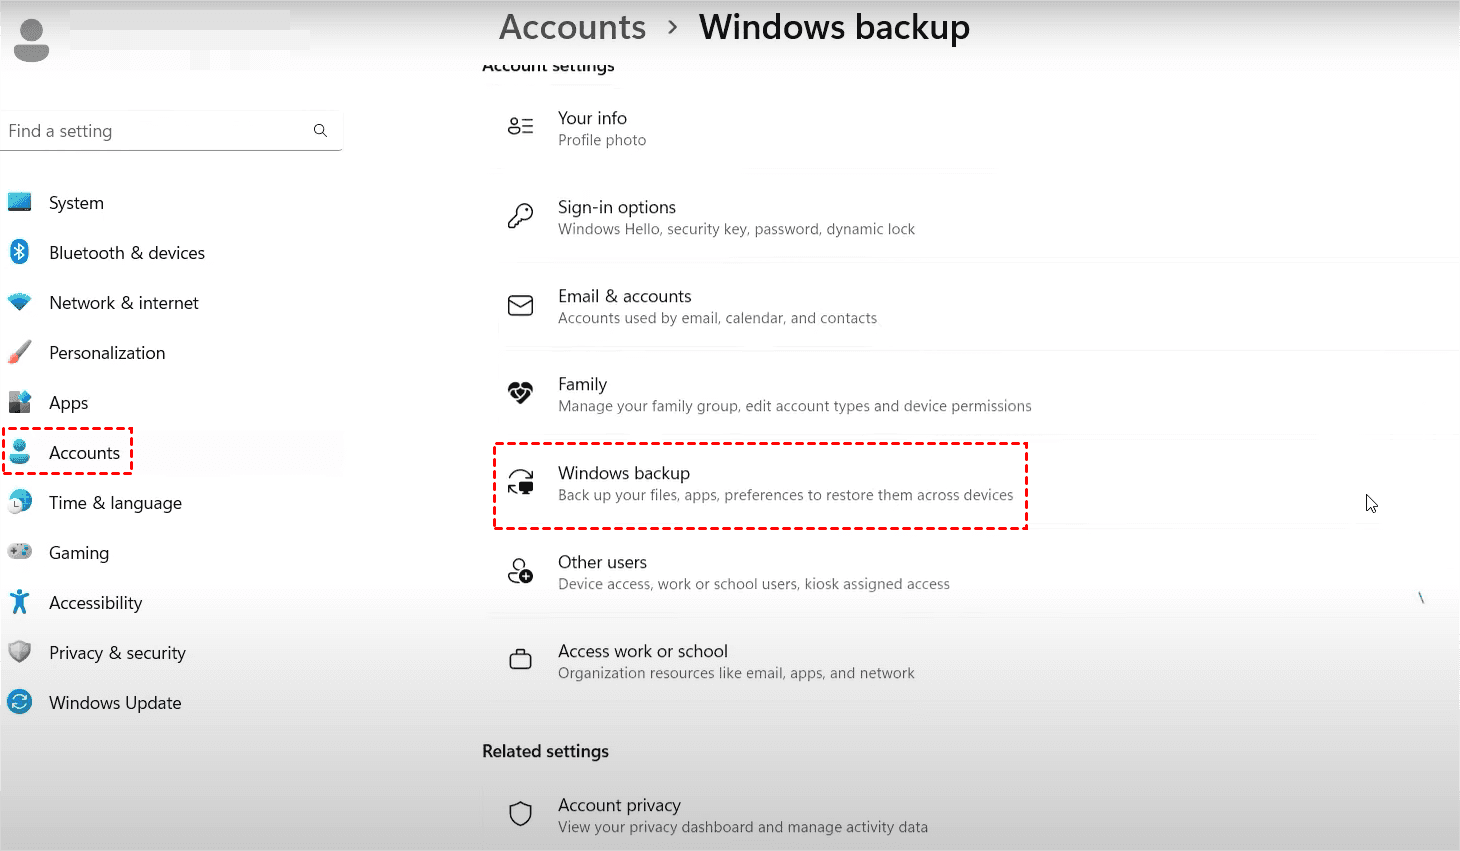
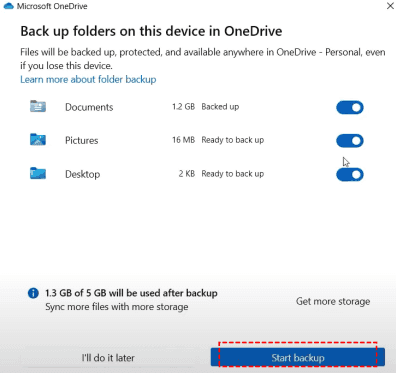
Step 1. Go into Settings, and click on Accounts. Scroll down and select Windows backup.
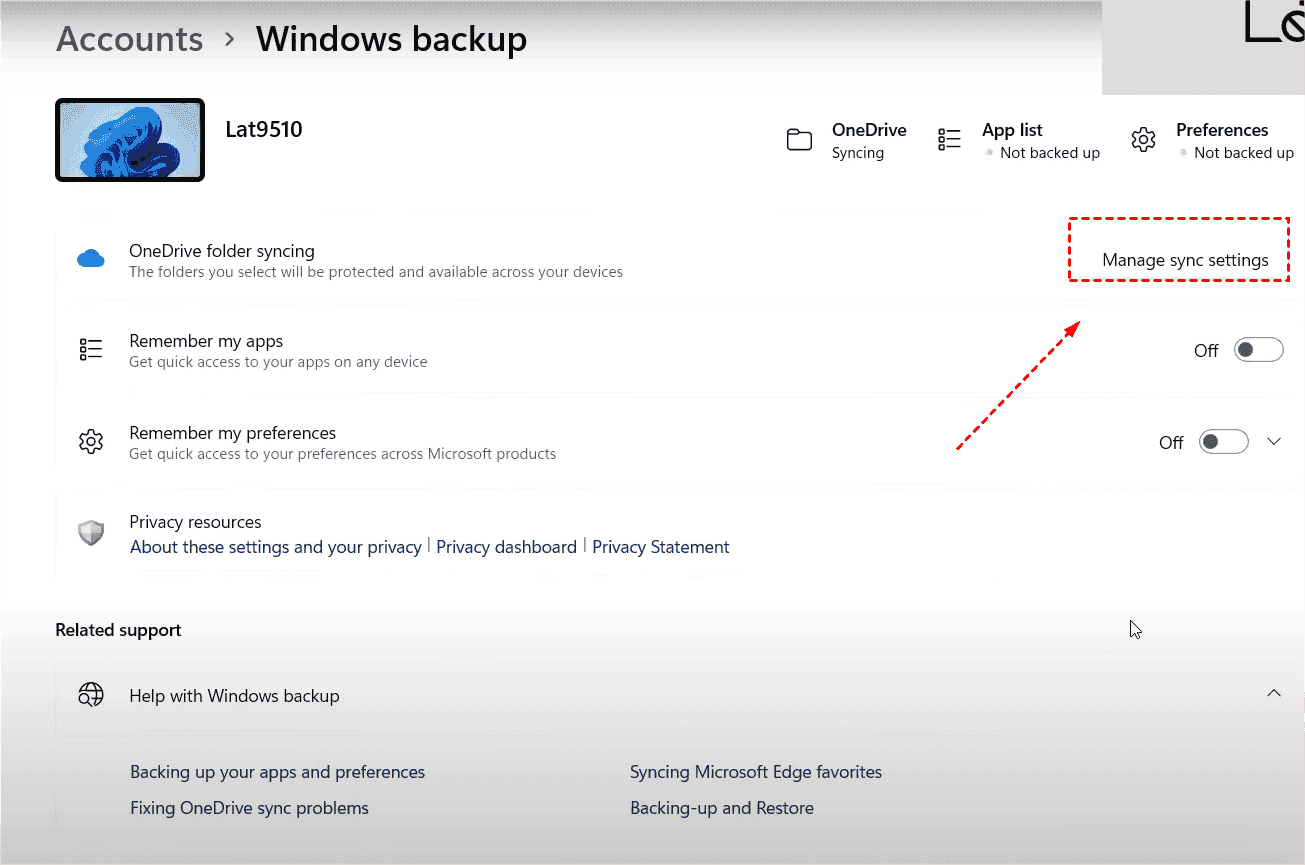
Step 2. In the pop-up window, select Manage sync settings on the right page.
Step 3. Then you can choose the items you want to backup on your Dell laptop.
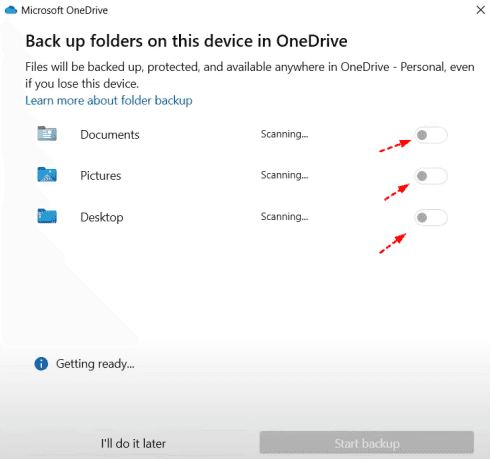
Step 4. After selecting, click Start backup to execute the progress.
Method 3. Backup Dell Laptop to an external hard drive via File History
How to backup a Dell laptop Windows 11? File history is a practical application that is integrated into Windows 11 and Windows 10 that allows you to execute timely backup. Now you can follow the tutorial below to learn how to backup Dell laptop to external hard drive on Windows 11.
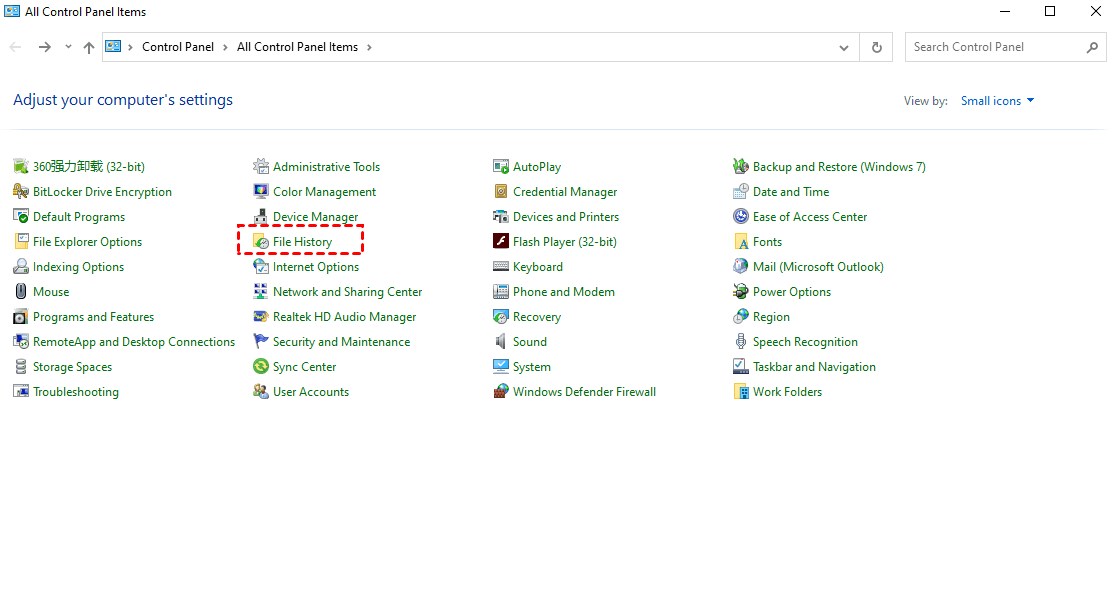
Step 1: Connect your external hard drive to your Dell laptop. Open Control Panel, then navigate to File History and open it.
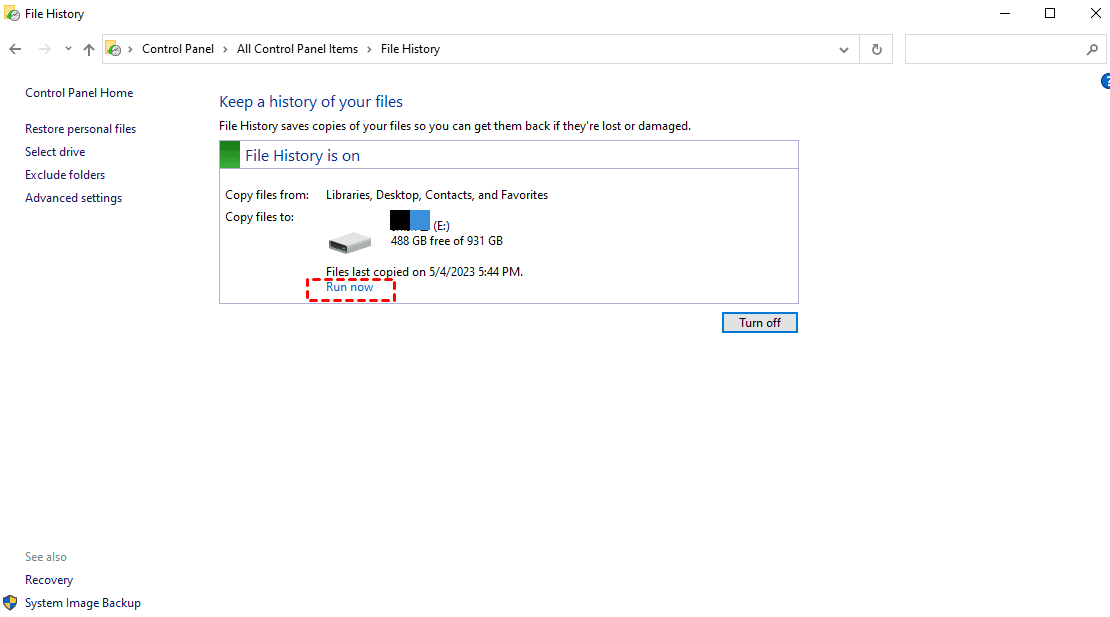
Step 2: In the File History pop-up window, ensure the correct destination path is selected, then click on the "Turn on" button.

Step 3: Once File History is turned on, click on the "Run now" button to initiate the backup process. Your files will then be backed up to the external hard drive you selected.
By following these steps, you can easily backup your files from your Dell laptop to an external hard drive using File History on Windows.
Method 4. Backup Dell laptop Windows Free - AOMEI Backupper
If you prefer continuous backup for your laptop system without the risk of duplicates and excessive storage consumption, consider using AOMEI Backupper Standard as an free alternative to File History.
AOMEI Backupper Standard offers efficient and customizable backup solutions tailored to your needs, including system backup, file backup, disk backup, and more. With its user-friendly interface and advanced features, you can schedule regular backups, perform incremental or differential backups to save storage space, and easily manage your backup tasks.
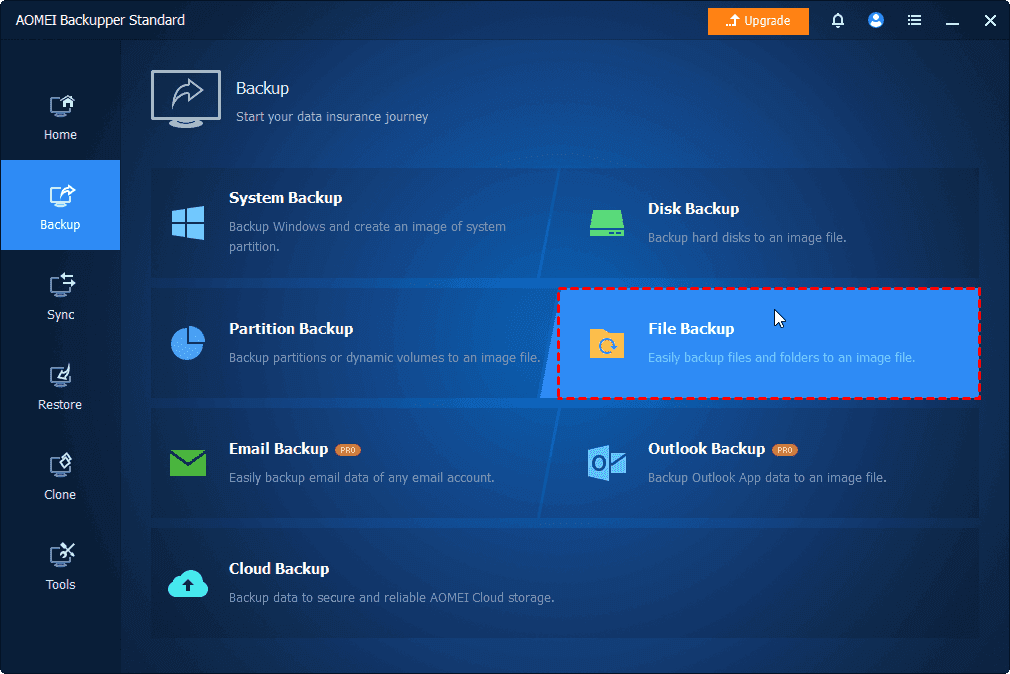
Step 1. Just download and open this tool.
Step 2. Then click Backup > File Backup.
Step 3. Click Add file or Add Folder to select files or folders on your laptop that you want to back up.
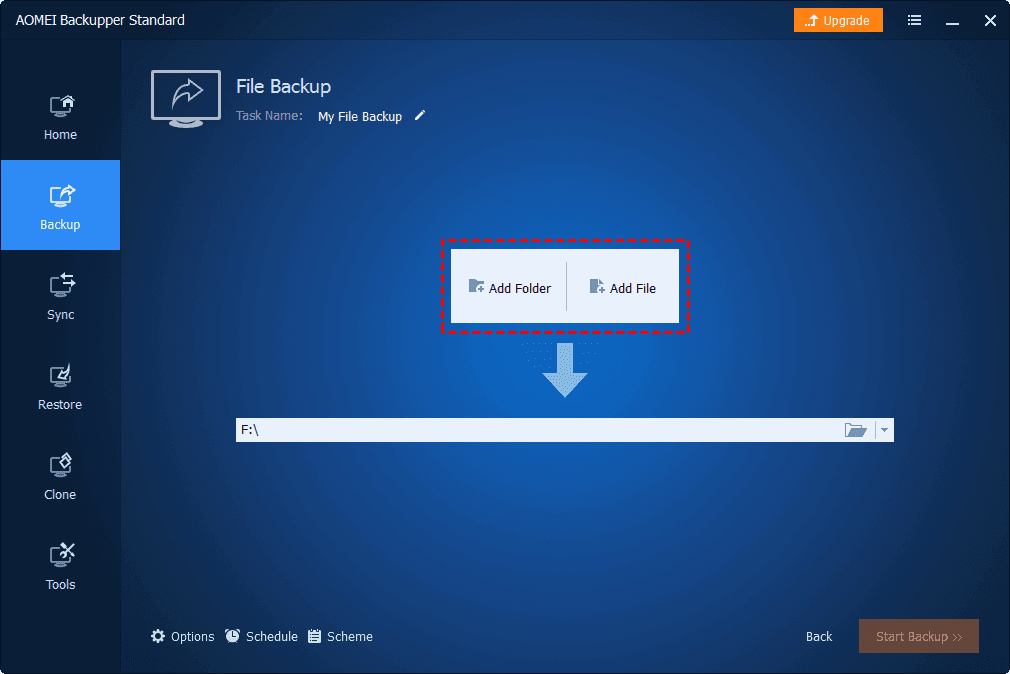
Step 4. Select the location as the destination path to store the backup image file. You can choose local or external hard drive, NAS and Share, Cloue service as well.
Step 5. Confirm your setting by clicking Start Backup button and wait for the task to finish.
Method 5. Best way to backup multiple computers
AOMEI Cyber Backup offers a comprehensive enterprise backup solution, allowing users to back up multiple Windows computers, including laptops, desktops, and servers, to various storage devices such as external hard drives and NAS drives.
- High compatibility: It supports various Windows operating systems, including Windows 11, 10, 8.1/8, 7, Windows Server 2022, 2019, 2016, 2012 (R2), and 2008 (R2).
- Centralized management: Users can easily add all devices and create backup tasks from a central console.
- Full backup coverage: Users can create full backups for multiple computers and laptops on shared storage, with the option to run incremental or differential backups to save time and storage space.
- Automatic and scheduled backups: Customizable backup schedules allow for automatic background backups on a daily, weekly, or monthly basis.
- Automatic backup cleanup: Backup retention settings automatically delete old backup files to manage storage space efficiently.
- Incremental & differential backup: Support for backing up only changed or newly added data since the last backup to reduce backup time and storage consumption.
- Flexible restore options: Users can restore data to the original location or to another client computer, even with dissimilar hardware.
- Centralized monitoring: Intuitive console for centrally monitoring all backup tasks and added computers, with the option to set up alerts for timely notifications of backup success and abnormal performance information.
Now here is the full guide on :
Step 1: Install AOMEI Cyber Backup Software and Agent
- Install AOMEI Cyber Backup software on your Windows computer.
- Install the AOMEI Cyber Backup agent on all Windows computers you want to back up.
- You can download the agent installation file from Source Device > Agents > Download Agent.
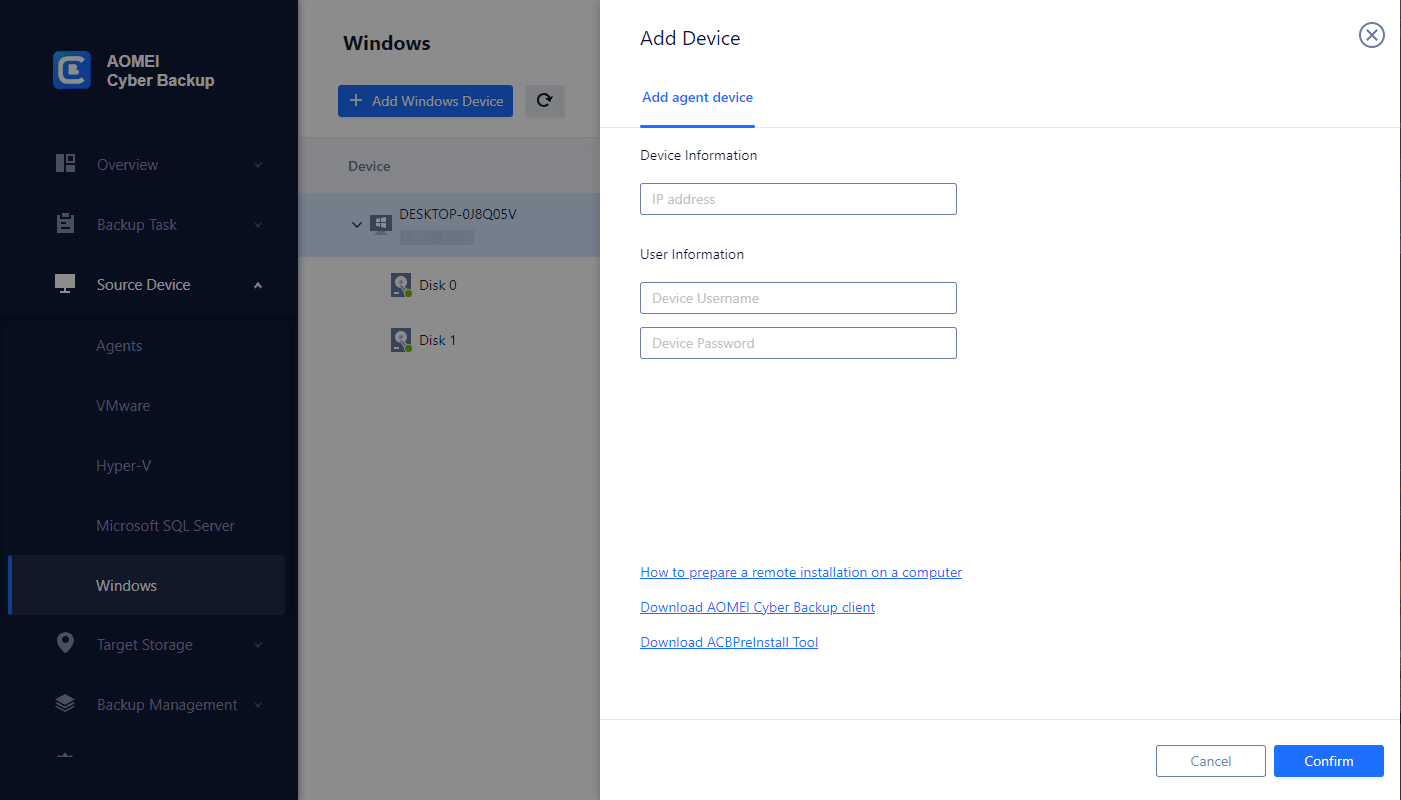
Step 2: Add Windows Computers
- Open AOMEI Cyber Backup and go to Source Device > Windows > click +Add Windows Device.
- Enter the IP address and user information to add a Windows computer.
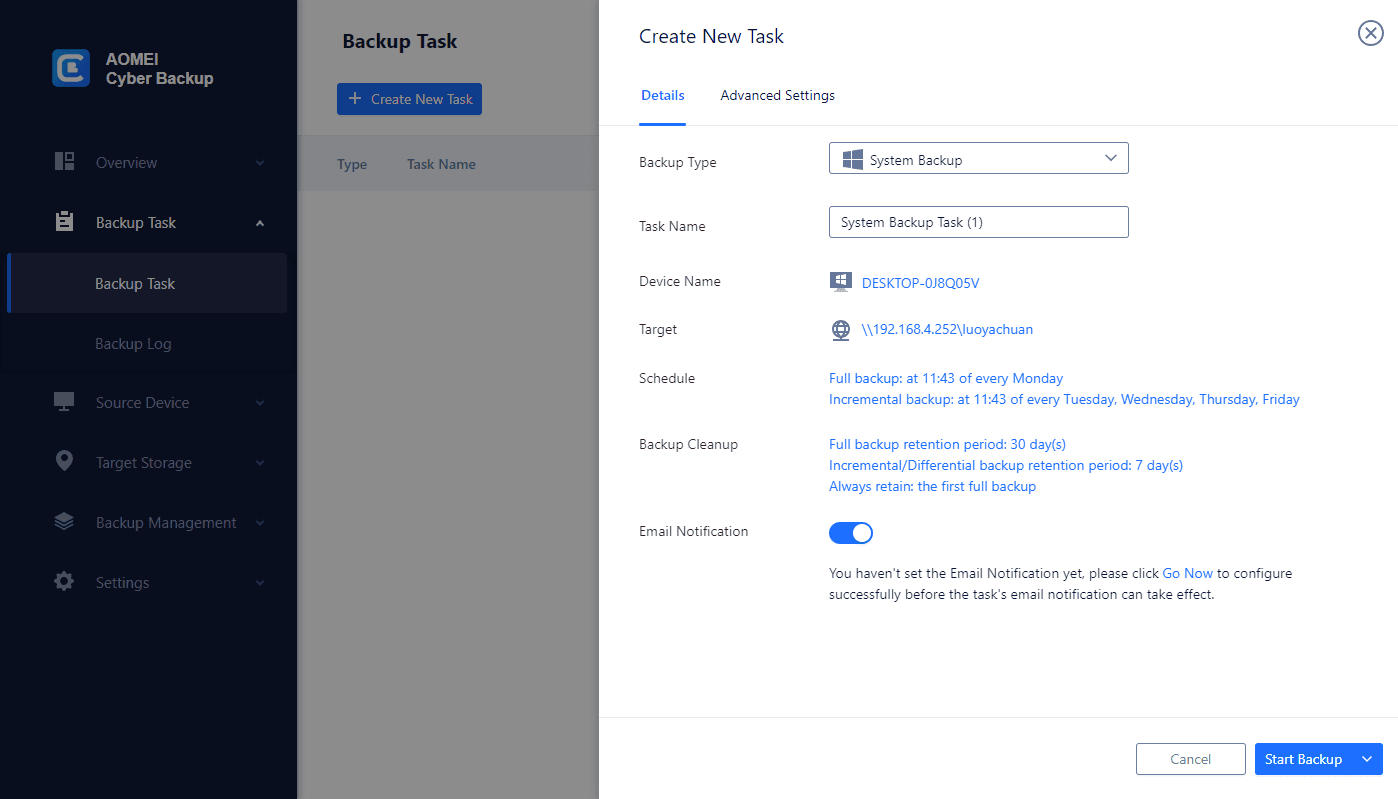
Step 3: Set Up Backup Task
- Click on Backup Task > Create New Task.
- Choose the backup type (e.g., Disk Backup).
- Customize the task by filling in details like task name, backup content, target location, schedule, etc.
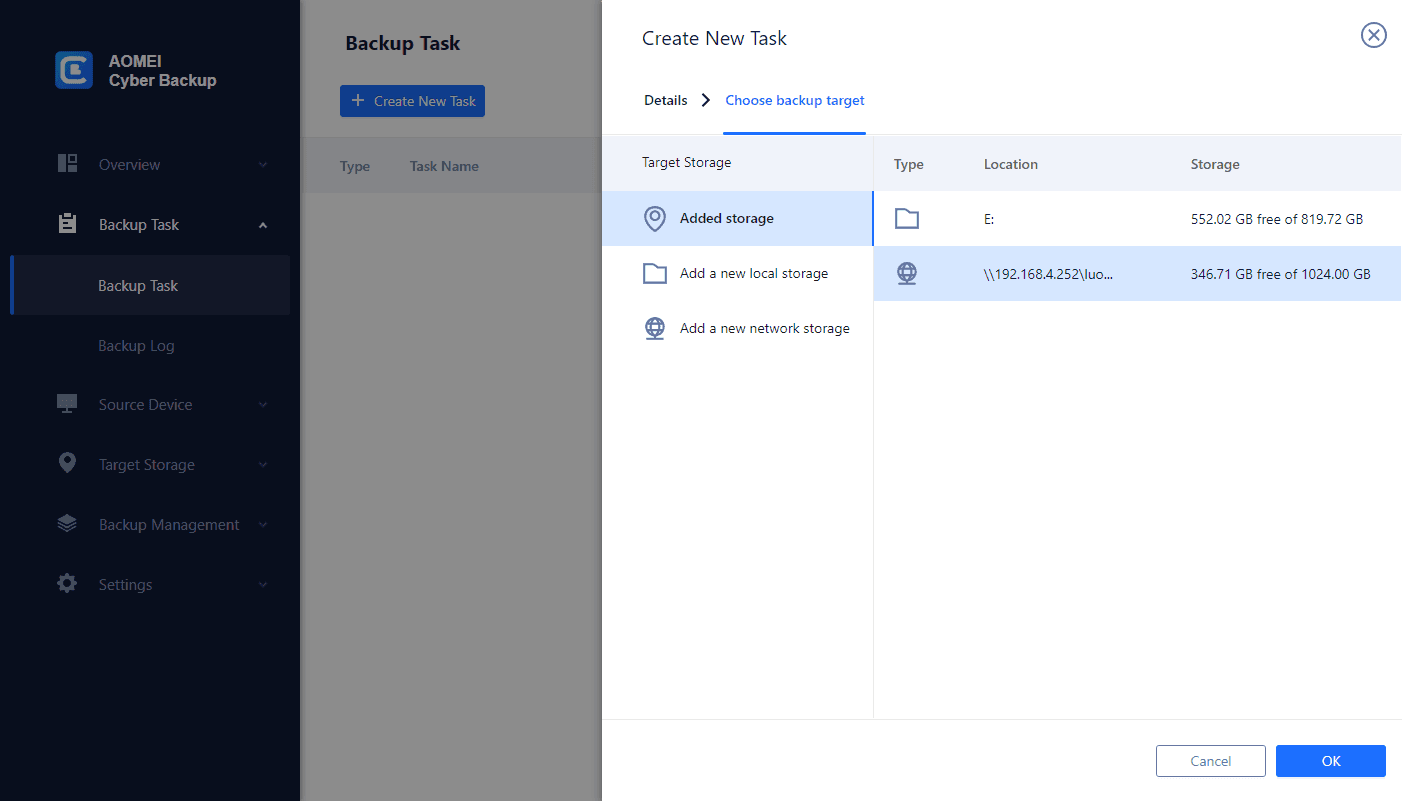
Step 4: Specify Destination Path
- Specify the backup target location where you want to save your backups.
Step 5: Start Backup
- Click the Start Backup button to begin the backup process.
- You can choose to start the backup immediately or based on the scheduled time.
Summary
Now that you're acquainted with different ways to tell how to backup Dell computer to external hard drive, such as Backup and Restore, Backup Assistant, File History, and AOMEI Backupper Standard and AOMEI Cyber Backup.
Proper backup can bring a lot of benefits to Windows users. AOMEI Cyber Backup is an all-on-one backup and recovery tool that offers full backup solutions and allows you backup multiple computer data to one shared storage location. Now try it yourself!
Best Enterprise Backup Solution

- VMware and Hyper-V Backup
- SQL Server/Workstation Backup
- Scheduled Automatic Backup
- Flexible Backup Cleanup Policy
- Backup and Manage Centrally


Still Need Help?
Have your problem been solved? If not, please input query in the search box below.