
How to Replace SSD on Legion Go: Upgrade Guide for Beginners
Upgrade your Legion Go storage with confidence. This guide takes you through the entire SSD replacement process, ensuring a smooth system migration and safe disassembly.
By Lily Updated on January 8, 2026
The Lenovo Legion Go is a powerful handheld gaming device, but its factory SSD can quickly feel limiting as modern games, updates, and media files consume more storage. Whether you’re running out of space, looking for faster load times, or replacing a failing drive, learning how to replace SSD on Legion Go is one of the most effective upgrades you can make.
Before You Replace SSD on Legion Go
Replacing the SSD in your Legion Go is a relatively straightforward upgrade, but proper preparation is critical. You may take a few minutes to get everything ready:
✅ Check SSD Compatibility and Storage Limits
The Legion Go uses an M.2 NVMe SSD in the 2242 form factor. Before purchasing a new drive, confirm that it matches the required size and interface.
✅ Back Up All Important Data
Before opening the device, create a full disk image or at minimum copy important data to an external drive or cloud storage. This step is essential to prevent permanent data loss.
✅ Prepare Necessary Tools
- A USB-C NVMe enclosure or adapter (for connecting the new SSD)
- A small Phillips screwdriver
- A plastic pry tool
- An anti-static surface or wrist strap if available
✅ Pick Disk Cloning Software
If you want to keep Windows, games, and all settings exactly as they are, cloning the old SSD to the new one is the easiest approach. For this, AOMEI Cloner is a strong choice for Legion Go users.

- Simple disk/system cloning with a clean, beginner-friendly interface.
- Intelligent clone mode to copy only used sectors (faster and safer).
- SSD alignment to improve performance and extend SSD lifespan.
- Support for different SSD sizes and types, making upgrades seamless.
Stepwise Guide for Lenovo Legion Go SSD Replacement
This method lets you replace SSD on Legion Go without reinstalling Windows, by cloning your original drive to the new one. Follow each step carefully to avoid data loss or boot issues. These steps also apply to Lenovo Legion Go 2 SSD upgrade (Windows version).
Step 1. Connect the New SSD
1. Insert the new SSD into the USB-C NVMe enclosure at a 30-degree angle, push it down gently, and secure it with the provided screw or clip.
2. Connect the enclosure to the Legion Go using a USB-C cable.
Step 2. Clone the Old SSD to the New SSD
1. Power on the Legion Go. Download, install, and launch AOMEI Cloner.
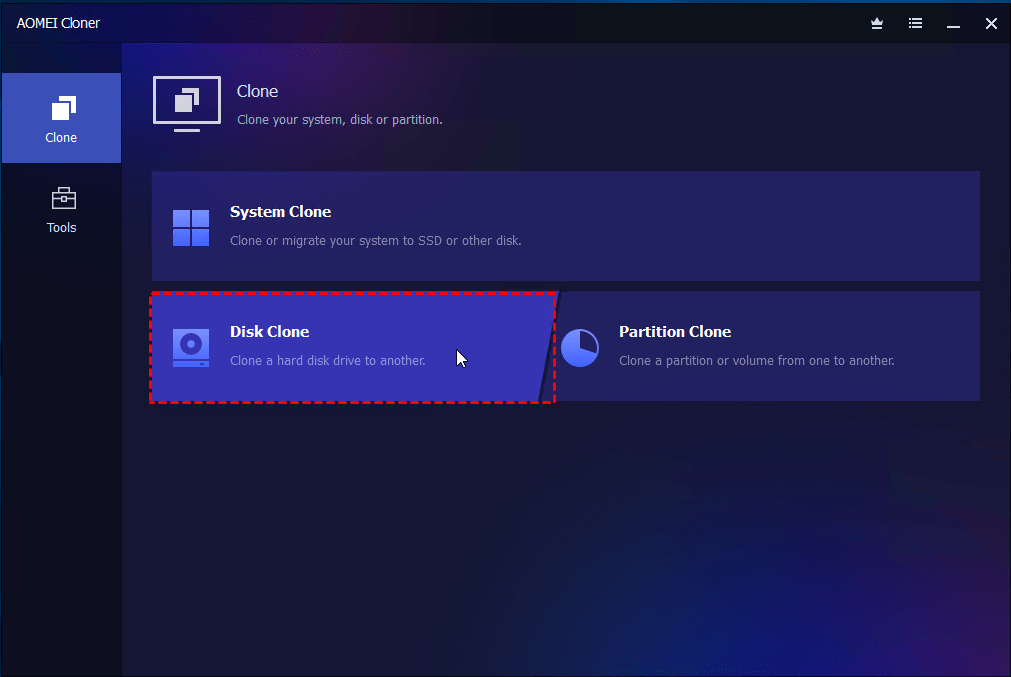
2. Click Clone from the left panel and select Disk Clone.
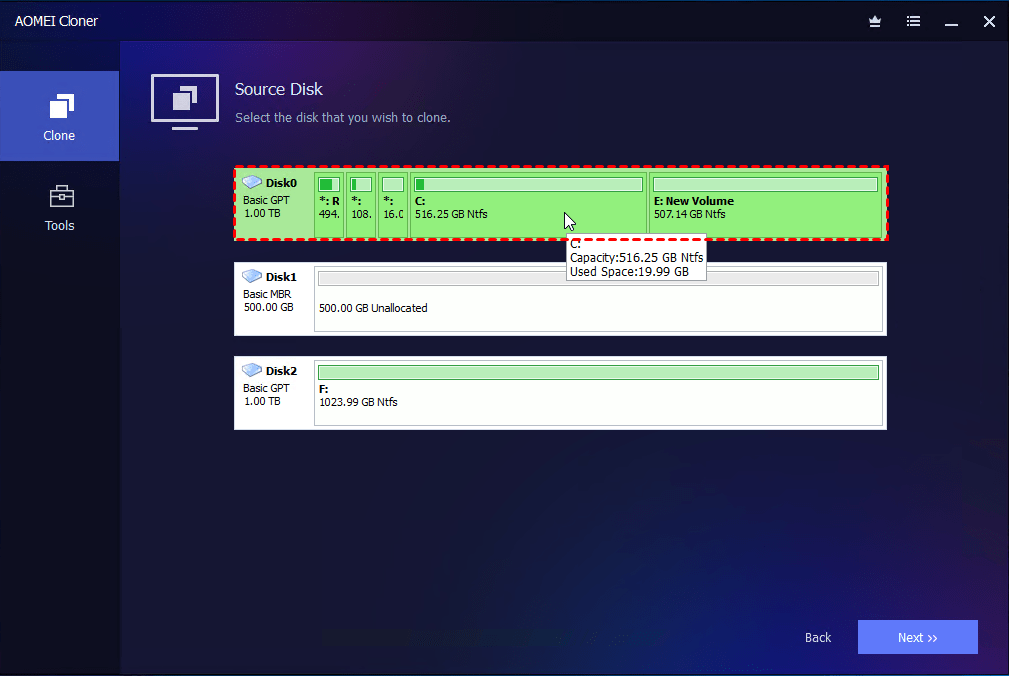
3. Choose the internal Legion Go SSD as the source disk and choose the new external SSD as the destination disk.
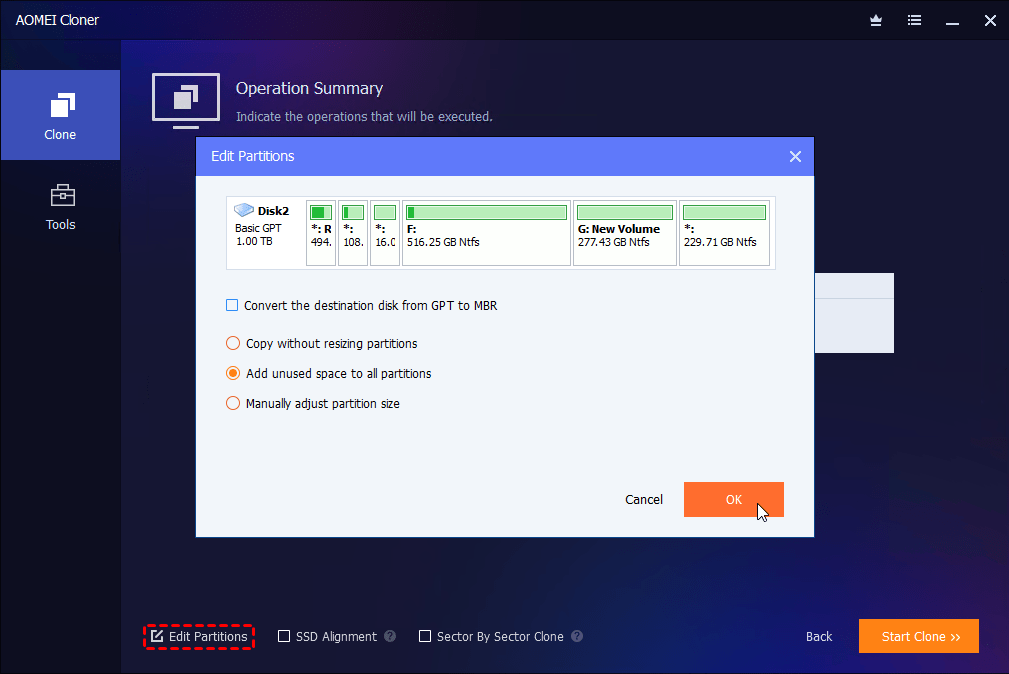
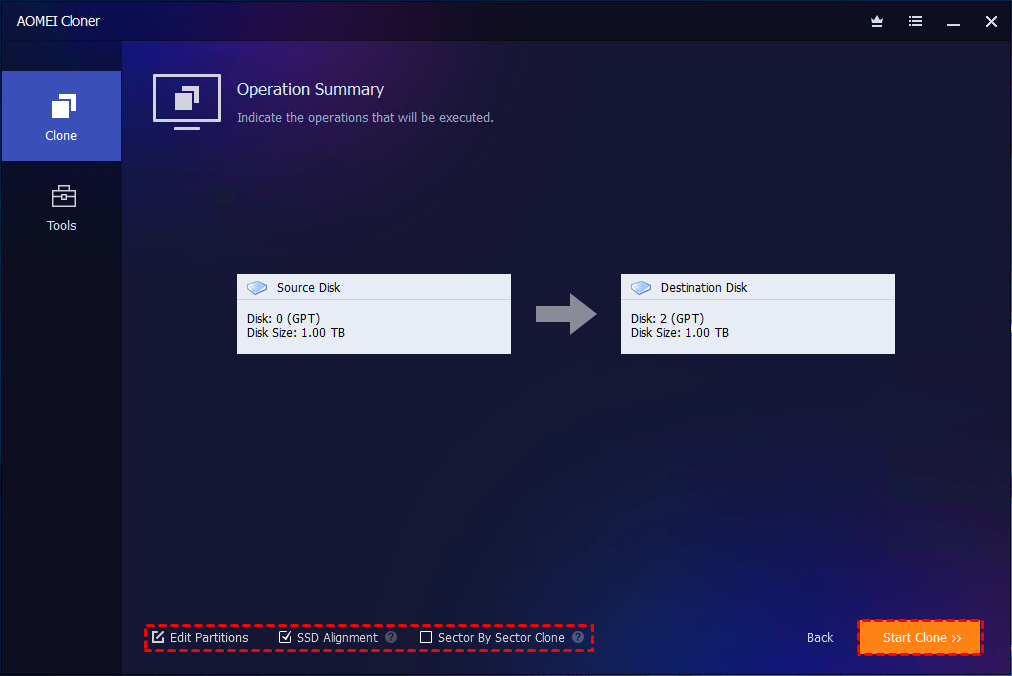
4. Adjust the partition style and size of the destination SSD as necessary.
- If the destination SSD is shown as “MBR” in AOMEI Cloner, click Edit Partitions > Convert the destination disk from MBR to GPT to make it work better with Windows 11.
- If the new SSD is larger, click Edit Partitions > Add unused space to all partitions so the full capacity is usable.
5. Enable SSD Alignment to optimize performance and lifespan. Confirm the operation and click Start Clone.
Step 3. Swap SSDs
1. When cloning finishes, completely shut down the Legion Go.
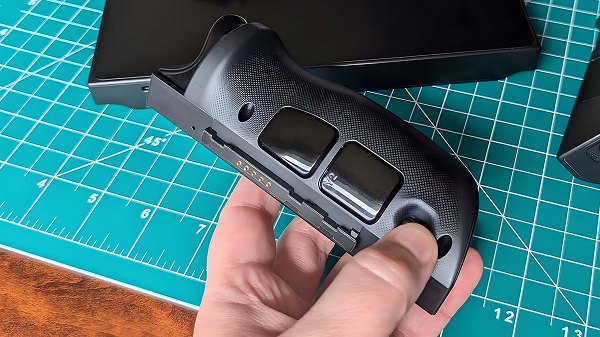
2. Detach the controller halves from the Legion Go.
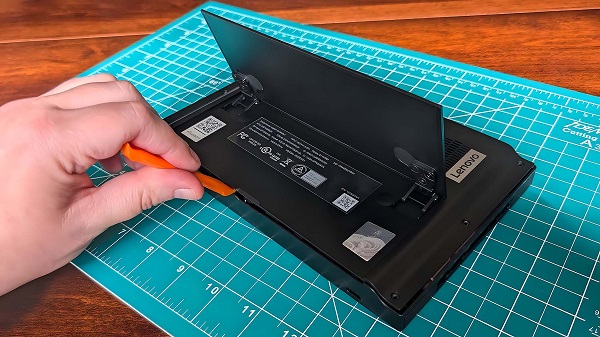
3. Place the Legion Go screen down on a clean, dry surface. Remove the back screws using a PH00 screwdriver.
4. Raise the kickstand and then use a plastic prying pick to gently lift the back casing off.
5. Peel the black sticker off the SSD and battery cable. Gently grab the battery cables and unplug them.
6. Use a PH1 screwdriver to unscrew the original SSD and remove it.
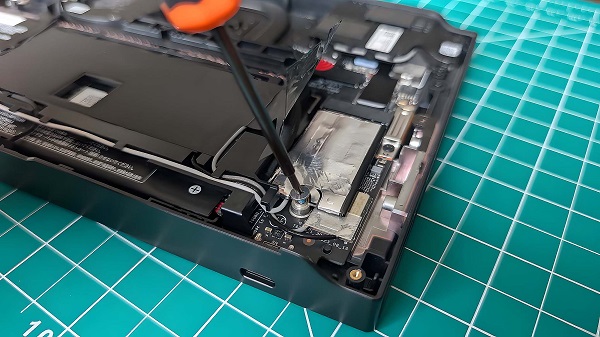
7. Slide the new SSD in place and secure it with the PH1 screw.
8. Plug the battery cable back in and put the black sticker back in place over the battery cable and SSD.
9. Reattach the back cover and tighten all screws.
10. Power on the Legion Go. If the process was successful, Windows will boot normally from the new SSD, and your files, games, and settings will remain exactly as before.
FAQs about Lenovo Legion Go Replacing SSD
1️⃣ Does replacing the SSD on Legion Go void the warranty?
Warranty policies can vary by region and seller. In many cases, opening the device or changing internal components may affect warranty coverage unless the original SSD is reinstalled before service. It’s recommended to check Lenovo’s official warranty terms or contact support before proceeding.
2️⃣ What type of SSD does the Lenovo Legion Go use?
The Lenovo Legion Go uses an M.2 NVMe SSD in the 2242 form factor. Only NVMe drives in this size are physically compatible. Standard 2280 SSDs are too long and will not fit without modification.
3️⃣ What capacity SSD should I choose for Legion Go?
Common upgrade options are 1TB and 2TB SSDs, which provide plenty of space for modern PC games. Choose based on your game library size and budget. Higher-capacity SSDs are ideal if you install large AAA titles.
4️⃣ Is it better to clone the SSD or reinstall Windows?
Cloning is the easiest method because it keeps Windows, drivers, games, and personal files intact. Using disk cloning software like AOMEI Cloner allows you to swap SSDs and boot immediately. A clean installation is useful if you want a fresh system, but it requires reinstalling drivers and all software.
Verdict
Upgrading the storage on your Lenovo Legion Go is one of the most effective ways to improve usability, performance, and long-term gaming comfort. In this guide, we covered how to replace SSD on Legion Go from start to finish.
With reliable cloning software AOMEI Cloner, you can upgrade the old SSD without reinstalling Windows and all your apps. You can also use AOMEI Cloner to clone hard drive in Server 2019/2022/2025, because it runs well on both Windows PCs and Servers. Try it now to discover more!
