
How to Fix "BCD Missing" Error on Windows 10 GPT Partition
What to do with BCD missing Windows 10 GPT? In this article, you will learn four easy and reliable ways to fix this annoying issue as well as three solutions to the BCD files not created Windows shut down.
By Hedy Updated on May 29, 2026
How to fix the BCD missing error on a GPT partition
Fixing a "BCD Missing" error on a GPT (GUID Partition Table) disk is different from the traditional MBR process. Because GPT disks use UEFI firmware, the boot files are stored in a hidden, dedicated EFI System Partition (ESP) rather than the main Windows partition. Here are 4 easy and effective ways to fix missing BCD file Windows 10 on a GPT partition.
Way 1. Run the boot repair tool
If you're dealing with a missing BCD file on Windows 10, AOMEI Partition Software offers one of the most straightforward solutions. While primarily known as a robust disk management suite, its dedicated Boot Repair feature is specifically designed to handle startup failures without the need for complex command-line tinkering.
-
User-friendly interface: Unlike native Windows recovery environments that can feel intimidating, AOMEI uses an intuitive layout. Even if you aren't a "tech expert," you can resolve boot issues through a clear, guided process.
-
All-in-one repair suite: It doesn't stop at BCD files. The tool performs a comprehensive sweep, repairing MBR (Master Boot Record), boot sectors, and other vital system files that might be preventing your PC from loading.
-
Flexible repair modes: You have the freedom to choose your approach:
-
Automatic: Let the software scan and apply fixes autonomously.
-
Manual: Select specific repair paths if you prefer a more surgical touch.
A safe and reliable disk partition management tool that helps you migrate OS to SSD or HDD, reorganize disk space, and improve overall PC performance.
Case 1: Repair a running PC
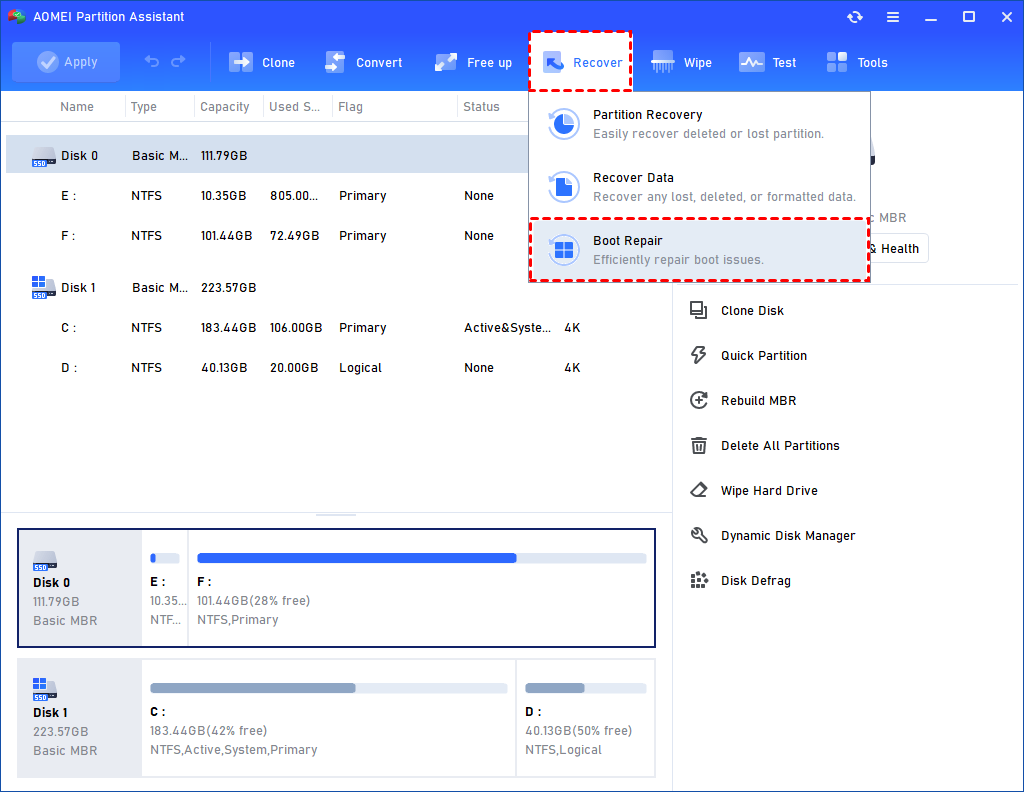
Step 1. Install and launch AOMEI Partition Software. In the Main Tab, please click the "Recover" tab and select "Boot Repair".
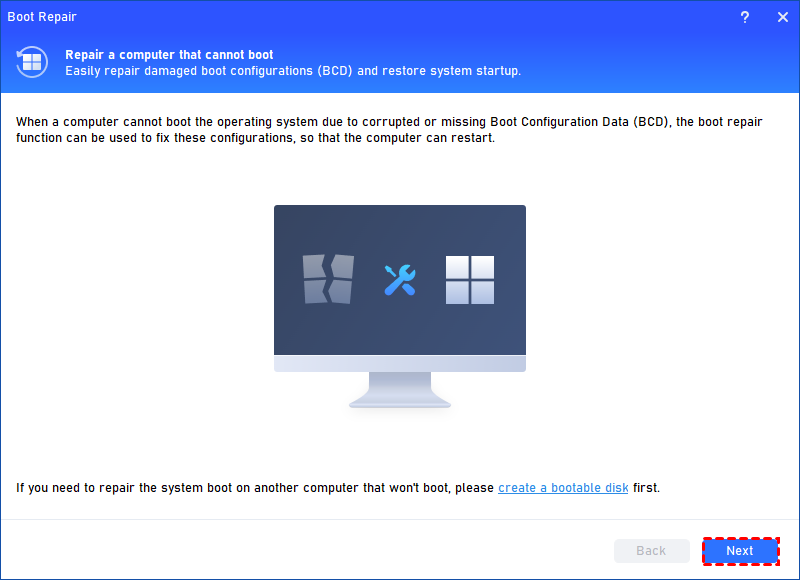
Step 2. The Boot Repair tool will pop up. Please click "Next" to start the system’s boot entries scan process.
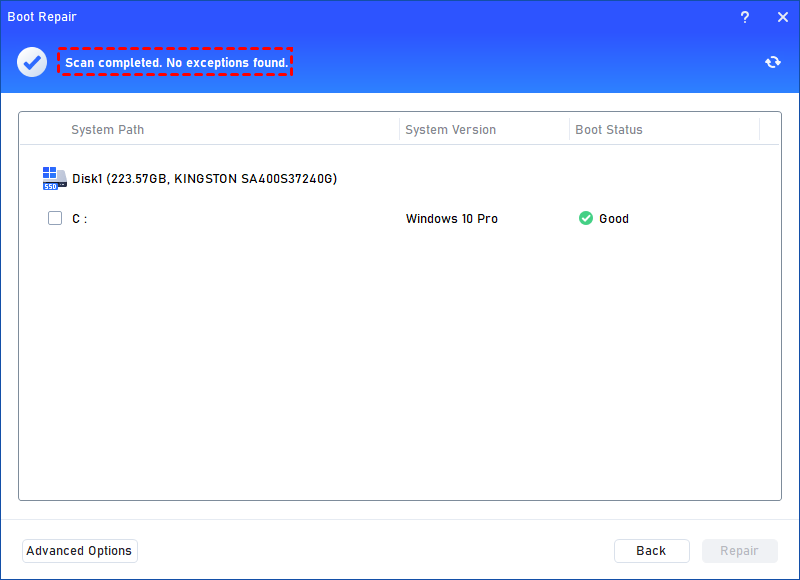
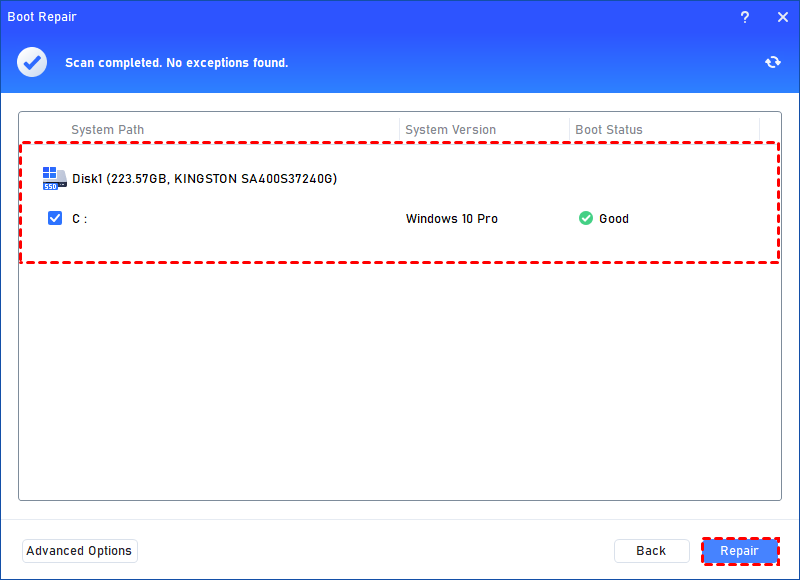
Step 3. After the process is completed, it will display the scan result: system paths, system versions, and boot status. And, all repairable boot entries will be available to select.
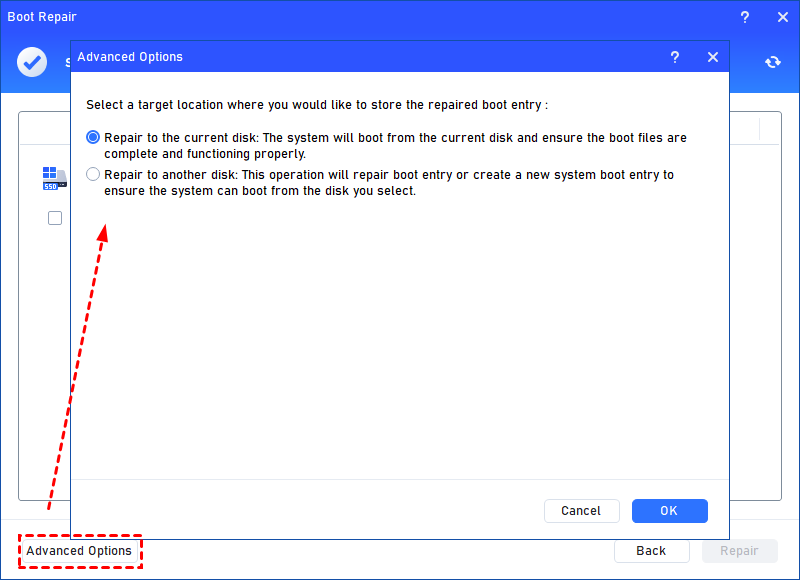
✍ Advanced Settings: Select a location to store the repaired boot entry.
◆ Repair to the current disk: The system will boot from the current disk and ensure the boot files are complete and functioning properly. (By default)
◆ Repair to another disk: This operation will repair the boot entry or create a new system boot entry to ensure the system can boot from the disk you select.
Step 4. Select one/multiple repairable boot entries you want to repair and click the "Repair" button to start the boot repair.
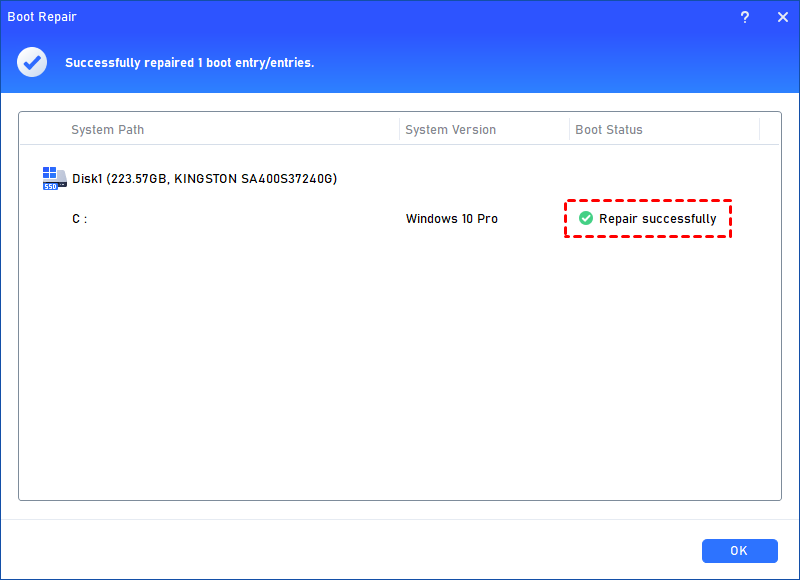
Step 5. Wait for the repair process to finish. Once it is finished, you can check the repair result. If it succeeds, you will get a "Repair Successfully" result.
Case 2: Repair boot for PC that is unable to boot
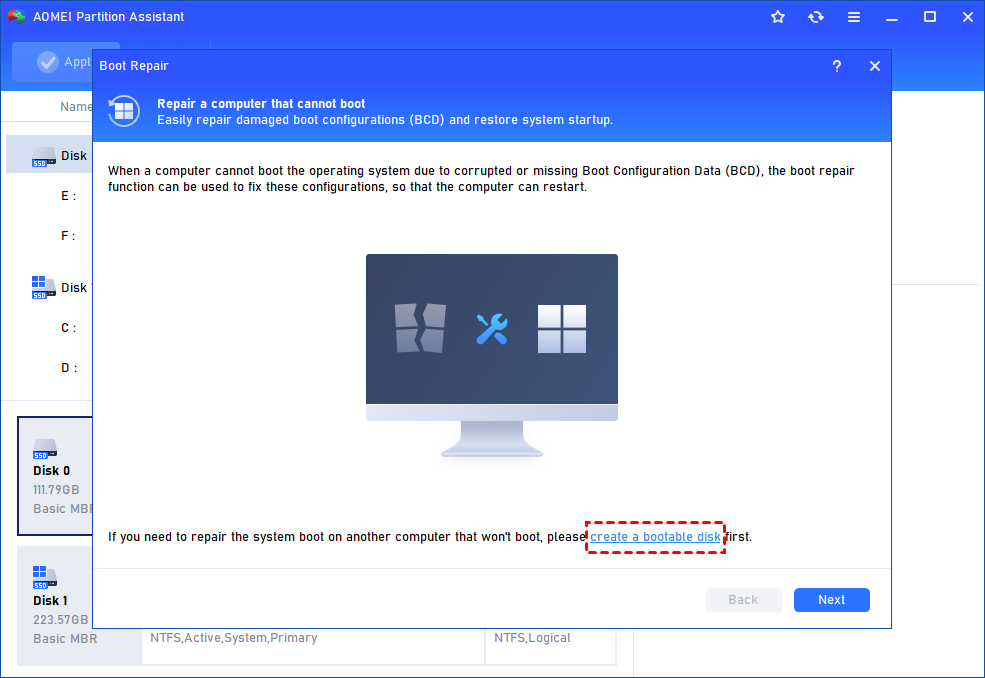
Step 1. Install and launch AOMEI Partition Assistant on a working PC, click "Recover"-"Boot Repair" and then click the "create a bootable disk" option to create a WinPE "Boot Repair" disk.
Step 2. Plug the bootable disk you created into the target computer you wish to repair the boot issue.
Step 3. Enter BIOS in your computer, choose the bootable disk as the boot drive to access AOMEI Partition Software.
Step 4. The PC that cannot boot into WinPE will automatically load the Boot Repair tool and start the boot entries scan process. All boot entries will be displayed. Then you can follow the same operations as the above shows.
Way 2. Rebuild the BCD
If the automatic repair didn’t fix the issue, manually rebuilding the BCD may help.
Step 1. Insert a Windows installation media (USB or DVD) and boot your system from it. Choose "Repair your computer" > "Troubleshoot" > "Command Prompt".
Step 2. Run BCD Rebuild Commands: In Command Prompt, type the following commands one by one, pressing Enter after each:
bootrec /fixmbr
bootrec /fixboot
bootrec /scanos
bootrec /rebuildbcd

These commands will attempt to fix the Master Boot Record, fix the boot sector, scan for existing installations, and rebuild the BCD.
Step 3. If prompted, type Y to confirm any prompts. Once done, restart your computer to see if the BCD missing error is resolved.
Way 3. Check partition status
If your computer isn't booting correctly, it may be because the boot partition isn't properly recognized. Follow these steps to identify and configure your partition using the Command Prompt.
Step 1. Once you have opened the Command Prompt from your recovery environment, type diskpart and hit Enter.
Step 2. Type list disk and press Enter. This will show a list of all physical drives connected to your machine.
Step 3. Identify which disk contains your operating system (usually Disk 0). Type select disk # (replace # with your disk number) and press Enter.
Step 4. Type list partition and press Enter to see the structure of the selected drive.
Step 5. For UEFI (GPT): Look for a small partition (usually 100MB–500MB) labeled as System or EFI.
Step 6. Look for the partition where your OS is installed or a "System Reserved" partition.
Step 7. Type select partition # (replace # with the correct number) and press Enter.
Step 8. Finalize configuration:
▶ If using MBR: Type active and press Enter.
▶ If using GPT: The active command is not required. Instead, ensure the partition is formatted as FAT32 and contains the necessary EFI boot files.
Step 9. Type exit, press Enter, and restart your computer to see if the issue is resolved.
Way 4. Repair the EFI Bootloader
For systems with UEFI firmware and a GPT partition style, repairing the EFI bootloader might be necessary to fix the BCD error.
Step 1. Use the Windows installation media to open Command Prompt as outlined in the previous steps.
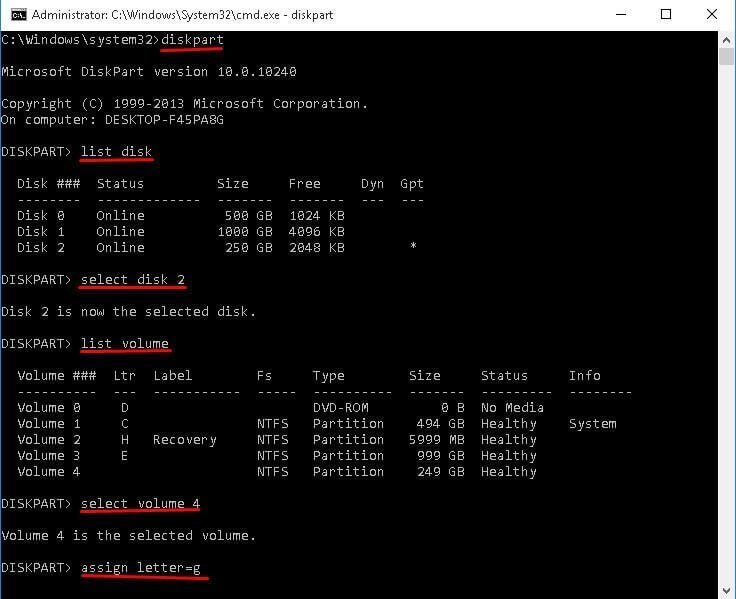
Step 2. Enter the following commands, pressing Enter after each line:
diskpart
list disk
select disk 2 (Replace 2 with your system disk number)
list volume
select volume 4 (Replace 4 with the EFI partition number)
assign letter=g (Assigns a drive letter to the EFI partition)
Step 3. Type the following commands to repair the EFI bootloader:
cd /d Z:\EFI\Microsoft\Boot\
bootrec /fixboot
ren BCD BCD.bak
bcdboot C:\Windows /l en-us /s Z: /f ALL
This process renames the existing BCD file and creates a new one, effectively rebuilding the EFI bootloader.
Step 4. Close Command Prompt, remove any bootable media, and restart your system to see if it boots properly.
What causes the "BCD missing" error?
The BCD (Boot Configuration Data) is a critical database that tells the Windows Boot Manager where to find the operating system to start the boot process. When you see a "BCD Missing" or "BCD Corrupt" error, it means the communication link between your hardware (BIOS/UEFI) and your software (Windows) has been severed.
Here are the primary technical causes for this failure:
1. File system corruption
The BCD resides in a specific partition (usually the EFI System Partition on GPT disks or the System Reserved partition on MBR disks). If the partition suffers from file system errors due to a sudden power outage, an improper shutdown, or a failing storage drive, the BCD file can become unreadable or physically "missing" from its directory.
2. Improper shutdowns during updates
Windows often modifies the BCD during system updates or service pack installations. If the computer loses power or is forced to restart while the Registry or the BCD hive is being written to, the file can be left in an incomplete, corrupted state that prevents it from loading during the next boot cycle.
3. Faulty disk writes & hardware failure
Since the BCD is stored on your hard drive or SSD, hardware-level issues can trigger the error:
🔸 Bad sectors: If the physical sector of the disk where the BCD is stored becomes damaged, the data is lost.
🔸 Failing drive: An intermittent connection or a dying controller on an SSD/HDD can cause the system to "lose" the partition entirely during the hand-off from BIOS to the Boot Manager.
4. Software & manual interference
💡 Disk management tools: Using third-party partitioning software to resize, move, or merge the EFI partition can inadvertently overwrite the BCD or change the partition's unique identifier (GUID), making it invisible to the bootloader.
💡 Malware: Certain types of rootkits or boot-sector viruses specifically target the boot configuration to gain low-level control of the system or to disable security features.
💡 Incompatible drivers: Occasionally, installing a driver that interacts with the boot process can corrupt the BCD configuration.
5. Transitioning partition styles
Switching between Legacy BIOS (MBR) and UEFI (GPT) without properly reconfiguring the boot files is a frequent cause. If the motherboard is set to boot in UEFI mode but the BCD is configured for an MBR partition (or vice-versa), the system will report that the BCD is missing because it is looking for the file in the wrong format or location.
Bonus: How to fix BCD files not created Windows shut down
When your computer shuts down because it can't find or create the Boot Configuration Data (BCD), it usually means the bootloader information on your EFI or System Reserved partition is corrupted, missing, or pointing to the wrong place. In addition to the methods mentioned above, you can also try the following methods.
Fix 1. Check for disk errors with CHKDSK
If you're dealing with boot errors, it's a smart move to verify your hard drive's health before attempting complex BCD repairs. Here is a streamlined guide to running a disk check via the Windows Recovery Environment.
Step 1. Before you start, ensure you have your Windows Installation Media (USB or DVD) plugged in.
Step 2. Restart your PC and boot from your installation USB or DVD. You may need to change your BIOS/UEFI boot order or use a "Boot Menu" key (like F12, F11, or Esc).
Step 3. When the Windows Setup screen appears, click Repair your computer in the bottom-left corner.
Step 4. Navigate through the menus: Troubleshoot > Advanced options > Command Prompt.
Step 5. In the black terminal window, type the following command exactly as shown:
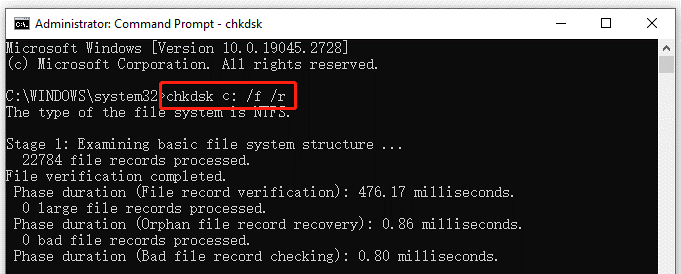
chkdsk C: /f /r
Note: If your Windows partition uses a different letter (like D:), replace C: accordingly.
Step 6. Press Enter. Windows will scan the file system for logical errors (/f) and check for physical bad sectors (/r), attempting to recover readable information.
Fix 2. Use System File Checker (SFC) for additional repairs
If the BCD (Boot Configuration Data) is acting up, it’s possible that underlying system files are corrupted. The System File Checker (SFC) is a built-in utility that verifies the integrity of Windows system files and replaces damaged ones with a cached "clean" version.
Step 1. In Command Prompt, type the following command:
sfc /scannow
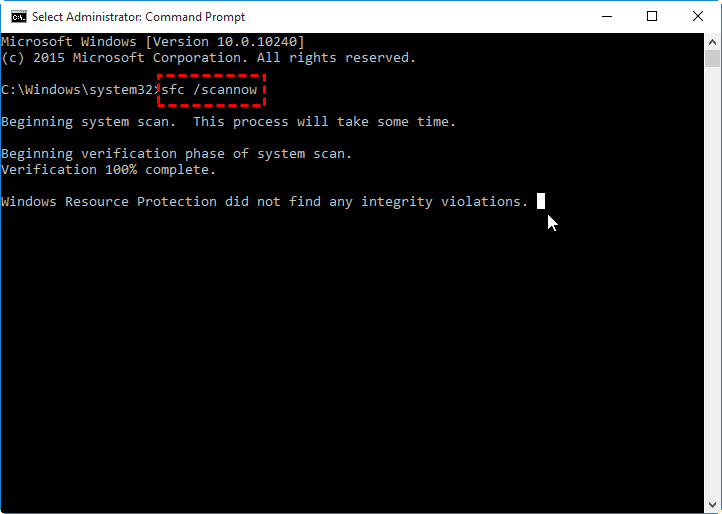
Step 2. Press Enter. The tool will begin scanning all protected system files.
Note: Do not close the window until the verification is 100% complete.
Step 3. Once finished, the terminal will report if it found and fixed any issues. Restart your computer to allow any pending repairs to take effect.
Fix 3. Use DISM to repair Windows image
If the System File Checker (SFC) isn't enough to solve the problem, the Deployment Image Servicing and Management (DISM) tool provides a more powerful layer of repair. While SFC fixes individual files, DISM repairs the underlying Windows system image that SFC uses for its own repairs.
Step 1. In Command Prompt, type the following command lines:
Dism /Online /Cleanup-Image /CheckHealth
This quickly checks if the system has already flagged any corruption.
Step 2. Then, use the following commands to deep scan:
Dism /Online /Cleanup-Image /ScanHealth
This performs a more thorough scan to find issues that might not have been logged yet.
Step 3. To restore integrity, enter the the following commands:
Dism /Online /Cleanup-Image /RestoreHealth
This is the most critical step. It downloads healthy files from Windows Update to replace any damaged components.
FAQs
🔎 Can you restore Windows 7 with a bad BCD?
Yes. You can restore boot functionality by using the Windows Installation Media's "Startup Repair" feature or manually regenerating the BCD file using bootrec commands in the Command Prompt to re-establish the boot path.
🔎 Why is fixing a "BCD Missing" error different on a GPT disk?
GPT disks use UEFI firmware and store boot data in a hidden EFI System Partition (ESP) formatted as FAT32. MBR disks use BIOS and typically store the BCD in the active system partition.
🔎 How can I use a repair tool like AOMEI Partition Assistant?
Create a WinPE bootable media on a working PC using a USB drive. Boot your crashed computer from this USB to access the AOMEI interface and use the "Rebuild MBR" or repair features.
🔎 What should I do if the standard bootrec /rebuildbcd command doesn't fix the error?
If the command fails, the BCD store might be corrupted beyond simple repair. You must manually export and delete the old BCD, then use bcdboot to copy fresh boot files from the Windows partition.
Conclusion
To fix a "BCD Missing" error on a GPT partition, you must address the EFI System Partition (ESP). Key solutions include using automated tools like AOMEI Partition Assistant, manually running bootrec commands, or rebuilding the EFI bootloader via Command Prompt. Additionally, checking for disk errors with CHKDSK and system file corruption via SFC/DISM can resolve underlying issues caused by hardware failure or improper shutdowns.