[2024] 4 Fixes to "iPod Is Disabled, Connect to iTunes"
Are you facing with “iPod is disabled connect to iTunes” issue? Read this passage to fix “iPod is disabled connect to iTunes” with iTunes and without iTunes.
By Demi / Updated on December 28, 2023
iPod is disabled, connect to iTunes.
I found my iPod after 3 years and stupidly enough tried different password that didn't work. I connected my iPod to my PC but I can't see it for some reason and I could not restore my iPod.
- Question from Apple Community
iPod is an amazing entertainment tool released by Apple. You could listen to music, watch movies and play games on it. But if you leave it alone for a long time and try to use it again, there may be something wrong with it just like the user above. If you see “iPod is disabled connect to iTunes” on its screen, your iPod will not be available temporarily. Follow this passage to know why and how to fix this issue.

Part 1. Why do you receive "iPod is disabled, connect to iTunes"?
For the sake of the safety of your iPod, if you enter an incorrect passcode many times, iPod will be disabled in order to prevent unauthorized users from accessing the iPod. Generally speaking, after the tenth attempt, you will receive the prompt "iPod is disabled, connect to iTunes".
The message means the iPod is completely locked. Now, the only way out is to try to unlock it with other tools. Read on and find solutions about how to unlock a disabled iPod.
Part 2. 4 fixes to “iPod is disabled, connect to iTunes”
The error message means the iPod is completely locked. Now, the only way out is to try to unlock it with other tools. Read on and try solutions about how to unlock a disabled iPod below.
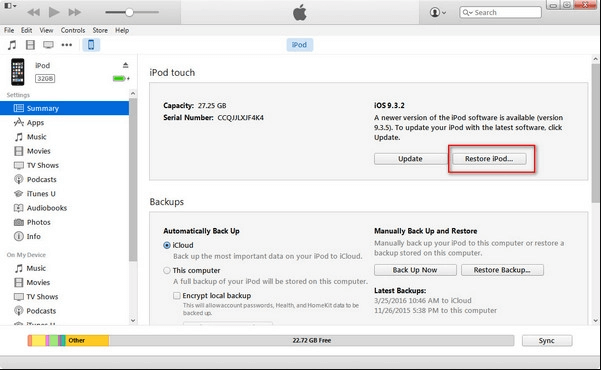
Solution 1. Restore your iPod via iTunes
Just like what iPod tells you, you may need to connect your iPod to iTunes to unlock it. But you have to keep in mind that this method can only work when you have previously backed up your iPod with iTunes on your computer. Follow these steps to fix “iPod is disabled connect to iTunes” with iTunes.
Step 1. Connect your iPod to the computer with a stable lightning cable > Launch iTunes.
Step 2. Select your iPod at the top of the screen > Click Back Up Now.
Step 3. Click Restore iPod to start resetting. It may take minutes to complete.
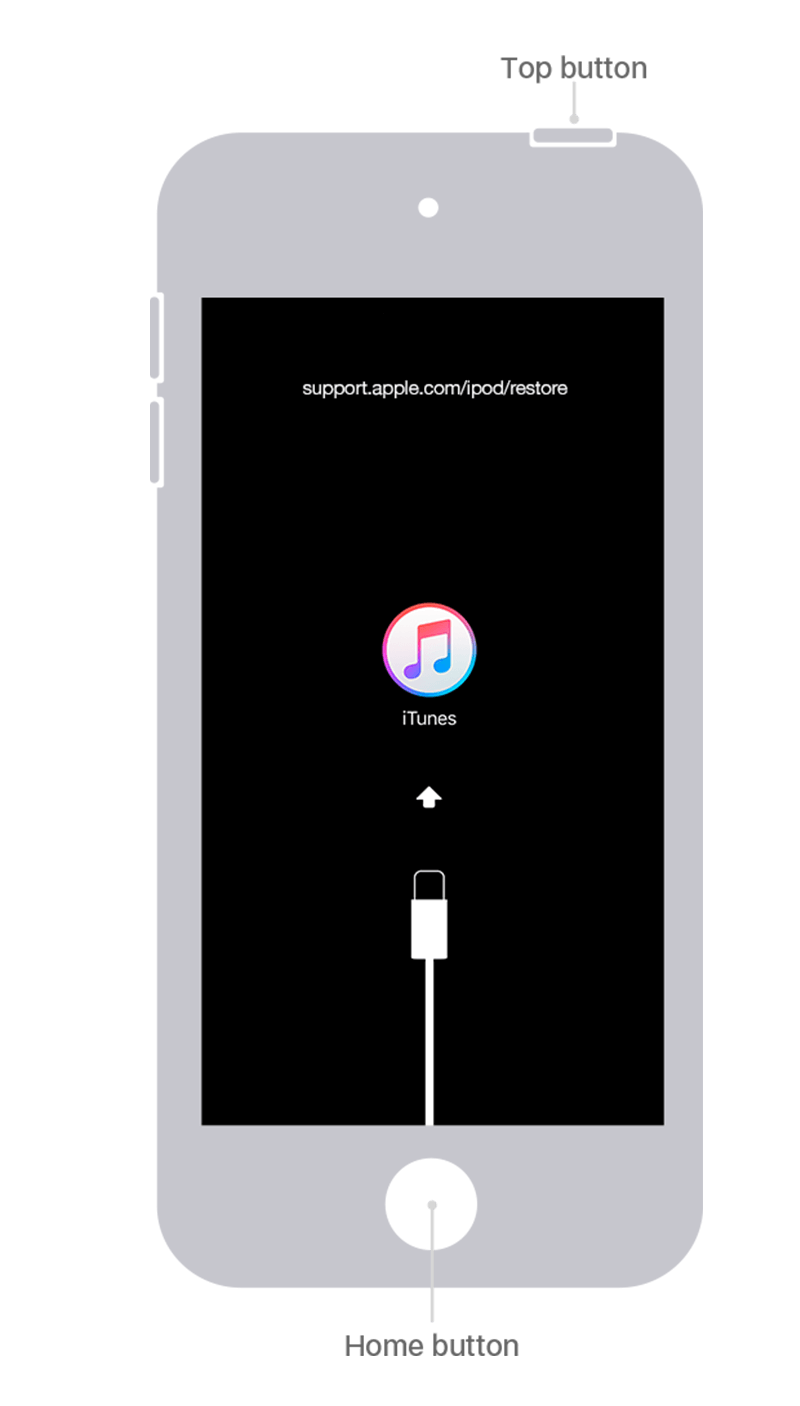
Solution 2. Put your iPod into recovery mode
An alternative way to fix a disabled iPod is to put the device into Recovery Mode with the help of iTunes. It is suggested to turn to Part 3. to backup your iPod first. The steps about how to reset the disabled iPod into recovery mode depend on the versions of iPod you're using.
iPod in 7 generation
Step 1. Hold the Top/Lock button until the power off slider appears > Drag the slider to turn off the iPod.
Step 2. Hold the Volume Down key and connect your iPod to computer via USB.
Step 3. Don’t release the key until the Recovery Mode screen appears.

iPod in 6 generation or earlier
Step 1. Hold the Top/Lock button until the power off slider appears > Drag the slider to turn off the iPod.
Step 2. Hold the Home button and connect your iPod to computer via USB.
Step 3. Don’t release the button until the Recovery Mode screen appears.
Solution 3. Remotely erase iPod via iCloud
If you don’t have a computer around you, you can also try to use iCloud to fix “iPod is disabled connect to iTunes” without computer. You can do it on a tablet or any iOS device. You need to backup iPod before using iCloud to fix this issue as well because iCloud will erase all the data including the passcode in your iPod.
Step 1. Go to www.icloud.com/find > Log in your iCloud ID > Click Find My icon.
Step 2. Click All Devices at the top of your screen > Select your iPod from the list.
Step 3. Click Erase iPod on the menu that pops up.
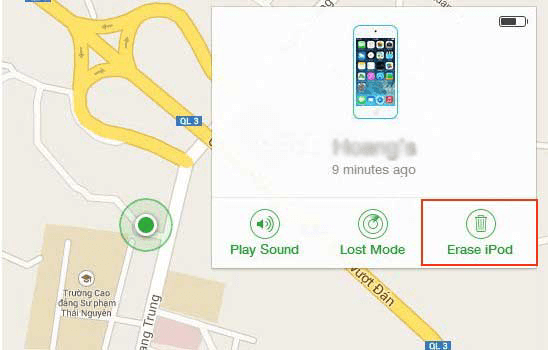
After these three steps, iCloud will erase your iPod remotely. When you can access your iPod again, remember to restore the data in iPod.
Solution 4. Deeply erase iPod without password with FoneTool
You can rely on the professional tool, FoneTool, to deeply erase the iPod and bring it back to a brand-new one without passwords.
Step 1. Download and launch FoneTool > Connect iPod to computer via a USB cable > Tap Trust in your iPod.
Step 2. Click Toolbox on the main interface > Select Data Eraser. (If you want to save iPod data first. Click Phone Backup and choose Full Backup.)
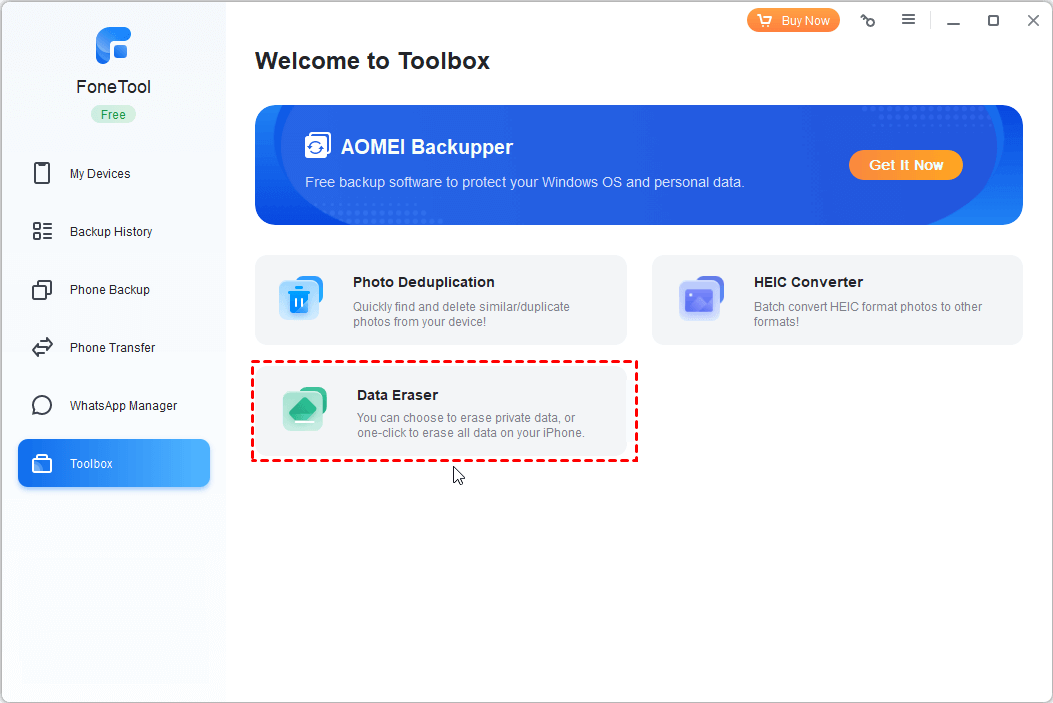
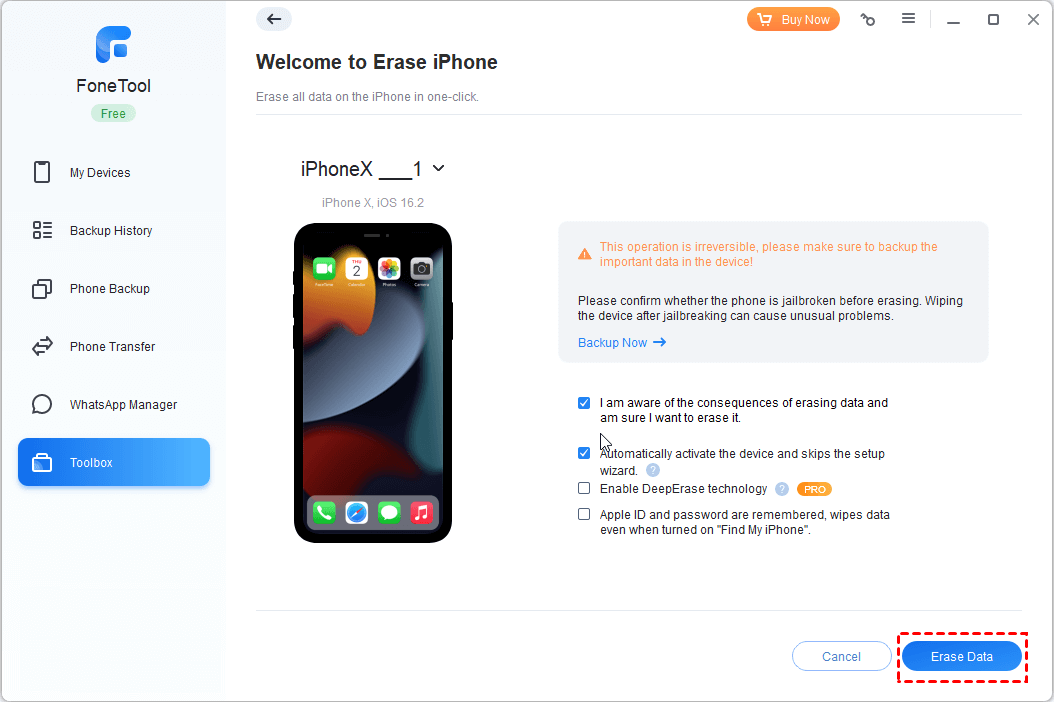
Step 3. Mouse over to Erase all data and click Get Started to continue.

Step 4. Click the options as per your need and click Erase Data to confirm.

Step 4. Click Erase Data.
Bonus: Backup and restore iPod with FoneTool
FoneTool, one of the best backup tools for iOS devices, provides you an easy and safe way to backup files from iPhone, iPad, and iPod to computer.
What you can enjoy with FoneTool
✓ Two types of Backup: Selective Backup enables you to backup the selective files from iOS devices to computer, while the Full Backup function backs up the whole iDevices to PC.
✓ Simple design and operation. FoneTool is pretty user-friendly. You can finish backing up within a few clicks.
✓ Optional backup storage path. You're free to save your backup file to a local folder on computer, an external hard drive, or USB as you like.
✓ Wide compatibility. FoneTool supports iPhone (from iPhone 4 to the latest iPhone 15), iPad (including iPad 2022), and versions of iPod. It also works well with iOS like iOS 17.
Since you're going to reset iPod, the following steps are about how to full backup iPod.
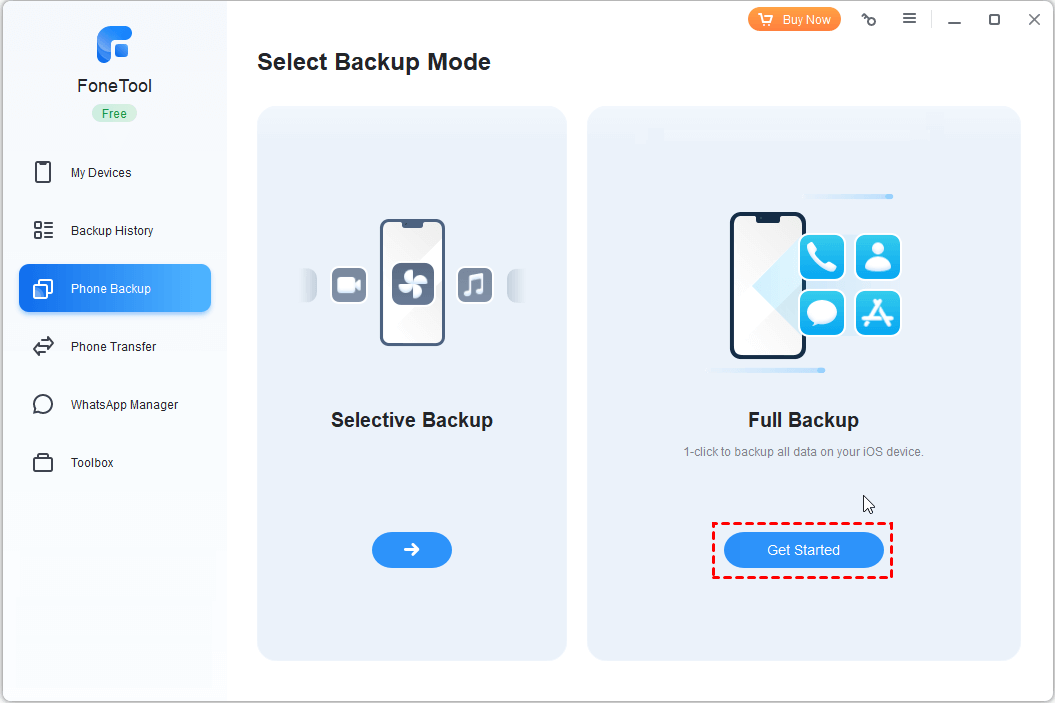
Step 1. Connect iPod to computer with USB > Launch FoneTool > Click Phone Backup and choose Full Backup > Click Get Started.
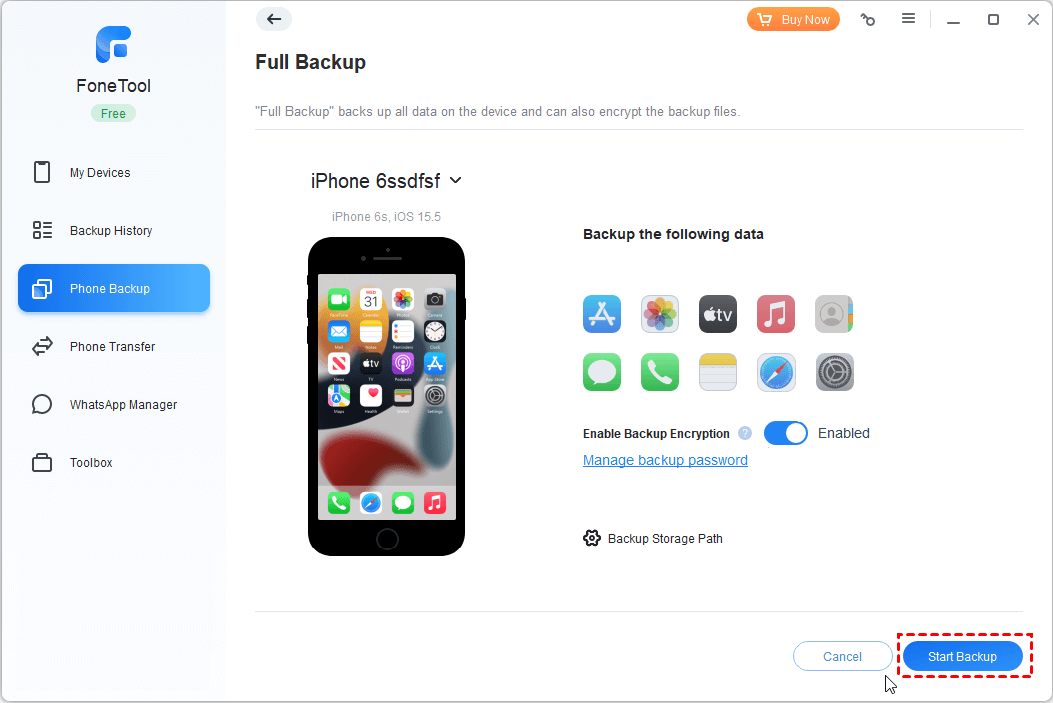
Step 2. Optionally, you can enable Backup encryption to protect your private data, like Health, Fitness records, etc.
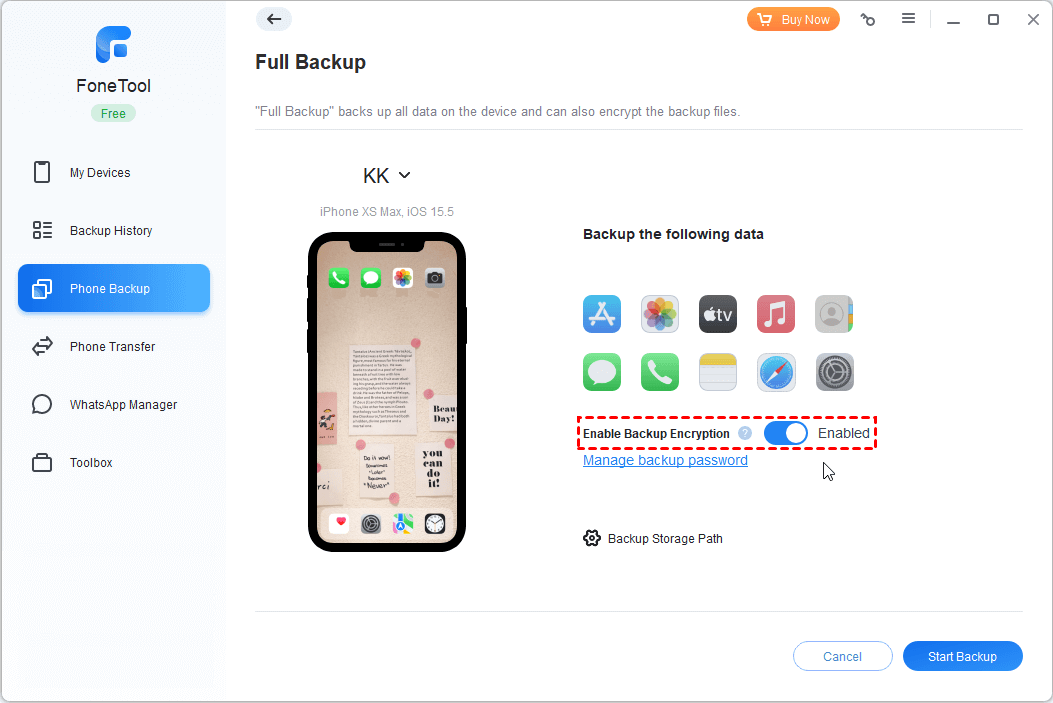
Step 4. Choose a storage path as you like > Click Start Backup to begin the task.
After getting the issue "iPod is disabled, connect to iTunes" fixed, you can restore the backup to your iPod. To restore backup, click Backup History in the main interface > Choose the backup files > Click the three-dot icon and click Restore to make it. To schedule daily iPod backup, you can utilize the Selective Backup function.
Conclusion
That’s all about how to fix the “iPod is disabled, connect to iTunes” issue. All of these methods require you to backup your iPod first. The function Full Backup in FoneTool can be a nice try.
It’s also suggested to backup your devices regularly via FoneTool to avoid data loss. If you have any other questions or suggestions, feel free to leave your comment or contact us.
