How to Move Voice Memos from iPhone to Computer: 2024 Tips
Refer to this article and find out the answers about how to move voice memos from iPhone to computer easily.
By Dylan / Updated on December 28, 2023
Whether to free up more space on your iPhone or just make a backup of your iPhone important data, transferring files to the computer is the best solution. This applies to any data, includes voice memos. If you're looking for methods about how to move voice memos from iPhone to computer (PC/Mac/laptop), then this guide will help you.
-
Method 1. Move Voice Memos from iPhone to Computer Using iCloud
-
Method 2. Transfer Voice Memos from iPhone to Computer with iTunes
-
Method 3. Get Voice Memos from iPhone to Computer Using Mail
Method 1. Move Voice Memos from iPhone to Computer Using iCloud
If you want to know the way of how to move voice memos from iPhone to computer without iTunes, this method will suit you for sharing multiple voice memos with iPhones. With iCloud Drive on your iPhone, you are able to share voice memos recordings and other supported files across your devices where you’re logged in with the same Apple ID.
Note: To avoid iPhone syncing Failed for not enough space, please make sure your iCloud account contains enough free space to receive voice memos from iPhone.
The steps are easy to follow. Please check the steps below:
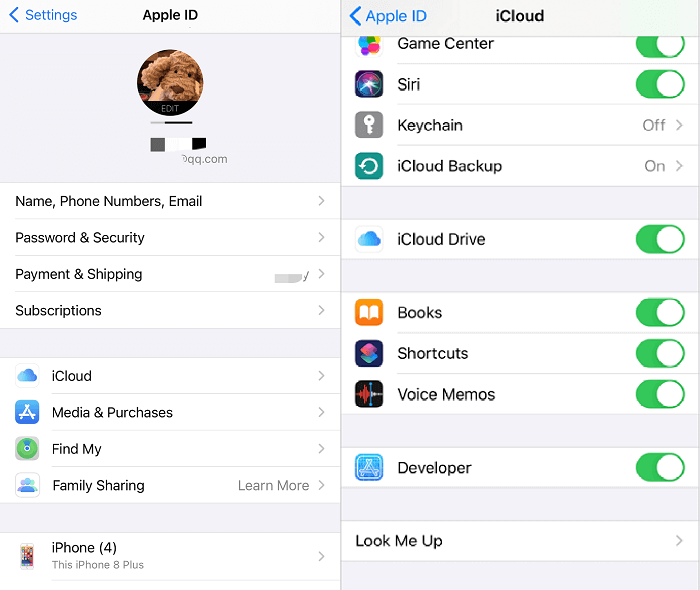
On your iPhone: Go to Settings > [your name] > iCloud > then turn on Voice Memos.
On your Mac: Choose Apple menu > System Preferences > Click Apple ID > iCloud in the sidebar > Select iCloud Drive > Options > Select Voice Memos in the list of apps.

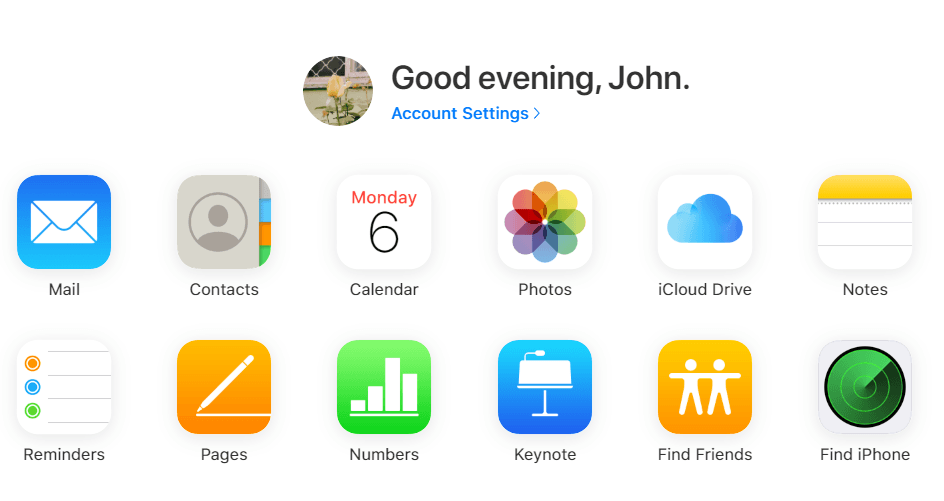
On your PC: Open a browser > Go to iCloud Web to sign in with the Apple ID > Choose iCloud Drive & Voice Memos > Download the voice memo from your iPhone to your PC.
Once you’ve finished setting up Voice Memos with iCloud to sync on your OS device and Mac/PC Windows 10, you can play, edit or download them on computer, or even transfer to external hard drive. Any changes you make will sync between the devices and new memos that you record on computer should show up on your iPhone as well.
Method 2. Transfer Voice Memos from iPhone to Computer with iTunes
iTunes could be a good tool to transfer voice memos from iPhone to computer for users. If you use a PC, you can transfer voice memos with iTunes. That’s also possible on Macs, but only those that run Mac OS 10.14 Mojave and earlier versions of the system software.
First, make sure you've downloaded the latest version of iTunes on your PC Windows 10, and then follow the steps below to focus on how to transfer voice memos from iPhone to computer with iTunes.
Connect your iPhone to the computer > Open iTunes > Click on your device icon > Select the Music option from the sidebar > Check Include Voice Memos > Click Apply button to confirm.

When the process completes, you can open File Explorer or Finder and go to Music > iTunes > iTunes Media > Voice Memos to locate your recordings on your computer in .m4a, or MP4 audio format. And you can play or edit them on iTunes or other media players.
Method 3. Get Voice Memos from iPhone to Computer Using Mail
Sometimes people want to get voice memos from iPhone to computer without syncing. Here the Share feature of the Voice Memos app on iPhone can help you make it easier. By using the Share Sheet, you can send single voice memo from your iPhone to any other services like Messages, Mail, Google Drive, OneNote, Gmail, other social media apps, etc. Later, you can receive these items by signing into the account of these services on any device.
Here are the instructions for how to get voice memos from iPhone to computer (PC and Mac), which you can follow to try. (Take Share with Mail for example)
Open the Voice Memos app on your iPhone > Click the voice memo you want to move > Click the More icon (3–dots) and choose Share > Select Mail > Fill in the recipient’s email address > Click Send.

Then the recipient can download the attachment from the email to his or her PC or Mac. Emailing aside, you can also send the voice memo as an attachment to another Mac.
Method 4. Send Voice Memos from iPhone to Mac via AirDrop
If your target device is an AirDrop-supported device like a Mac, iPad, or iPhone, the Share feature of Voice Memos app also allows you to use AirDrop to send the voice memos quickly. Here is the guide you can follow:
Open Voice Memos and choose the track you want to share just like the Method 3 > Select AirDrop> Tap the target device to AirDrop your voice memo (Turn on AirDrop on target device and let it be discovered by everyone).

And on the target device, click accept the AirDrop request to get the voice memos.
Tips: The shared voice memo will be sent to Voice Memos app on the iOS device. For Mac, the sent files will be stored in the Downloads folder.
Recommend: Backup iPhone Data to Computer without iTunes
Apart from moving voice memos from iPhone to computer, we recommend you backup iPhone data to computer for better managing. Here I would like to introduce one professional iPhone backup software- FoneTool, which helps you back up your iPhone selectively music, videos, photos, contacts and other data to a PC without iTunes.
With the user-friendly UI, you can back up your iPhone to computer and restore in only a few clicks. Now is the time to take action and learn more.
Conclusion
From the methods we have mentioned about how to move voice memos from iPhone to computer with iTunes, iCloud and the Share features of the Voice Memos app, you can choose the best one to transfer your voice memos based on your situation.
