How to Backup Photos from iPhone to Mac in 3 Ways
How to backup photos from iPhone to Mac? This passage would give you 3 ways to transfer photos to Mac via USB or over the air.
By Dylan / Updated on June 6, 2023
How to backup photos from iPhone to Mac
----I have used my iPhone X for 2 years and there are about 3K pictures in camera roll. I would like to know how to transfer these pictures to my Mac. Any suggestion?
- Question from Apple Community
With more and more pictures saved to iPhone, you might need to backup photos from iPhone to Mac. Apple has devoted lots of energy to developing the camera on iPhone. You could see that camera has become one of the main selling points of iPhone. If you go to Apple’s website, you would find that they introduce many things about how excellent iPhone camera is.
Indeed, iPhone is a good choice for a photographer. You could take good photos with it. After you save thousands of high-quality photos on iPhone, they could eat much storage on your iPhone. In addition, if you don’t backup photos on iPhone, they would suffer a high risk of being lost for many reasons, like lost iPhone, or broken iOS.
Backing up photos from iPhone to your Mac could protect your photos in a good way. If you lost photos on iPhone or want to transfer photos to new iPhone, the backup on Mac would always help you. You could find how to backup photos from iPhone to Mac in every way and backup iPhone to Mac without iTunes. Your photos would be well preserved.

Method 1: Backup photos from iPhone to Mac with Photos app
Mac OS has something like Photos app on iPhone and it also called Photos. They even share the same icon, so you could easily find it on Mac.
Step 1. Connect iPhone to Mac with USB cable and tap “Trust” on iPhone.

Step 2. Usually, Photos app would pop up. If not, you could open it by yourself.

Step 3. You could find your device shown in the sidebar. Click it and then you could see the photos in the Photos app on iPhone.
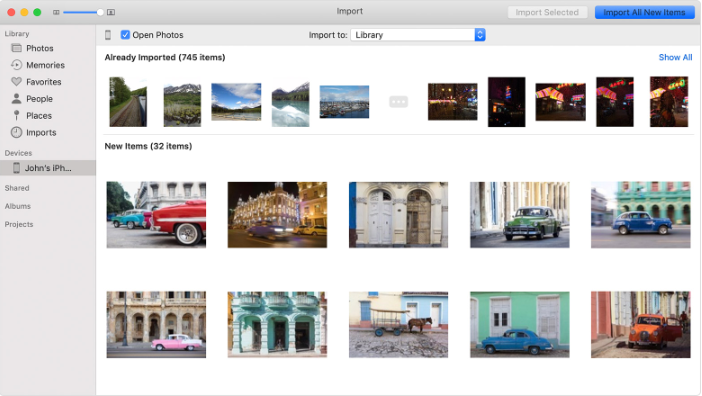
Step 4. Select the wanted photos or albums and click Import Selected.
You could disconnect iPhone from Mac and permanently leave your photos’ backup copy on Mac now.
●Note: If you have used iTunes to sync photos from PC to iPhone, these photos could not be detected or transferred to Mac in this way. You could go to the third method of this passage.
Method 2: Download photos from iPhone to Mac with iCloud
iCloud on iPhone could make you upload every photo to the server and then you could easily download them to Mac. This way should be highly recommended. You could backup iPhone photos to Mac and also save them in iCloud at the same time, but there's a problem. You have only 5GB of free space in iCloud, if your iCloud storage is full, you could not upload other photos. This way should be adapted if you don’t have too many photos on iPhone.
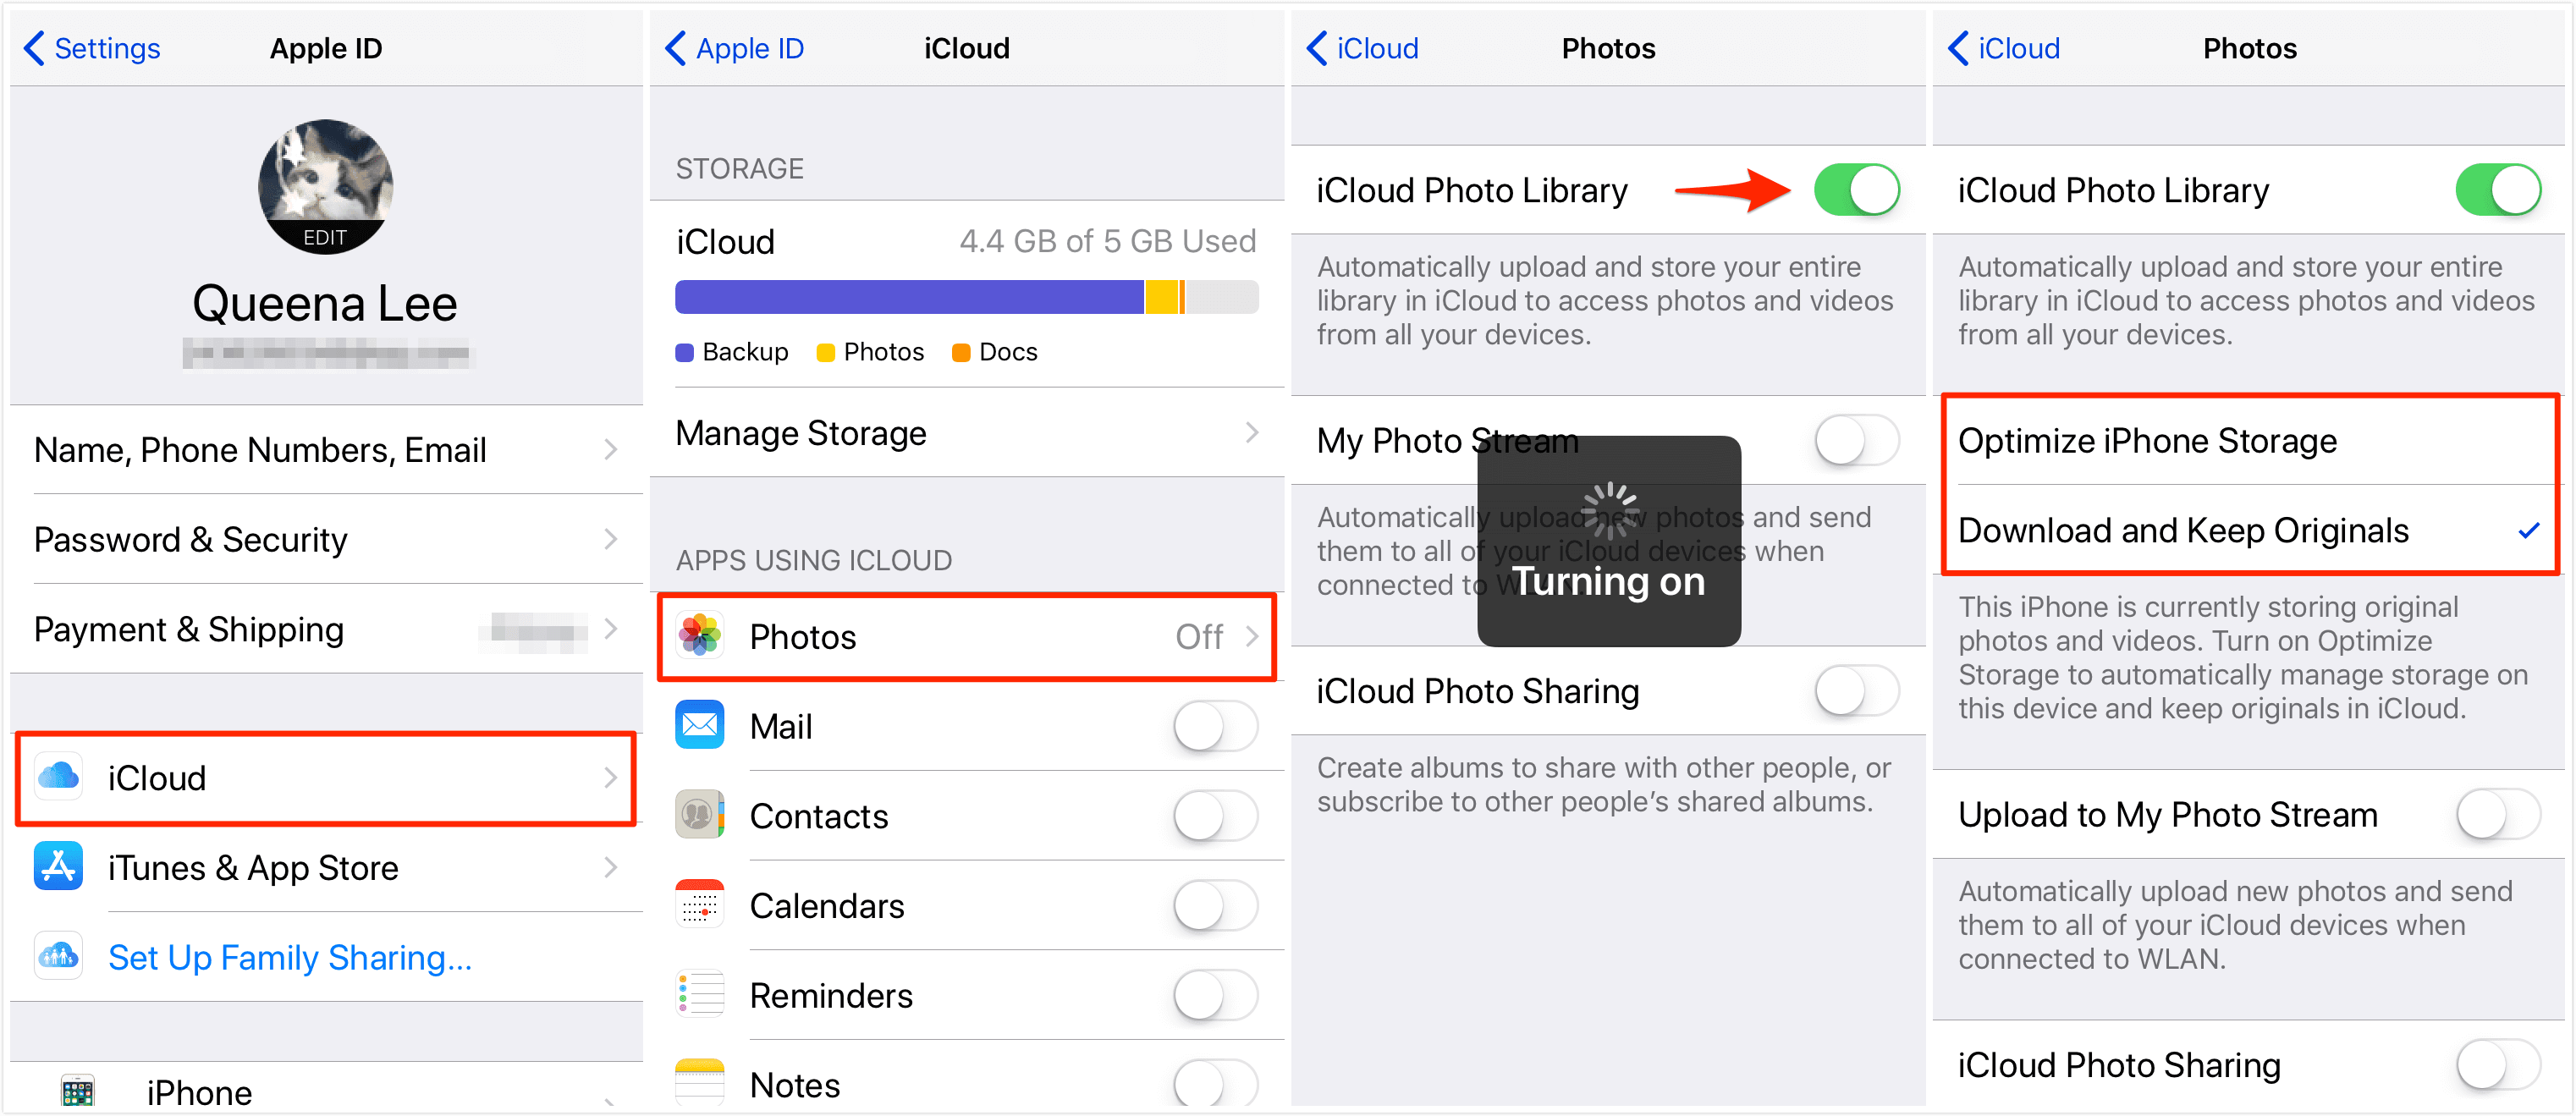
Step 1. Select iCloud in iPhone Settings.
Step 2. Select Photos and toggle on iCloud Photos. You should make sure iPhone has been connected to a stable Wi-Fi. Wait for your photos being saved to iCloud.
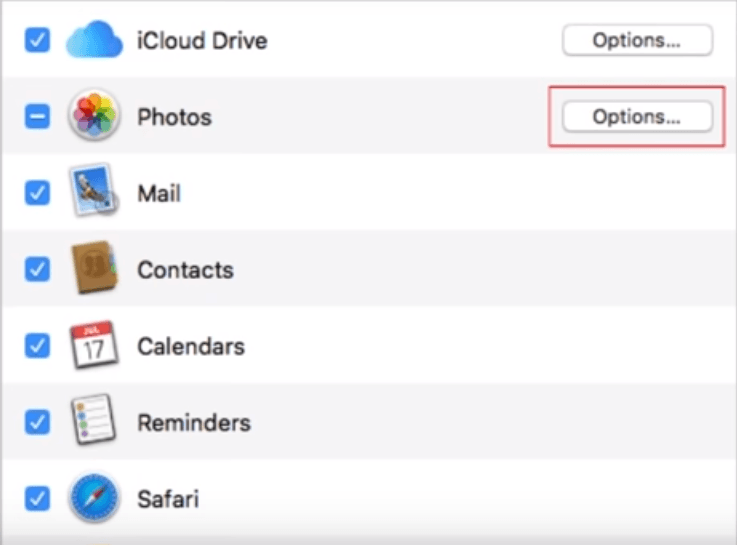
Step 3. Open System Preferences on Mac, select iCloud and sign in the same Apple ID.

Step 4. Click Options in the right of Photos, check iCloud Photo Library and then click Done.
Your iCloud photos could be found in the Photos app on Mac. You should give it some time to download all the iCloud photos.
Tips: Except Photos app, you could also download photos to Mac at the site of iCloud. Just sign in your ID and select the wanted photos.
Method 3: Transfer photos from iPhone to Mac without USB cable
Except for using iCloud, how to transfer photos from iPhone to Mac without USB cable? Of course, you could use AirDrop to backup photos form iPhone to computer and it doesn’t need the internet. If you want to AirDrop, you need to make sure the iPhone is near your Mac. It works like Bluetooth, but it's faster. You could transfer about 500 pictures at most at a time.
Step 1. Choose Go, select AirDrop, and then check the “Allow me to be discovered by”. This step would let your iPhone discover your Mac.

Step 2. Enable Wi-Fi and Bluetooth on both iPhone and Mac. You don’t need to connect any device to the Internet. Just switch on the buttons to let the connection be built.

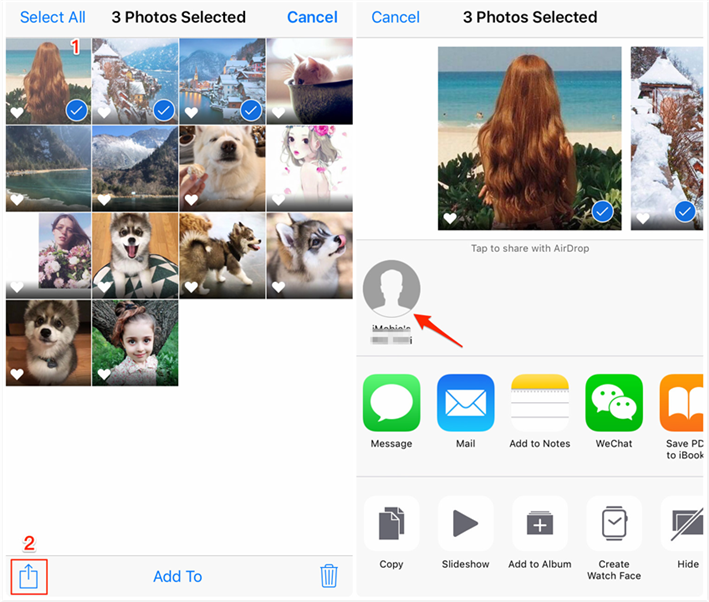
Step 3. Open Photos app on iPhone. Select the photos you want to backup and tap the Share Button. The name of your Mac would be displayed and tap it to send the selected photos to Mac.
Step 4. The request would be sent to Mac. Just click Accept on Mac to receive photos from iPhone.

Conclusion
● Photos app needs you to connect iPhone to Mac with USB cable and then import all the photos from iPhone to Mac.
● iCloud and AirDrop would let you transfer photos from iPhone to Mac over the air and AirDrop doesn’t require the Internet.
You could save a lot of photos via photographing. These photos should be permanently saved because they are carrying your memory. If you have a windows computer, you could try FoneTool have an easier way to backup iPhone photos to PC.
Do you like this passage? You could share it to help more people.
