[Solved] Erase iPhone Verification Failed Issue
Trying to erase iPhone verification failed? This guide will list all the methods that can help fix the “Verification failed when trying to erase iPhone” error. Besides, a quick way to wipe iPhone clean is also included.
By Lena / Updated on July 21, 2023
Problem: Erase iPhone Verification Failed
Trying to Erase iPhone Verification Failed
I am trying to erase all my personal data from my iPhone 8 so I can sell it. However, every time I try to turn off Find My iPhone or delete iCloud I get a "Verification Failed. There was an error connecting to the Apple ID server." error. What's causing this and how can I fix it?
- Question from an iPhone user
Have you encountered the same error as this user? It’s indeed an annoying problem that can drive you crazy. You want to wipe your iPhone before selling it but it does not allow you to do so. Well, most of the time, the reason for this problem has nothing to do with your Apple ID but some other reasons prevent your device from connecting to Apple’s server.
In fact, sometimes Apple's servers will go down due to maintenance or other reasons, you can go to have a check on Apple’s System Status Site (https://www.apple.com/support/systemstatus/) to make sure the problem isn’t on Apple’s. If it shows that iCloud is working properly, then you can try the following methods to fix the “Erase iPhone Verification Failed” issue.
The methods in this article are also applicable to solve the Erase iPad Verification Failed problem.
Part 1. How to Fix Erase iPhone Verification Failed Issue
Try the methods in order to troubleshoot the “Erase iPhone Verification Failed” issue. You may test between steps to check if the problem is resolved.
1. Restart Your iPhone
Sometimes a simple restart can help fix issues. In addition, you can force restart your iPhone.
● Force restart iPhone 8 and later & iPad with Face ID :
Quickly press and release the Volume Up button > Quickly press and release the Volume Down button > Press and hold the Side/Top button until you see the Apple logo.
● Force restart iPhone 7/7 Plus:
Press and hold Power button and Volume Down button together > Release both buttons when the Apple logo appears.
● Force restart iPhone 6s, SE and earlier & iPad with Home button:
Hold down the Home button and the Power button at the same time > Release both buttons when the Apple logo appears.
2. Connect Your iPhone to Wi-Fi Network
Verification failed when trying to erase iPhone issue can happen when your device is not properly connected to the network. Please make sure that your iPhone is connected to Wi-Fi network, otherwise, it will not connect to Apple's servers. You can also turn on Airplane Mode to refresh the connection.
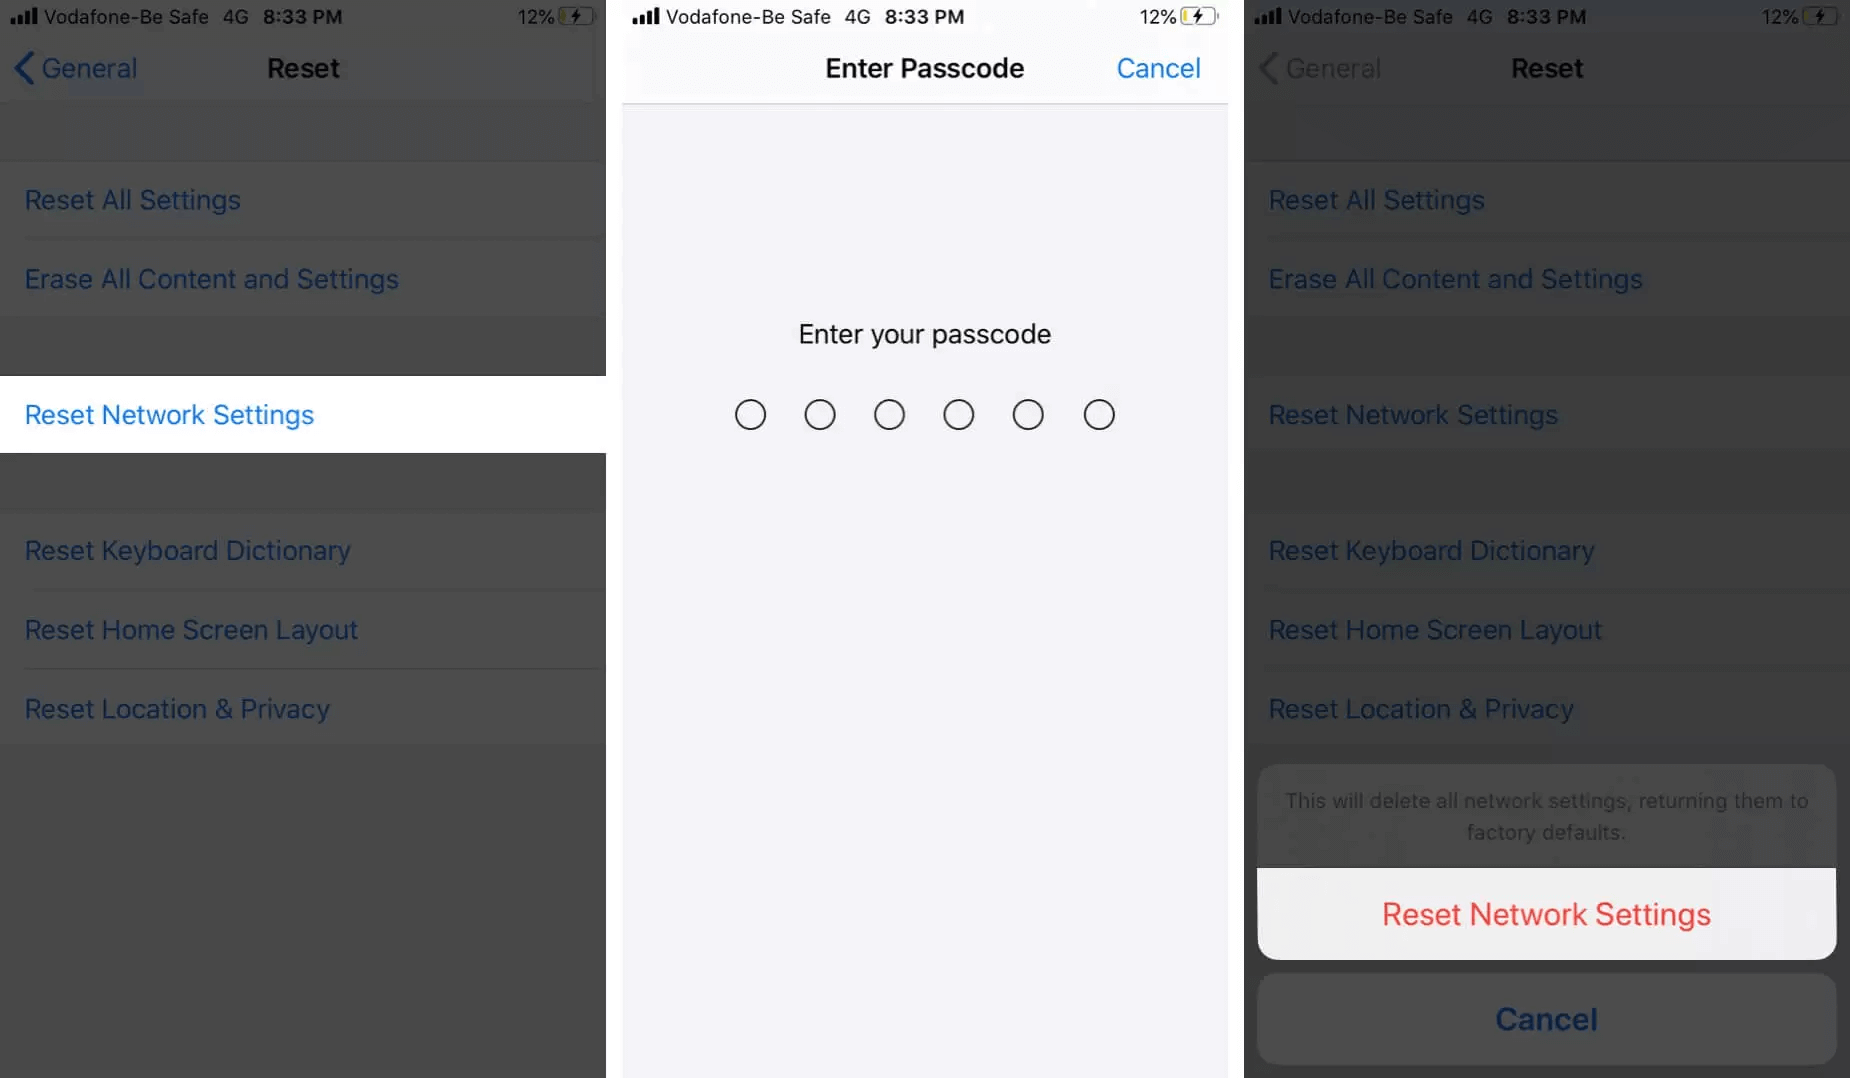
3. Reset Network Settings
Trying to erase iPhone but verification failed even if you have connected Wi-Fi? You may have accidentally changed some important network settings, which will result in incorrect connection to Wi-Fi. In this case, you can try to reset the settings of the network:
Go to Settings > Tap General > Tap Reset (Transfer or Reset iPhone > Reset) > Tap Reset Network Settings. Reconnect your iPhone to Wi-Fi network when it finishes.
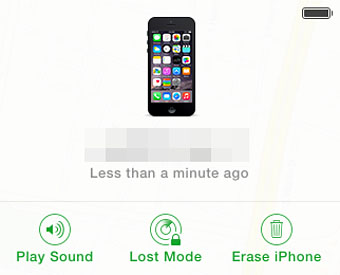
4. Erase iPhone in iCloud.com
If all the above methods cannot help you fix the “Erase iPhone Verification Failed” issue, then you may try to erase your iPhone on another device.
- Go to iCloud.com on a computer or another mobile phone > Log in with your Apple ID and passcode.
- Choose Find My iPhone option > Choose All Devices > Find your iPhone from the list of devices.
- Choose your iPhone > Click Ease iPhone and it will start resetting your iPhone to factory settings > You can also click Remove from Account to delete your iPhone from your iCloud account.
Part 2. How to Wipe an iPhone Clean (100% Unrecoverable)?
From the above, you know how to fix the “Erase iPhone Verification Failed” problem. You can tap the Erase All Content and Settings option to reset your iPhone to factory settings and it seems that you will have an iPhone without any data.
But actually, the data may be restored through iPhone data recovery tool. To make sure your information will not fall into the wrong hands, you’d better erase your iPhone with a professional iPhone data eraser to make sure that no one can misuse your personal data, especially if you are going to sell your iPhone.
FoneTool, one iOS backup tool just released the iPhone Eraser function to help you wipe your iPhone clean in minutes:
● Easy and Fast - 1-click to erase all content and settings on device.
● Erase Completely - Deeply scan and erase all deleted and existing data.
● No Possibility of Recovery - Wipe data multiple times ensuring 100% unrecoverable.
● Professional R&D Team - More than 100 engineers in the R&D team provided solid technical support.
Click the button to download the tool and follow the steps below to erase your iPhone completely.
1. Launch FoneTool and connect your iPhone to computer via USB cable.
2. From Toolbox, Click Data Eraser.
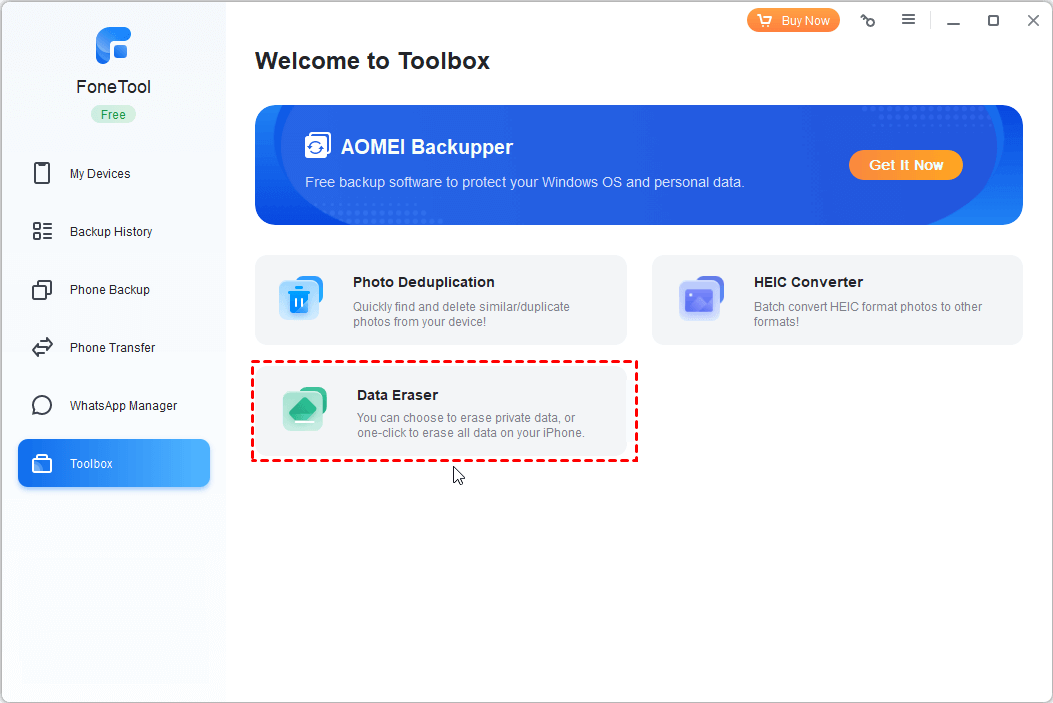
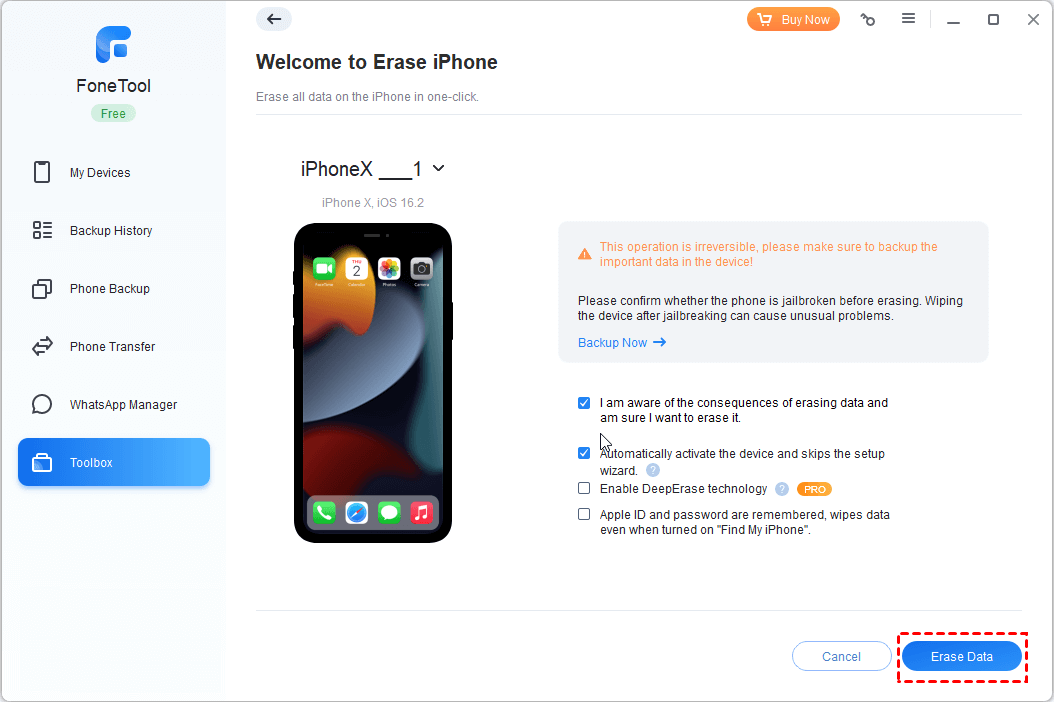
3. Go to Erase all data.

4. Tick the option I have understood the consequence of erasing data, and I am sure to erase data and there will be two options available > Select Deeply erase data to prevent recovery option.

5. Click Erase Data > A warning message will appear and click Yes to confirm.
FoneTool also supports data backup and data transfer. Before wiping the iPhone, you can create a full backup of your iPhone or transfer the data to your new iPhone in case of data loss.
Conclusion
When you can't erase iPhone because it says verification failed, you can try to force restart your device, reset network settings, or erase your iPhone via iCloud.com. If you plan to sell your iPhone, remember to erase your iPhone via FoneTool to make sure that the data is unrecoverable.
