


vCenter Enhanced Linked Mode Requirements and Setup Guide
What is vCenter Enhanced Linked Mode? What are the benefits and how is it different from the previous linked mode? Get clear ideas, as well as a step-by-step guide to set up vCenter 7 Enhanced Linked Mode.
By Delia / Updated on February 14, 2023
What is vCenter Enhanced Linked Mode, what are the benefits
vCenter Server works as a central administrator for multiple ESXi hosts connected on a network, and vCenter Linked Mode is one of the features added since vSphere 4 that breaks some limitations in installation and management.
Previously, vCenter Linked Mode was only available for Windows vCenters. Until the release of vSphere 6.0, the new vCenter Enhanced Linked Mode (ELM) can connect multiple vCenter Servers (both vCenter Servers running on Windows and vCenter Server Appliances) by using one or more Platform Services Controllers.

vCenter Enhanced Linked Mode enables you to view and search across all linked vCenter Server systems and replicate roles, permissions, licenses, policies, and tags. More specifically, you can:
- View and manage inventories of all the vCenter Server systems in the group from any single instance.
- Join up to 15 VCSA deployments with Enhanced Linked Mode in a single vSphere Single Sign-On domain.
- Create a vCenter Enhanced Linked Mode group during the deployment of vCenter Server Appliance (VCSA).
- Join a vCenter Enhanced Linked Mode group by moving, or repointing, a vCenter Server from one vSphere domain to another existing domain.
How does vCenter Enhanced Linked Mode (ELM) work?
Enhanced Linked Mode (ELM) offers a single pane across multiple vCenter Servers in a vSphere Single-Sign-On (SSO) domain. Once enabled, the inventories of all vCenters that are part of the SSO domain will be linked in Enhanced Linked Mode. Their accessibility will be managed from a single web client interface.

Back in vSphere 6.0, Platform Services Controller (PSC) was introduced as Embedded PSC for single vCenter Server and External PSC to manage multiple vCenter Servers. But from vSphere 6.5 U2 and vSphere 6.7 onwards, External PSC has been deprecated, Embedded PSC is recommended to manage multiple vCenter Servers and deploy VCSA with embedded PSCs will be used now and onward.
And the limitations for Linked Mode with external or embedded PSCs are different:
- For vCenter Servers deployments with external PSCs, you can join up to 10 external PSCs and 15 vCenter Server systems in a single SSO domain.
- For vCenter Servers with an embedded PSC, you can join up 15 nodes in one SSO domain.

During installing vCenter Server, you can select whether to create a vCenter Single Sign-On domain or join an existing domain. If you’ve installed or deployed a PSC instance and have created a vCenter SSO domain, you can select to join the existing one. And when you do that, the infrastructure data between the existing Platform Services Controller and the new Platform Services Controller is replicated.
Next I will present the vCenter 7 Enhanced Linked Mode requirements.
vCenter Enhanced Linked Mode requirements
◾ Enhanced Linked Mode is supported by vSphere Web Client. It doesn’t work with the standard vSphere Client.
◾ Enhanced Linked Mode requires the vCenter Server Standard licensing level, and is not supported with vCenter Server Foundation or vCenter Server Essentials.
◾ To join vCenter Server systems in Enhanced Linked Mode, connect them to the same vCenter SSO domain.
◾ Enhanced Linked Mode (ELM) requires a minimum of 2 vCenter Server systems, and a maximum of 15.
◾ All vCenter Servers must be running the same version.
◾ Since Windows vCenter and external Platform Services Controller are both deprecated in vCenter 7, during upgrade, you can migrate all your configuration and historical data to the VCSA, and consolidate your external PSC(s) into the embedded model using the converge tool built in vCenter 7.0 upgrade UI.
How to set up vCenter 7 Enhanced Linked Mode for VCSA
This part illustrates how to enable Enhanced Linked Mode in vCenter 7. You can apply similar steps to set up Enhanced Linked Mode for vCenter 6.7.
To configure Enhanced Linked Mode, you must already have a vCenter Server with an existing SSO domain. So, if you are deploying a new environment, then you can proceed normally with the steps to install vCenter Server and create a new SSO domain (by default) as part of the process.
✍Tips: It’s recommended to take file-based backup for vCenters in case you want to restore them.
How to check if vCenter is in Enhanced Linked Mode
First, the most obvious identifier is that vCenter Servers using Enhanced Linked Mode will list 2 or more vCenter Servers in the vSphere inventory.
You can also select vCenter Server in the vSphere Client -> Click the “Linked vCenter Server Systems” tab (If there’s no such an option, click … icon to expand it) -> Check the list of linked vCenter Server systems, if there’s blank, then it is not in Enhanced Linked Mode.
Stage 1: Deploy the VCSA
This is the phase you deploy the vCenter Server Appliance on ESXi host and assign IP address and name.
1. Mount the VCSA ISO as a virtual DVD drive on your computer or any other computer that has network access to the ESXi host you will be installing VCSA on. Navigate to vcsa-ui-installer\win32 directory and find installer.exe, right-click it and select Run as administrator.
2. On the interface of vCenter Server Installer application, click Install to start installing a new vCenter Server.

3. Follow the wizard to accept the terms of the End User License Agreement (EULA).
4. Specify the vCenter Server deployment target settings (where the vCenter Server will be deployed).

5. Specify the VM settings, the deployment size, the storage location, and the network settings for this vCenter Server sequentially.

6. Review all the settings, and click Finish to initialize stage 1 deployment.
✍Tips: If you closed the wizard window by mistake, you can open a browser, and type the FQDN or IP address of the appliance followed by port 5480 (https://). This will directly launch the stage 2 deployment.
Stage 2. Configure Enhanced Linked Mode for VCSA
In the second stage, you can set up the Enhanced Linked Mode in the SSO configuration page.
1. Click Next to proceed the installation: Set up vCenter Server.

2. Configure the Time synchronization mode and SSH access in vCenter Server configuration.

3. Next is the SSO configuration page, choose “Create a new SSO domain” or “Join and existing SSO domain”.
If this is your first vCenter Server, then you need to choose Create a new SSO domain since you don’t have another SSO domain. Fill in the boxes with the required information. The password you enter here will be used to log in to the vCenter Web Portal and for other permission configurations, so please keep it safe.

Once the 1st vCenter is configured correctly, you can deploy the 2nd or further vCenter Server Appliances and choose Join an existing SSO domain. Enter the details of the vCenter server for the target SSO domain, and the existing administrator password.

4. Click Next to configure the Customer Experience Improvement Program (CEIP) accordingly, and then review the settings in the next page. If everything’s OK, click Finish to finalize the deployment.

When finished, log in to vCenter Server as usual. you should now see vCenter and any linked vCenter servers from the vSphere Client.
As for removing it from Enhanced Linked Mode, please refer to unlink vCenter tutorial.
With multiple vCenter Servers in hand, don't forget the importance of backup. Backing up vCenter helps to achieve data protection, fast recovery, and saves the storage space.
While vCenter Server is efficient to manage multiple virtual machines, it cannot offer direct data protection for large numbers of virtual machines. So, for enterprises with large data, the appropriate solution is to use a third-party VM backup software.
How to effectively protect multiple VMs in vCenter Servers
AOMEI Cyber Backup is an efficient VMware backup software designed to backup virtual machines securely and restore them from any point you need.
With it, you can add VMs managed by vCenter Servers or standalone ESXi hosts (including free ESXi) to a central web console. Its simplicity makes it possible for even novices to configure ESXi or vCenter backups with several clicks.
AOMEI Cyber Backup can be installed on Windows and Linux systems, and works with VMware ESXi 6.0 and above versions (as well as Hyper-V servers). Here are some more benefits:
Backup in batch: Backup large numbers of VMs managed by vCenter Server or standalone ESXi host at once.
Hot backup: Simply backup VMware VMs while running. No need to suspend operations and ongoing access.
Automation: Create VMware backup schedule to automate VM protection, and enable retention policy to auto delete old backup files.
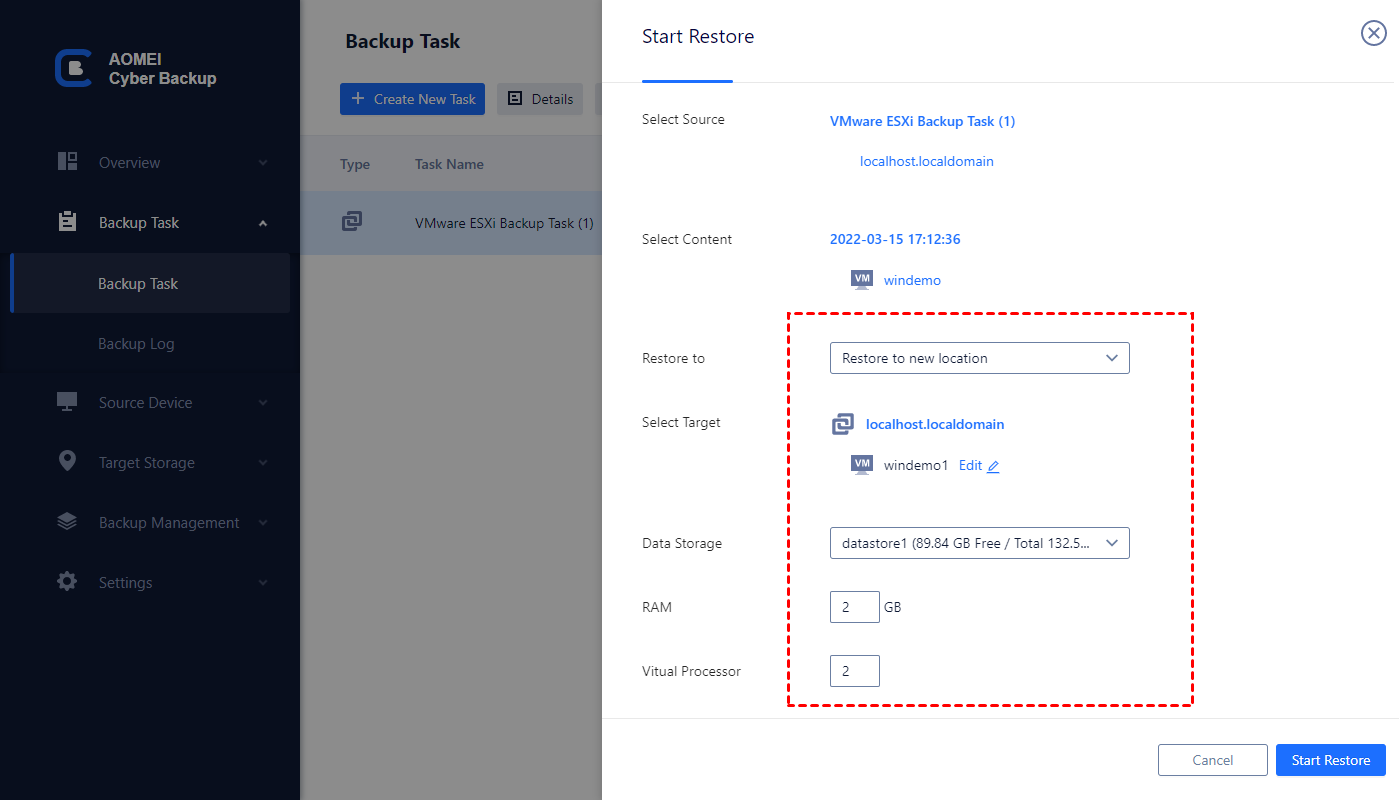
Restore to new location: Besides in-place recovery, you can restore a VM to new location in the same or another datastore/host/vCenter for migration or cloning.
Flexible backup method: Besides full backup, it offers incremental/differential mode to auto track changed data.
Email notification: Send email notification when the task is completed or abnormal.
You can click the following button to download the software.
*You can choose to install this VM backup software on either Windows or Linux system.
Backup multiple virtual machines with AOMEI Cyber Backup
Next, I will show you how to backup VMs managed by vCenter Server with AOMEI Cyber Backup in 4 simple steps
1. Navigate to Source Device > VMware > + Add VMware Device to add vCenter or Standalone ESXi host. And then click … > Bind Device.

2. Create backup task by hitting Backup Task > Create New Task. Follow the Wizard to schedule VM backup.
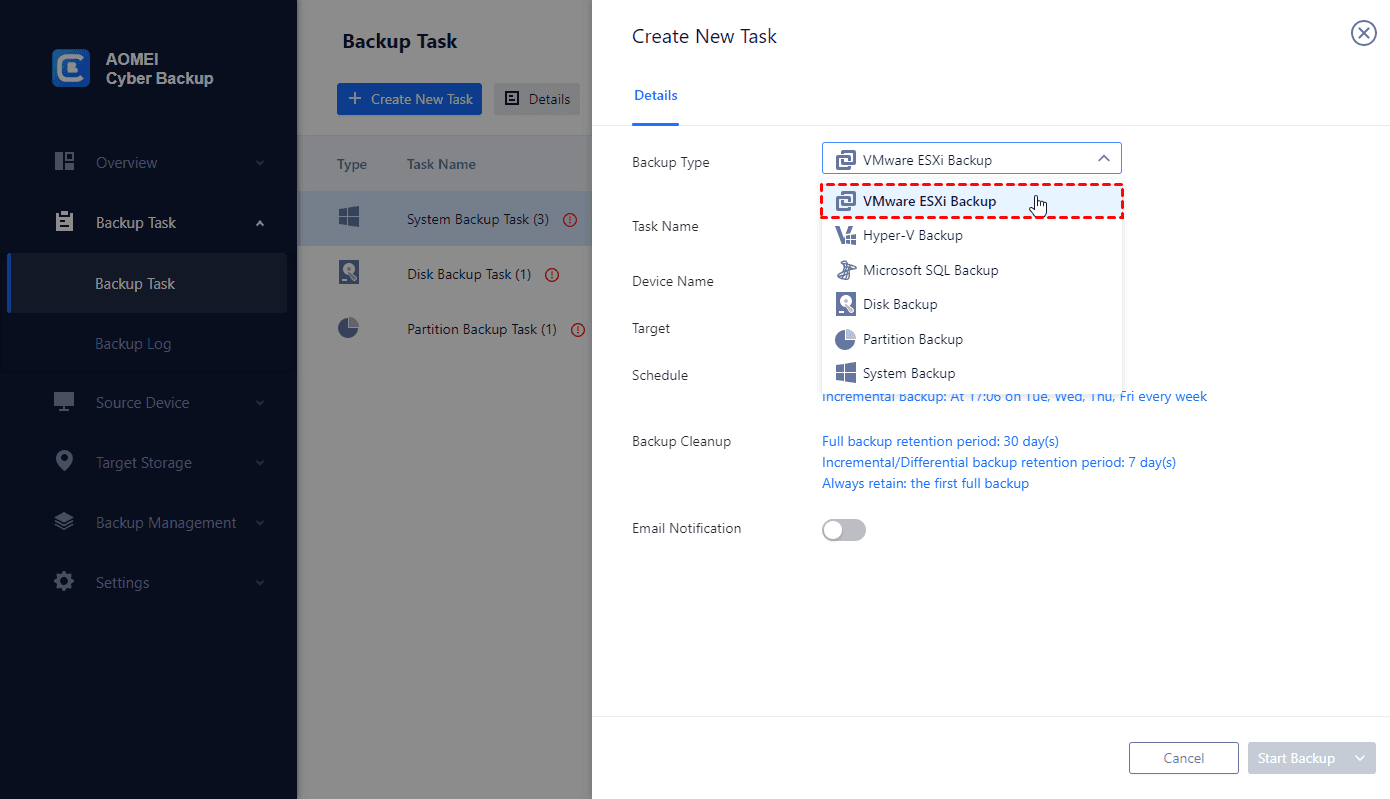
- You can select as many VMs as you need to back them up at once.
- Schedule daily/weekly/monthly VMware backup with different backup strategies, such as full backup for the entire VM and incremental backup for the changed data.
- Set up backup cleanup to auto delete the old backup copies that exceed the retention period you specified.
3. Click Start Backup. You can select Add the schedule only or Add the schedule and start backup now.
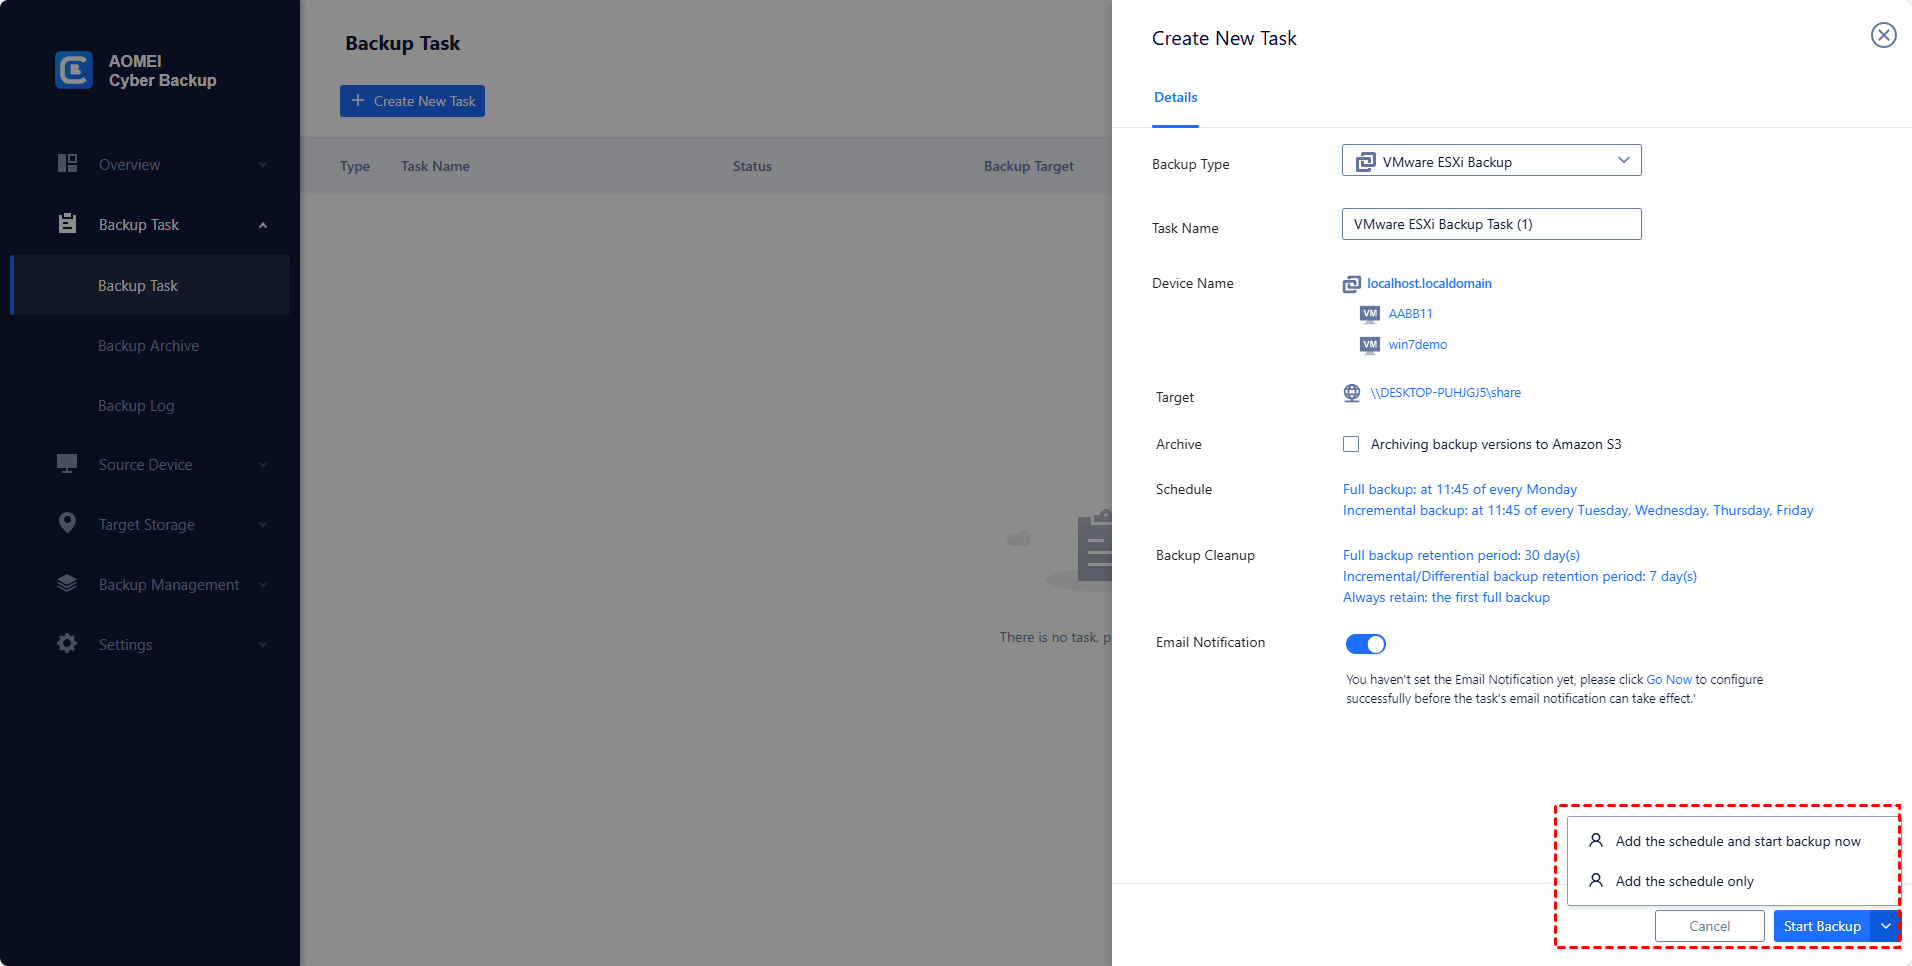
Created backup tasks will be listed and monitored separately, for restoring, progress checking and schedule changing. When restoring, you can also restore to new location to create a new VM in the same or another datastore/host/vCenter directly from the backup, saving the trouble of re-configuring the new VM.
Frequently Asked Questions for Adding Host to vCenter
💬Enhanced Linked Mode vs Hybrid Linked Mode
Hybrid Linked Mode is concerned with linking your on-premises vCenter server to the cloud vCenter server. The key difference is that the Hybrid Linked Mode does not join the same SSO domain, but instead maps the connection by using a cloud gateway appliance or LDAP identity source.
You can set up on-premises vCenter Servers in Enhanced Linked Mode and still use Hybrid Linked Mode to connect those servers to the cloud vCenter Server.
💬What are the Linked Mode port requirements?
Here are the ports need to be opened in firewall:
|
Port |
Protocol |
Purpose |
|
135 |
TCP/UDP |
Linked Mode |
|
389 |
TCP/UDP |
This is the LDAP port number for the Directory Services for the vCenter Server group. The vCenter Server system needs to bind to port 389, even if you are not joining this vCenter Server instance to a Linked Mode group. If another service is running on this port, you can run the LDAP service on any port from 1025 through 65535. |
|
636 |
TCP |
vCenter Server Linked Mode, this is the SSL port of the local instance. |
|
1024 |
TCP |
RPC communication on dynamic TCP ports is required between all vCenters that need to replicate (via ADAM). |
|
7500 |
UDP |
Linked Mode, Java Discovery Port |
|
8443 |
TCP |
VMware Web Management Services Linked Mode Communication port. |
|
10111 |
TCP |
vCenter Inventory Service Linked Mode Communication. |
|
10443 |
TCP |
vCenter Inventory Service HTTPS |
|
2012 |
TCP |
Control interface RPC for vCenter Single Sign-On (SSO). |
|
2014 |
TCP |
RPC port for all VMCA (VMware Certificate Authority) APIs. |
|
7005 |
TCP |
Base shutdown port |
|
7080 |
TCP |
HTTP Port |
|
7444 |
TCP |
HTTPS Port |
|
7009 |
TCP |
AJP Port |
Conclusion
If you have multiple vCenter Servers to manage, then it’s smart choice to utilize vCenter Enhanced Linked Mode. This article provides some basic information about ELM, and presents a step-by-step guide to configure vCenter 7 Enhanced Linked Mode. Hope it’s helpful to you.
Also, remember the importance of backups. In addition to the file-based backup for configurations that comes with VCSA, it is also necessary to use a reliable VMware backup solution to secure the VMs.

