


Hyper-V VM Encryption | Generation 1 and Generation 2 VM
If you want to protect your Hyper-V VM data from leakage, you can perform Hyper-V VM encryption. This feature is enhanced from the release of Windows Server 2016 and operations are different on different generations of VMs. In this article, I will introduce how to perform Hyper-V VM encryption on both generation 1 and generation 2 VMs.
By Crystal / Updated on March 8, 2023
How Can you encrypt Hyper-V VMs
Virtual machines may retain very important development data on it, therefore, protecting your VM data is also a very essential part of the daily routine, not just against accidental loss, but also against leakage or malicious attacks. Virtual machine backup and encryption are exactly what you need to protect your VM data.
Microsoft Hyper-V is a widely used type-1 hypervisor. If you are using Hyper-V, you may want to know how to perform Hyper-V VM encryption?

In fact, in the previous versions of Hyper-V, there were some shortcomings in the Hyper-V security features. However, with the release of Windows Server 2016, some security features have been enhanced to provide further protection for Hyper-V VMs. That makes the Hyper-V VM encryption to be divided into 2 scenarios.
- Generation 1 Hyper-V VM encryption: Generation 1 virtual machines do not support vTPM, but Microsoft engineered a special file, known as a Key Storage Drive, is attached to the IDE controller of the virtual machine, and used to store the BitLocker secrets.
- Generation 2 Hyper-V VM encryption: Generation 2 virtual machines have support for a vTPM chip. This allows guest OS administrators to enable BitLocker and protect themselves against rogue administrators.
In this article, I will introduce how to perform Hyper-V encryption on both generation 1 VMs and generation 2 VMs.
How to encrypt generation 2 Hyper-V VM with vTPM
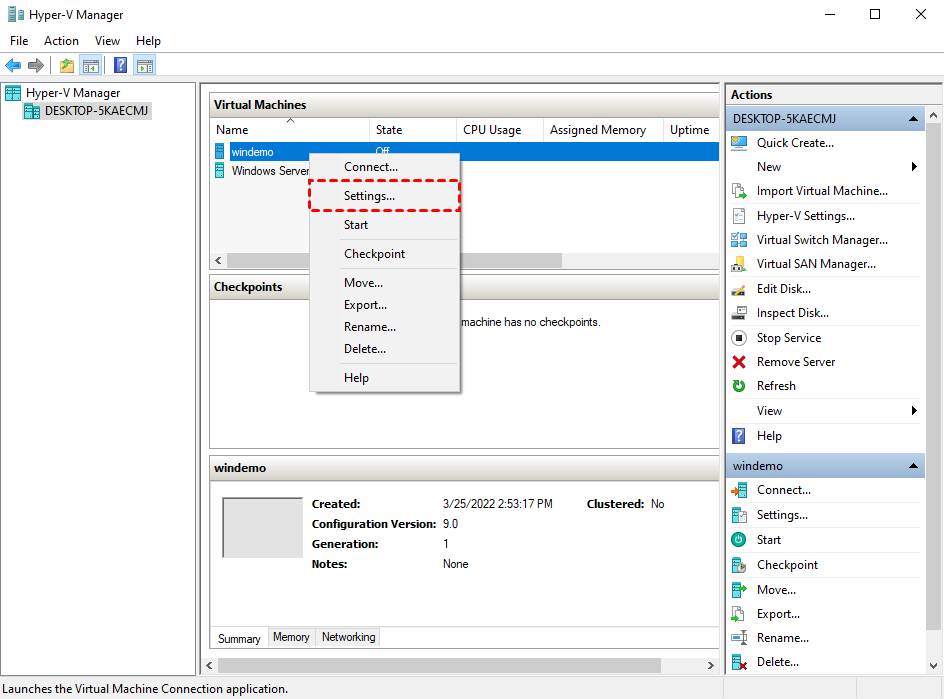
1. Launch Hyper-V Manager, and right-click on the target generation 2 virtual machine you want to encrypt, and select Settings…
2. Navigate to Hardware > Security from the left inventory.
3. Check the Enable Trusted Platform Module option from the right side, and click OK to save.

4. Power on the target virtual machine, open Device Manager and navigate to Security devices > Trusted Platform Module.

5. Open BitLocker, click Turn On BitLocker, and select how do you want to back up your recovery key. Click Next to continue.

6. Choose how much of your device to encrypt, and click Next.

7. Choose which encryption mode to use, and click Next.

8. Click Start encrypting. And wait to finish the encryption process.

How to encrypt generation 1 Hyper-V VM with Key Storage Drive
1. Launch Hyper-V Manager, and right-click on the target generation 1 VM, select Settings.
2. Navigate to Hardware > Security, click Add Key Storage Drive from the right side.

3. A new Key Storage Drive will be added to IDE Controller 0, click Key Storage Drive from the left inventory, and select the controller and location on the controller to attach the Key Storage Drive.

Now you just need to power on the virtual machine to configure BitLocker. The process is the same as I showed above.
4. Power on the target virtual machine and open BitLocker, click Turn On BitLocker, and select how do you want to back up your recovery key. Click Next to continue.
Choose how much of your device to encrypt, and which encryption mode to use.
Then you can click Start encrypting.
Protect your VM data from accidental loss: Backup Hyper-V VMs
Hyper-V encryption is an effective way to protect your virtual machine data from being compromised. In addition to leakage, data loss is also an important issue that you need to be aware of. To protect your VM data from accidental loss, the most easy and effective way is to backup Hyper-V VMs.
Here I introduce you to a free Hyper-V backup software -- AOMEI Cyber Backup. It offers you the following benefits.
✦ Agentless Backup: create complete and independent image-level backup for VMware ESXi and Hyper-V VMs.
✦ Multiple Storage Destinations: backup to local or network share destinations.
✦ Automated Execution: create backup schedules to automate virtual machine protection
✦ Perpetual Free: you can use AOMEI Cyber Backup Free Edition with no time limit.
AOMEI Cyber Backup supports Hyper-V in Windows 8/8.1/10/11, Windows Server/Microsoft Hyper-V Server 2012 R2 and later versions.
Next, I will show you how to backup VMware ESXi/Hyper-V VMs with AOMEI Cyber Backup in 3 simple steps. You can click the following button to download the freeware.
*You can choose to install this VM backup software on either Windows or Linux system.
How to backup and restore Hyper-V VMs (3 easy steps)
1. Bind Devices: Access to AOMEI Cyber Backup web client, navigate to Source Device > Hyper-V > + Add Hyper-V to add a Hyper-V host. And then click … > Bind Device.

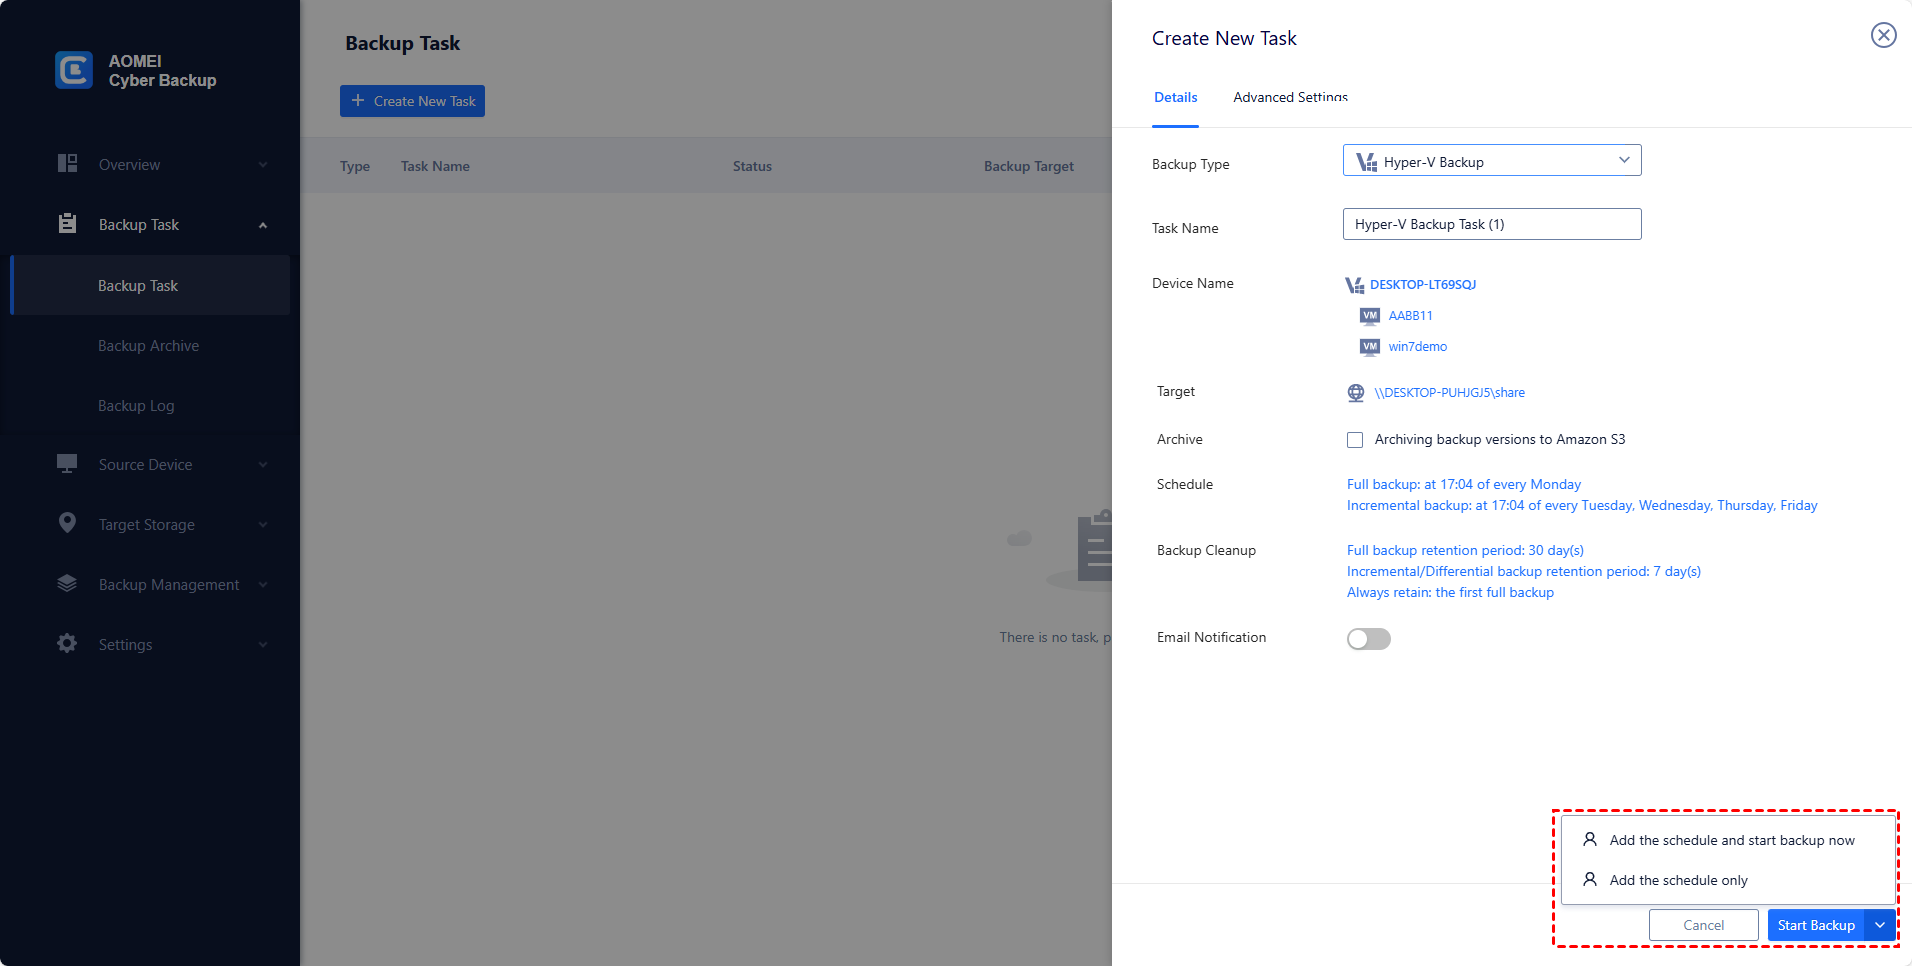
2. Create Backup Task: Navigate to Backup Task > + Create New Task, and then set Task Name, Backup Type, Device, Target, and Schedule.
- Device: select VMs on the host to backup in one task.
- Target: select to back up to a local path, or to a network path.
- Schedule: choose to perform full, differential or incremental backup, and automate execution according to the frequency you specified.
3. Run Backup: Click Start Backup and select Add the schedule and start backup now, or Add the schedule only.
4. Restore VM: Click … > Restore on the backup task to open a wizard, and click Select Content to specify a restore point. Select to Restore to original location, and click Start Restore.
Created backup tasks will be listed and monitored separately, for restoring, progress checking and schedule changing.
While the Free Edition covers most of VM backup needs, you can also upgrade to Premium Edition to enjoy:
▶ Batch VM backup & restore: batch backup and restore large numbers of VMs managed by vCenter Server or on standalone ESXi hosts.
▶ Backup cleanup: Configure a retention policy to auto delete old backup files and save storage space.
▶ Restore to new location: Create a new VM in the same or another datastore/host directly from the backup, saves the trouble of re-configuring the new VM.
Summary
For Hyper-V secure VM, Hyper-V VM encryption is an effective way to protect your virtual machine data from leakage. Starting from Windows Server 2016, Microsoft enhanced Hyper-V security features with vTPM module, that can be used on generation 2 VMs. In this article, I introduced how to perform Hyper-V VM encryption on both generation 1 and generation 2 VMs.
If you want to further Hyper-V secure VM from accidental loss, you can backup Hyper-V VMs with AOMEI Cyber Backup. In this way, when the VM is corrupted, you can restore entire VM from the backups.

