


Solved | Hyper-V VM Black Screen with Blinking Cursor Issue
Hyper-V VM shows blinking cursor in a black screen and unable to boot properly? Try these solutions to fix it, or directly using an alternative for VM migration.
By Delia / Updated on January 10, 2023
Scenario: Hyper-V VM black screen with a blinking cursor
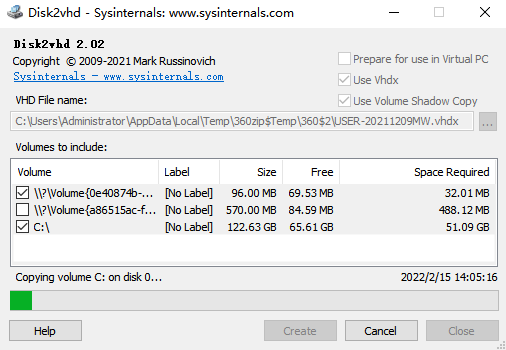
We used Disk2VHD to convert an HP desktop running Windows 7 Home into a first-generation VDMX. It was saved over the network on a new PC running Windows 10 Pro with Hyper. Now when starting the VM, it just shows a blinking cursor and doesn't go anywhere from there.
Many users found that the virtual machine could not start after a Hyper-V P2V or V2V (especially with Disk2VHD). It shows a black screen with cursor blinking - unable to make any further progress.
Why does this problem occur and how to make converted Hyper-V VM bootable? Keep reading to get clear ideas.

Why does Hyper-V VM cursor blinking and how to fix it
From the feedback of users whose Hyper-V VHDX not booting, the most common causes are as follows:
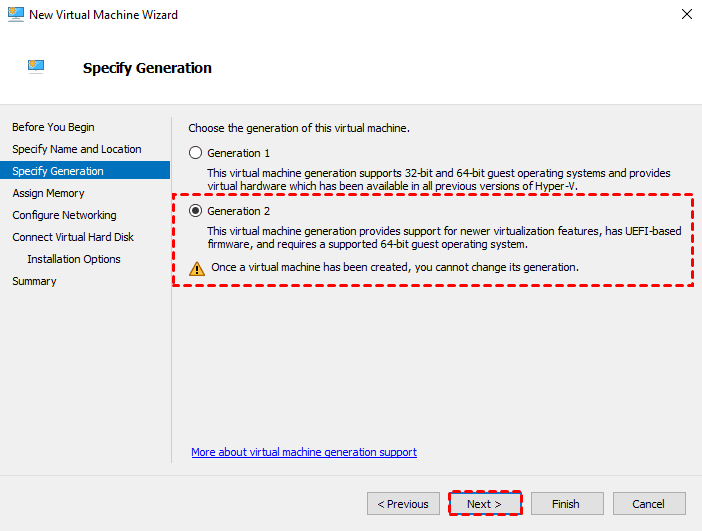
1. The generation of the created VM does not match the original hardware
Starting from Windows Server 2012 R2, you can create Hyper-V VMs of generation 2, which differs from generation 1 in firmware and boot technology. Generation 2 VM uses UEFI boot, while generation 1 can only boot by legacy BIOS.
That is, if your original boot mode is UEFI, then you should create a new Gen-2 virtual machine instead of Gen-1.
Note that you cannot change a VM’s generation once you’ve created the VM. So if you selected the wrong one before, you need to recreate the virtual machine and select it as Generation 2.
Then, with any luck, the newly created virtual machine will start normally without black screen and blinking cursor.
2. The system partition got messed during conversion
If you’ve created a generation-2 VM and still experience this Hyper-V VM blinking cursor boot issue, don’t worry, this is actually a common disk2vhd boot failure in Hyper-V: When the IMG file was converted, the boot configurations were messed up, and the boot partition is marked as RAW.
To fix it, you need to repair, or more specifically, recreate the boot partition properly. I will introduce how to do this in the next part.
How to repair boot partition and fix blinking cursor issue in Hyper-V
To fix this Hyper-V VHDX not booting issue, you can try the following steps.
1. Assuming you’ve created a new VDHX using Disk2VHD (or other conversion tool), you can first create a new generation 2 VM, and point it to the created VDHX.
2. Then, download the Windows ISO of the version corresponding to your VHDX. For example, if you are trying to convert a Windows Server 2019 machine into VM, you need to download the ISO file of Windows Server 2019.
3. Connect the ISO to your created VM. That is, copy it to your host, and open the settings of that VM in Hyper-V Manager. Navigate to DVD Drive and find Media section. Click Browse to select the ISO and make sure it’s mounted.
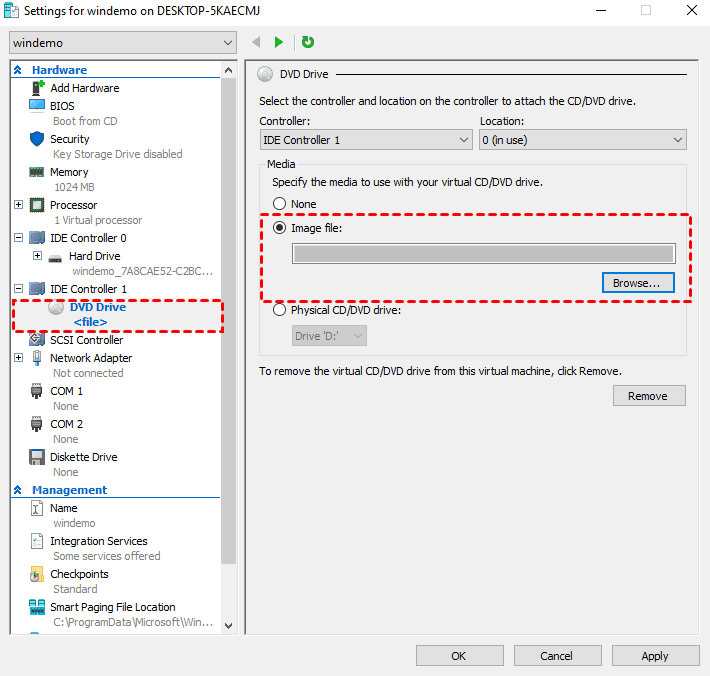
4. Then switch to Firmware tab, make sure the DVD Drive is the first boot option in Boot order.
Now open the VM console and start it, you should be able to boot VM from the ISO now.
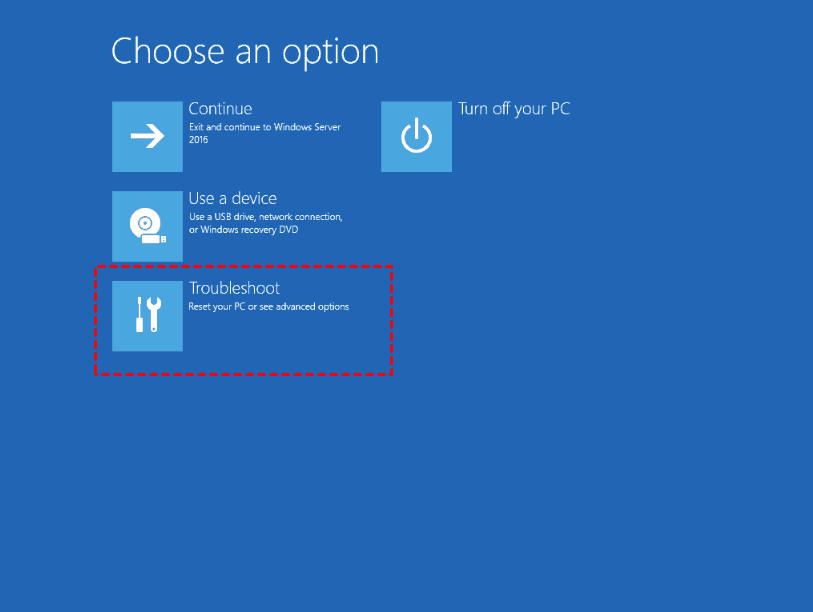
5. Select language, keyboard, etc. step by step. When you see the Repair your computer option, click on it.
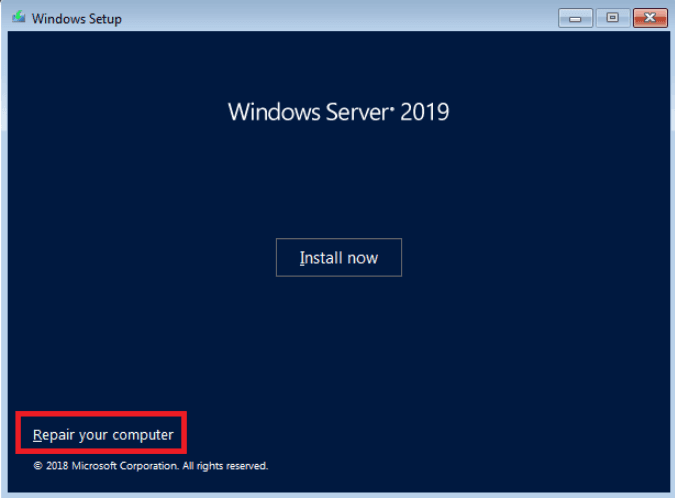
Choose Troubleshoot > Advanced options > Command Prompt. From here, you can execute various commands to fix and recreate the boot partition.
✍The steps below are relatively complicated. Before proceeding, you can first try 3 easier commands to repair the operating system:
bootrec /fixmbr
bootrec /fixboot
bootrec /scanos
Then reboot the VM and check if Windows can load properly. If not, continue to using the following method.
Type the following commands sequentially and press Enter after each line:
diskpart
list disk
select disk 0 (Select the system disk, usually disk 0. If it is not, change the number accordingly.)
list volume
select volume x (There should be a 99 MB sized volume marked as “RAW”, which means it’s blank. Note its number and select it.)
assign drive letter x (Name it as you need, just remember not to repeat existing drive letters.)
FORMAT FS=FAT32 LABEL=”BOOT” (Give it a file system and label it as boot partition.)
Exit (Leave diskpart.)

Now you’ve got a formatted boot partition, the next thing to do is to create efi, Microsoft, boot folder structure for the bootloader using md commands.
x: (The following "x" represents the drive letter you specify for the boot partition.)
md x:\efi
md x:\efi\Microsoft
md x:\efi\Microsoft\Boot
bootrec /fixboot (Create the bootrecord)
bcdboot C:\Windows /l en-us /s x: /f ALL (Copy the boot files from the windows system directory)
Exit

Then you can click Continue to exit and continue to boot your Windows system.
Secure alternative for Hyper-V P2V or V2V without boot issues
To avoid Disk2VHD boot failure in Hyper-V, you can take a backup-and-restore way for P2V or V2V migration. Compared to a direct conversion, this method is less likely to mess up your operating system, and you have the flexibility to choose what data to migrate (systems, partitions, or files).
Here I’d like to introduce you a centralized backup software that can back up and restore all the laptops, desktops, servers on the network efficiently. By installing client programs on virtual machines, you can also backup them just as other physical machines, and achieve not only VM protection, but also V2V or P2V.
It supports various Backup options, including File Backup, System Backup, Disk Backup, Partition Backup, SQL Server Backup, File Sync, Real-Time Sync and Mirror Sync task with optional backup schedule, cleanup, compression, and password encryption.
When you want to Restore a task, you can choose which backup version and time point to restore from. You will also be given options to perform in-place recovery, or restore to another machine on the network.
In addition, its built-in Universal Restore feature ensures that you can transfer your system to a different hardware without boot issues. Even after the migration is complete, you can continue using this backup & recovery solution for daily physical and virtual data protection.
It could be installed on any computer running Windows 11, 10, 8.1/8, 7, Vista, XP or Windows Server 2022, 2019, 2016, 2012(R2), 2008(R2), etc. as the central console, from where you can gain control over client PCs or servers in the LAN for backup and monitor.
Download this 30-day free trial to experience all these benefits:
*For more detailed guide, please refer to the Help Documents.
How to perform Hyper-V P2V or V2V via backup and restore
Here I will show you how to convert a Windows physical machine to Hyper-V virtual machine (or convert from another supervisor. First you need to create a new Hyper-V virtual machine with Windows operating system, and assign a separate IP to it.
Then, download and install AOMEI Centralized Backupper on any of your PCs or Servers as the management console, then launch it to proceed:
Go to Computer > Uncontrolled Computers > Install client program. You’ll see two options as follows:
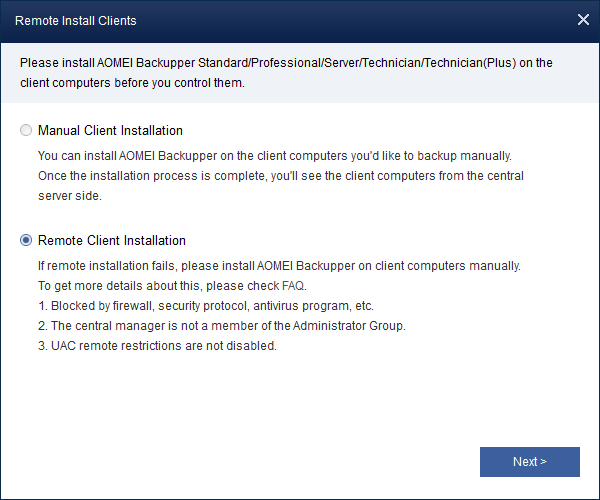
- Manual Client Installation: Manually copy the setup file to client computers, run it as administrator and follow the wizard to install it one by one. These computers will be listed in Computer > Uncontrolled Computers.
- Remote Client Installation: Choose the client computers that you’d like to backup, input username and password of each computer and click "Install All".
Basically, you just need to make sure both the physical machine (or source virtual machine) and the target virtual machine are both listed under Controlled Computers, and then follow the steps below.
Steps to perform Hyper-V P2V via backup and restore
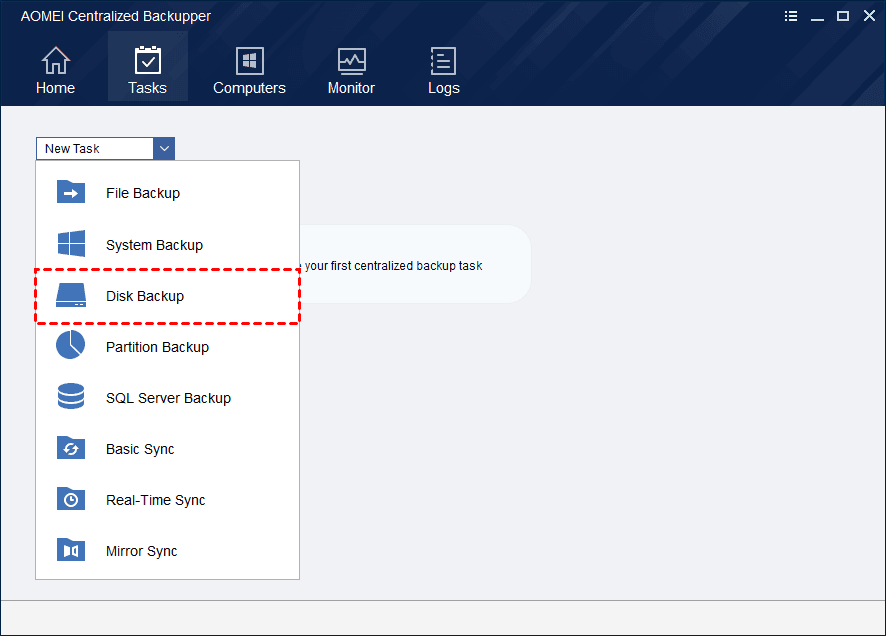
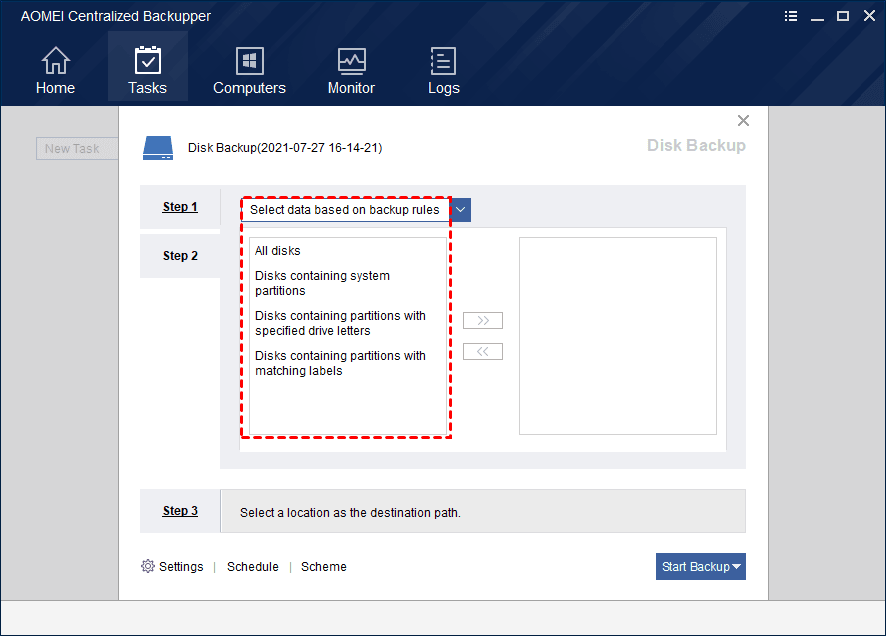
1. As you can see, there are multiple backup options. If you want to migrate everything from a computer to another, you can choose Disk Backup here. Click Task > New Task > Disk Backup.
2. Type a task name, and click Add Computers to select the original physical or virtual machine. You can select the source data based on backup rules or based on the client.
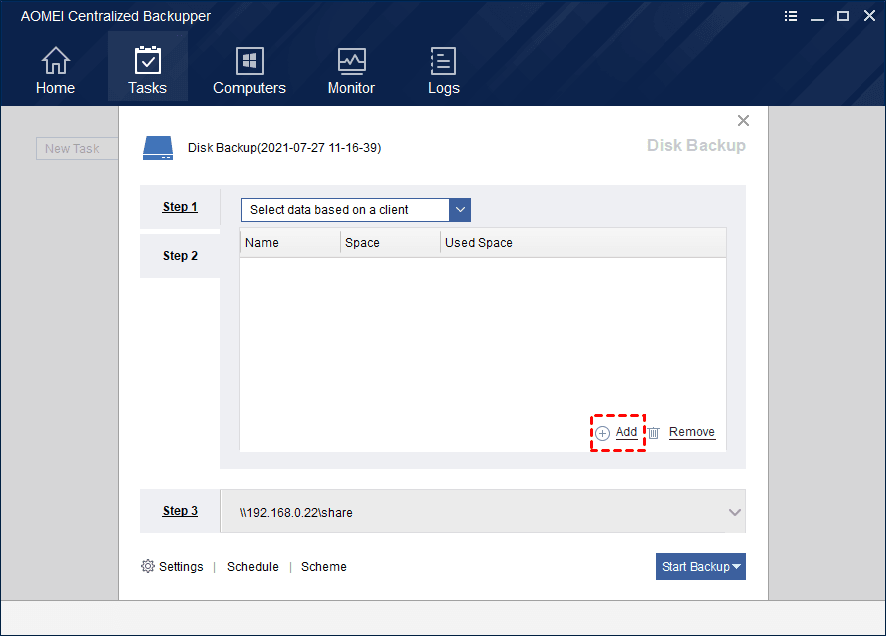
3. Select a network location (NAS or share folder) as the destination to save the backup image, then click Start Backup to create and execute the task.
✎Tips: According to your needs, you can manage more backup Settings, set up automatic backup Schedule, or create a retention policy in Scheme.
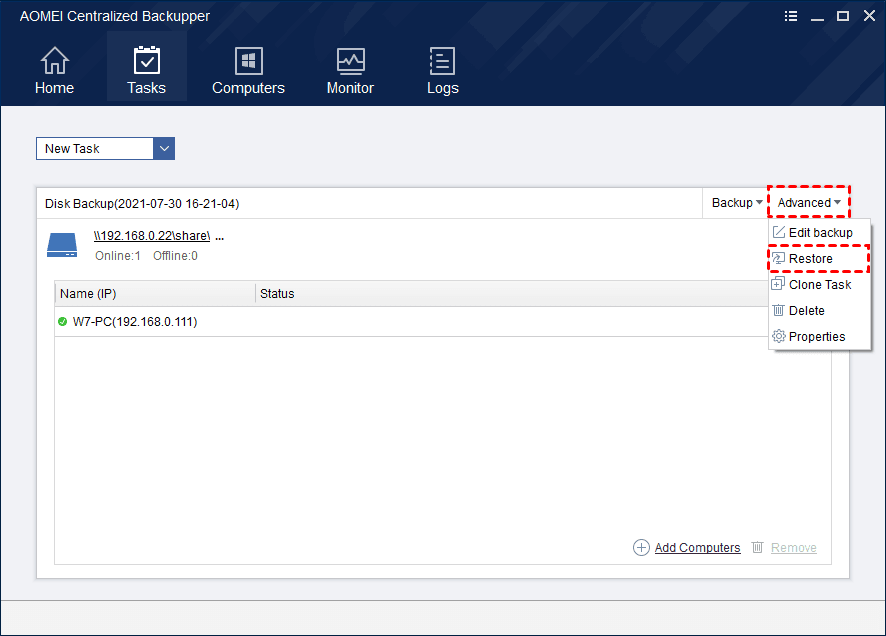
4. Find the created backup task in the Tasks tab. Click Advanced on the top-right corner, and then select Restore.
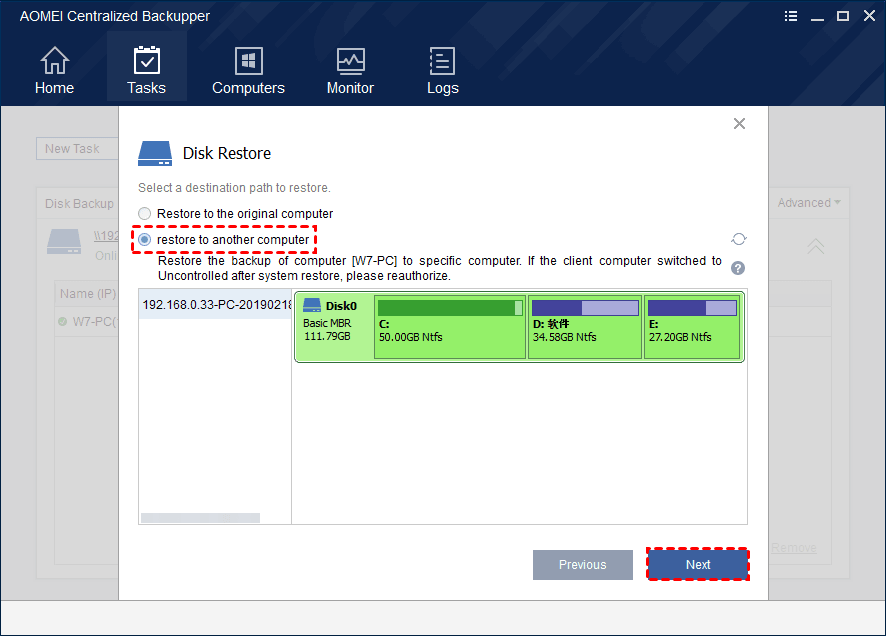
5. Follow the on-screen prompts to proceed, and choose Restore to another computer when asked. You can select the Hyper-V virtual machine you created on the same network as the target.
6. Preview the operations and choose advanced settings as needed. If you want to restore only one system drive, there is an Edit Partition option that allows you to change drive letter, partition type, and adjust partition size. If you restore the system to dissimilar hardware, it is recommended to check the Universal Restore option.
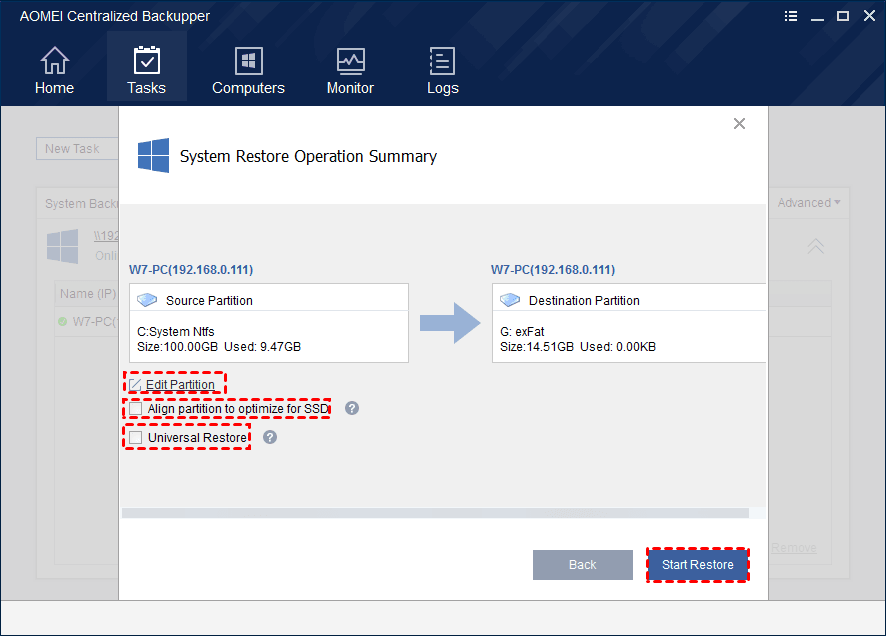
Then, click Start Restore to execute the operation. When it's finished, your Hyper-V VM migration is complete.
Conclusion
This article discusses what to do when Hyper-V VM blinking cursor shows in a black screen without going anywhere. Usually, you can mount the Windows ISO file to boot the created VM into recovery options, and then try to repair the boot partition.
In addition to this, you could also consider using backup & restore way for Hyper-V VM migration, which should be more secure and flexible.
With endpoint backup software such as AOMEI Centralized Backupper, you can achieve these operations easily, and also facilitate your future data protection & management for devices on the network.

