


[How to Guide] Hyper-V Hot Add Memory and Remove Memory
Running out of the memory of your virtual machines may cause it fail to start or use normally. To prevent this from happening, you can perform Hyper-V hot add memory or remove memory on Windows Server 2016 and later versions. This article will show you how to do this.
By Crystal / Updated on March 8, 2023
What is hot add memory?
As you may know, the memory of a virtual machine is configured at creation. Sometimes you can configure dynamic memory for the virtual machine, for example, on Microsoft Hyper-V, which can be effective in avoiding some errors or delays caused by out of memory. For example, virtual machine running slow. However, if you configured fixed memory and it is not enough, then you may need hot add memory.
VM Hot add memory is a feature that allows user to increase the RAM of a virtual machine without shutdown. You may have heard of VMware vSphere hot add, but how about Hyper-V increase RAM without shutdown?

In fact, you can also hot add or remove memory on Hyper-V Manager or using PowerShell commands. In this article, I will introduce the detailed operations of how to perform Hyper-V hot add memory and Hyper-V remove memory.
The requirements and restrictions of Hyper-V hot add memory
Hot add and remove memory is a new feature in Hyper-V on Windows Server 2016. Therefore, the hypervisor must be at least a 2016 version, for example, Windows 10, Windows Server 2016, and Hyper-V Server 2016. In addition, there are more requirements and restrictions to use hot add/remove memory feature.
- The guest operating system must support hot add/remove memory.
- Dynamic memory is not enabled for the virtual machine.
- Memory beyond host availability or capacity cannot be added.
- Memory below 1 gigabyte (1000MB in the tools, not 1024) cannot be removed.
Hyper-V hot add memory feature support both generation 1 and generation 2 virtual machines. Next, I will introduce 2 ways to perform it. Both of them are very easy.
Way 1. Use Hyper-V Manager to hot add/remove memory
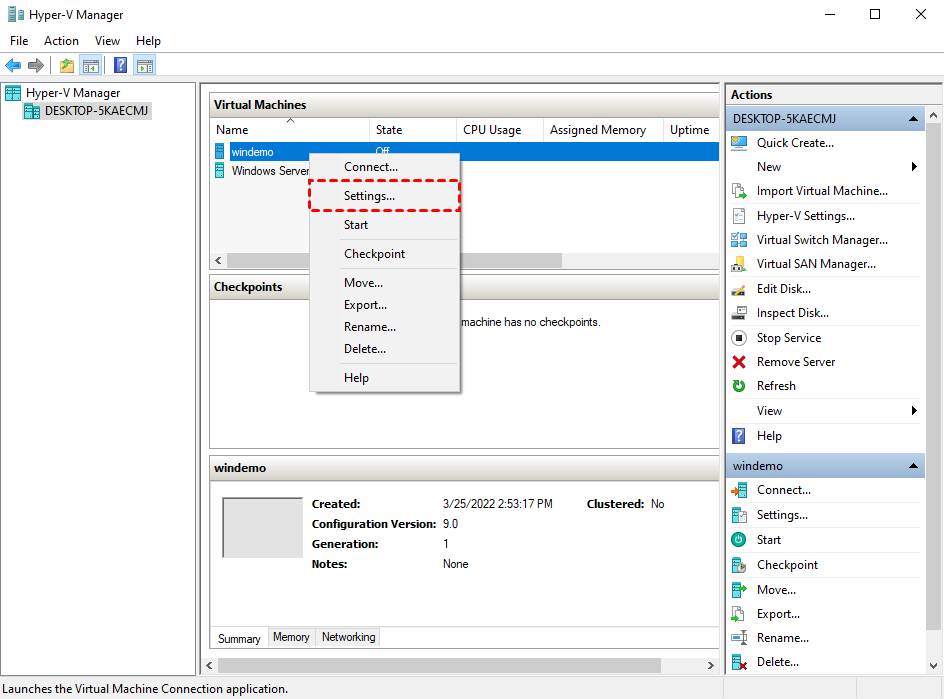
1. Launch Hyper-V Manager, right-click on the name of target virtual machine, and select Settings…
2. Navigate to Hardware > Memory, and specify the amount of memory that this virtual machine can use in RAM.

3. Click OK to save the change. And verify the settings in the information of your guest operating system.
Way 2. Use PowerShell to hot add/remove memory
Launch Windows PowerShell, and use Set-VMMemory command with the StartupBytes parameter to specify the amount of memory that this virtual machine use. The command is like:
Set-VMMemory -VMName VMname -StartupBytes Xgb
Replace the black bold text with the name and the memory you want to specify to your own virtual machine. If you don’t get any output, the command worked.

The possible reason why you encountered error applying Memory changes
When performing Hyper-V hot add memory or Hyper-V remove memory, the most common error you may encountered may be a non-descript error: Failed to modify device ‘Memory’. Sometimes it may tell you what is the reason that leads to this error, but sometimes it doesn’t.

The possible reasons for the error: Failed to modify device ‘Memory’:
- The guest operating system doesn’t support Hyper-V hot or remove memory.
- You assigned more memory than the host has.
- You enabled dynamic memory on this virtual machine.
- …
Always remember to backup your virtual machines to prevent errors
If your Hyper-V virtual machine ran out of memory, you may no longer be able to use your virtual machines normally. For example, the virtual machine may fail to start and you cannot access the data in it. In addition to resize the memory, and create a new virtual machine using the virtual disk, it is better that you keep an image-level backup of the virtual machine to prevent accidental data loss.
Here I introduce you to a free Hyper-V backup software -- AOMEI Cyber Backup. It offers you the following benefits.
✦ Agentless Backup: create complete and independent image-level backup for VMware ESXi and Hyper-V VMs.
✦ Multiple Storage Destinations: backup to local or network share destinations.
✦ Automated Execution: create backup schedules to automate virtual machine protection.
✦ Perpetual Free: you can use AOMEI Cyber Backup Free Edition with no time limit.
AOMEI Cyber Backup supports Hyper-V in Windows 8/8.1/10/11, Windows Server/Microsoft Hyper-V Server 2012 R2 and later versions, including Windows Server 2016.
Next, I will show you how to backup Hyper-V VMs with AOMEI Cyber Backup in 3 simple steps. You can click the following button to download the freeware.
*You can choose to install this VM backup software on either Windows or Linux system.
How to backup and restore Hyper-V VMs (3 easy steps)
1. Bind Devices: Access to AOMEI Cyber Backup web client, navigate to Source Device > Hyper-V > + Add Hyper-V to add a Hyper-V host. And then click … > Bind Device.

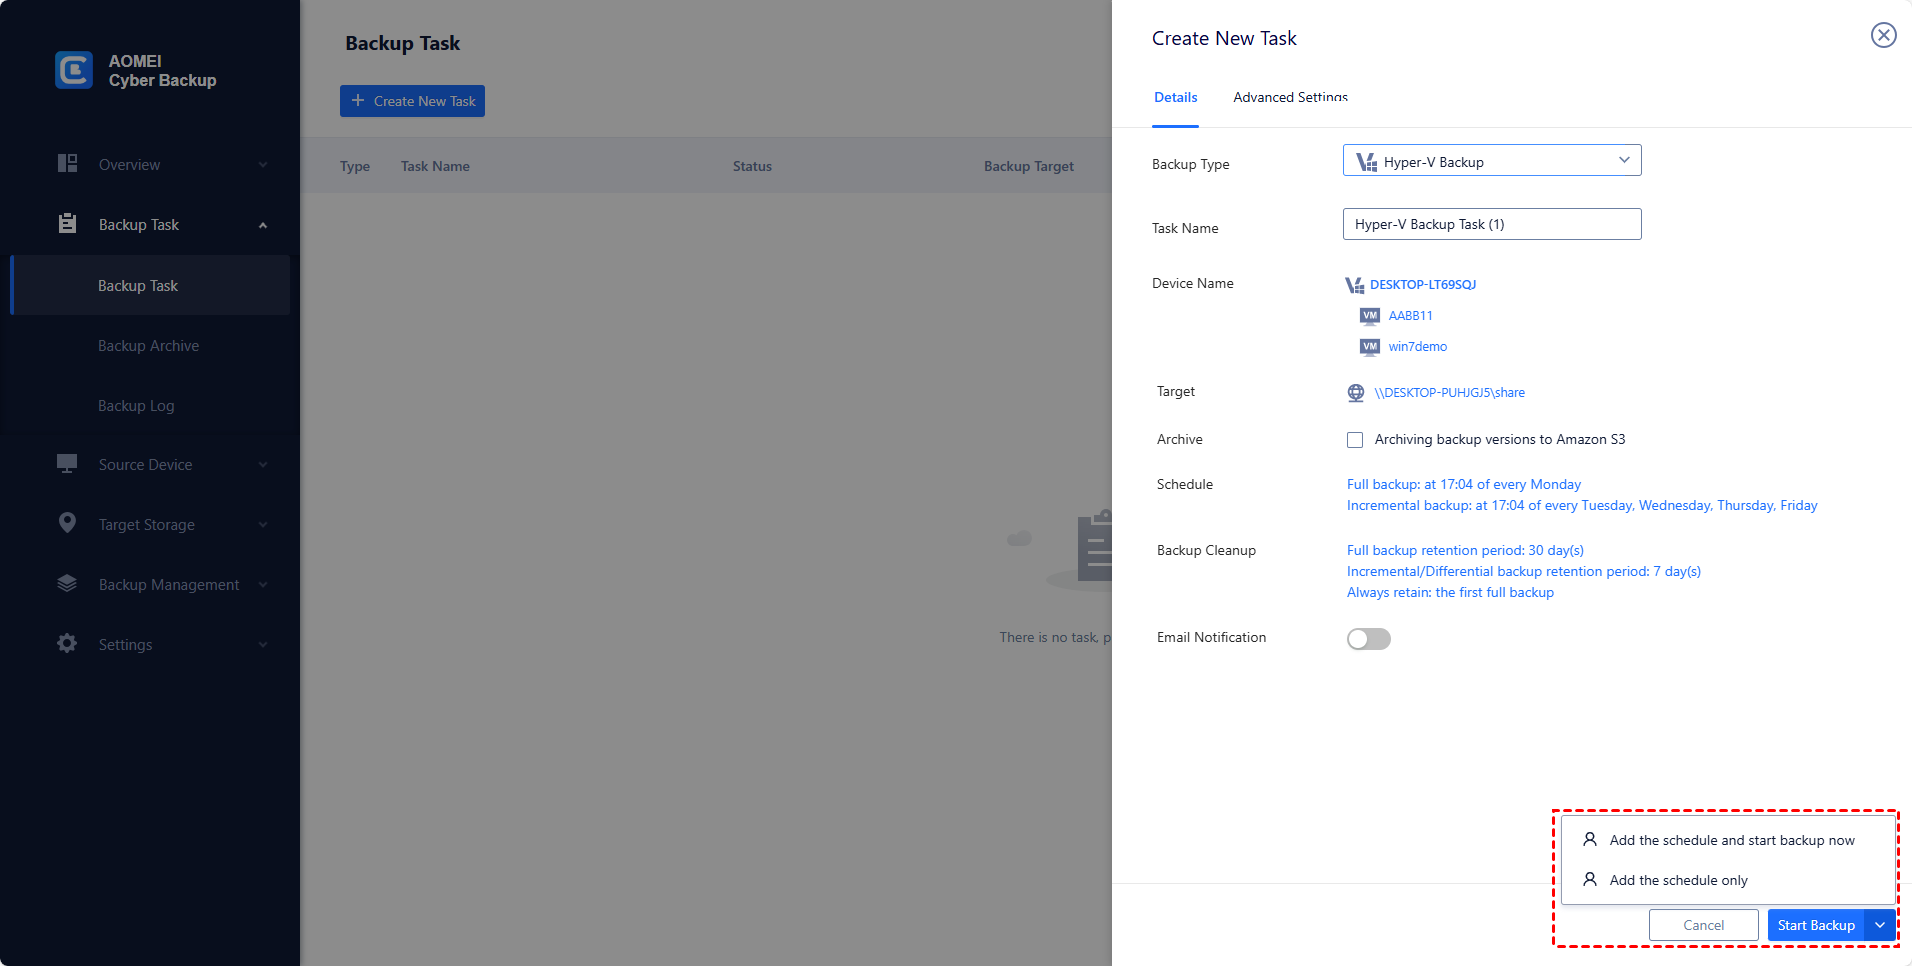
2. Create Backup Task: Navigate to Backup Task > + Create New Task, and then set Task Name, Backup Type, Device, Target, and Schedule.
- Device: select VMs on the host in one backup task.
- Target: select to back up to a local path, or to a network path.
- Schedule: choose to perform full, differential or incremental backup, and automate execution according to the frequency you specified.
3. Run Backup: Click Start Backup and select Add the schedule and start backup now, or Add the schedule only.
4. Restore VM: Click … > Restore on the backup task to open a wizard, and click Select Content to specify a restore point. Select to Restore to original location, and click Start Restore.
Summary
You may haven’t specified enough memory when you created your virtual machine. Fortunately, Microsoft enhanced the Windows Server 2016 and later versions with the feature Hyper-V hot add/remove memory. In this article, I introduced how to perform Hyper-V hot add memory and Hyper-V remove memory. Both of these ways are easily to perform.
Running out of the memory of your Hyper-V virtual machines may bring many problems. Except for add memory. Please don’t forget to backup Hyper-V virtual machines regularly. You can try AOMEI Cyber Backup. It can be used to restore entire VM in case of accidental errors.

