


Sync SQL Database in Azure SQL Database and SQL Server [Complete Guide]
Understanding database synchronization is essential for businesses seeking to optimize their operations and maintain data integrity in a dynamic and interconnected digital landscape. Join us and set up a complete plan of SQL data sync.
By Crystal / Updated on October 26, 2023
What Is Database Synchronization in SQL Server
Database synchronization in SQL Server refers to the process of ensuring that data across multiple databases remains consistent and up-to-date. In a typical scenario, an organization might have several instances of SQL Server databases running in different locations, on various servers, or even in the cloud. These databases need to be synchronized to maintain data integrity, reduce data conflicts, and support applications that rely on accurate, real-time information.

Requirements of using SQL Data Sync
Before using SQL Data Sync, it's essential to ensure that your environment meets the necessary system requirements to successfully set up and run the service. SQL Data Sync is a cloud-based service offered by Microsoft for synchronizing data across multiple SQL Server databases and Azure SQL Databases. Here are the typical system requirements and considerations:
✔ Azure Subscription: You must have an active Azure subscription to use SQL Data Sync. If you don't have one, you can sign up for an Azure account on the Azure website.
✔ Supported Database Versions: SQL Data Sync is compatible with the following database versions:
- SQL Server 2019, 2017, 2016, 2014, 2012, and 2008.
- Azure SQL Database.
How to Set up SQL Data Sync between Two databases
This can be incredibly useful in these scenarios where you have databases in different locations, on-premises and in the cloud or if you simply want to create redundancy and ensure data consistency.
In this part, we will walk you through the process of setting up SQL Data Sync between two SQL Server databases. The steps include:
Step 1. Create a Sync Group
1. Ensure that databases can be hosted on Azure SQL Database, SQL Server on Azure VM, or on your on-premises SQL Server.
2. In the Azure portal, navigate to the SQL Database that you want to sync with. Select "Sync to other databases" >> "New Sync group" to create a new synchronization group.
3. Follow the wizard to specify the source and target databases, choose sync direction, conflict resolution policy, and sync frequency.
Under the Conflict Resolution, one of two options can be chosen in case a conflict occurs:
The first option is the Hub win. If this option is chosen and the conflicts occur, the data in the hub database overwrite the conflicting data in the member database.
The second option is Member win. In a conflict situation, the data in the member database will overwrite the data in the hub database.
Step 2. Set Up Sync Members
Add databases to your sync group as members. This can include on-premises SQL Server databases or other Azure SQL Databases.
1. Enter the existing username and password for the SQL Database server under Database.
2. Under the Member Database section, an azure database can be added as a member by selecting Add an Azure Database or a on-premises SQL Server database can be added by selecting Add an On-Premises Database.
For example, to add an SQL Server database, we select Add an On-Premises Databases, and then the Configure On-Premises tab will appear:
3. To start configuration synchronization between the Hub database and on-premises SQL database, select Choose the Sync Agent Gateway; the Select Sync Agent tab will appear:
4. On the Choose the Sync Agent page, choose whether to use an existing agent or create an agent.
- If you choose Existing agents, select the existing agent from the list.
- If you choose Create a new agent, do the following things:
a. Download the data sync agent from the link provided and install it on a server that is different from where the SQL Server instance is located. You can also download the agent directly from Azure SQL Data Sync Agent. For best practices on sync client agent, refer to Best practices for Azure SQL Data Sync.
b. Enter an Agent Name.
c. Select Create and Generate Key and copy the agent key to the clipboard.
d. Select OK to close the Select Sync Agent page.
5. On the server where sync client agent is installed, locate and run the Client Sync Agent app.
a. In the sync agent app, select Submit Agent Key. The Sync Metadata Database Configuration dialog box opens.
b. In the Sync Metadata Database Configuration dialog box, paste in the agent key copied from the Azure portal. Also provide the existing credentials for the server on which the Sync Metadata Database database is located. Select OK and wait for the configuration to finish.
c. Select Register to register a SQL Server database with the agent. The SQL Server Configuration dialog box opens.
d. In the SQL Server Configuration dialog box, choose to connect using SQL Server authentication or Windows authentication. If you choose SQL Server authentication, enter the existing credentials. Provide the SQL Server name and the name of the database that you want to sync and select Test connection to test your settings. Then select Save and the registered database appears in the list.
e. Close the Client Sync Agent app.
6. In the Azure portal, on the Configure On-Premises page, select Select the Database.
7. On the Select Database page, in the Sync Member Name field, provide a name for the new sync member. This name is distinct from the name of the database itself. Select the database from the list. In the Sync Directions field, select Bi-directional Sync, To the Hub, or From the Hub.
8. Select OK to close the Select Database page. Then select OK to close the Configure On-Premises page and wait for the new sync member to be created and deployed. Finally, select OK to close the Select sync members page.
Step 3. Map Tables for Synchronization
1. Under Tables section, select the tables you want to synchronize and click Save.
2. Define the sync direction for each table (bi-directional or one-way sync). By default, databases are not synced until scheduled or manually run. To run a manual sync, navigate to your database in SQL Database in the Azure portal, select Sync to other databases, and select the sync group. The Data Sync page opens. Select Sync.
You can use Azure portal tools to monitor synchronization progress, review conflict logs, and adjust synchronization settings as needed.
How to Automate Database Backup in SQL Server
Automating database backups in SQL Server is a smart move for data security and disaster recovery. AOMEI Cyber Backup simplifies this process and offers key benefits for SQL database backups:
✧ Effortless Automation: AOMEI Cyber Backup streamlines the backup process, allowing you to set up automatic, scheduled backups of your SQL Server databases.
✧ Comprehensive Protection: You can ensure the safety of your SQL databases by performing full, incremental, or differential backups, giving you a range of options for data recovery.
✧ Versatility: It supports SQL Server 2005 - 2022 making it compatible with a wide range of SQL Server versions.
✧ Intuitive User Interface: The user-friendly interface makes it accessible to both SQL Server novices and experts.
You could click the following button to use AOMEI Cyber Backup for 30 days trial.
Schedule Auto Backups and Deletion for SQL Server Databases
To properly use AOMEI Cyber Backup, you should note these prerequisites for Microsoft SQL backup:
✧ Computer with both AOMEI Cyber Backup Agent and Microsoft SQL Server installed
✧ Local disk or network share to store backup files
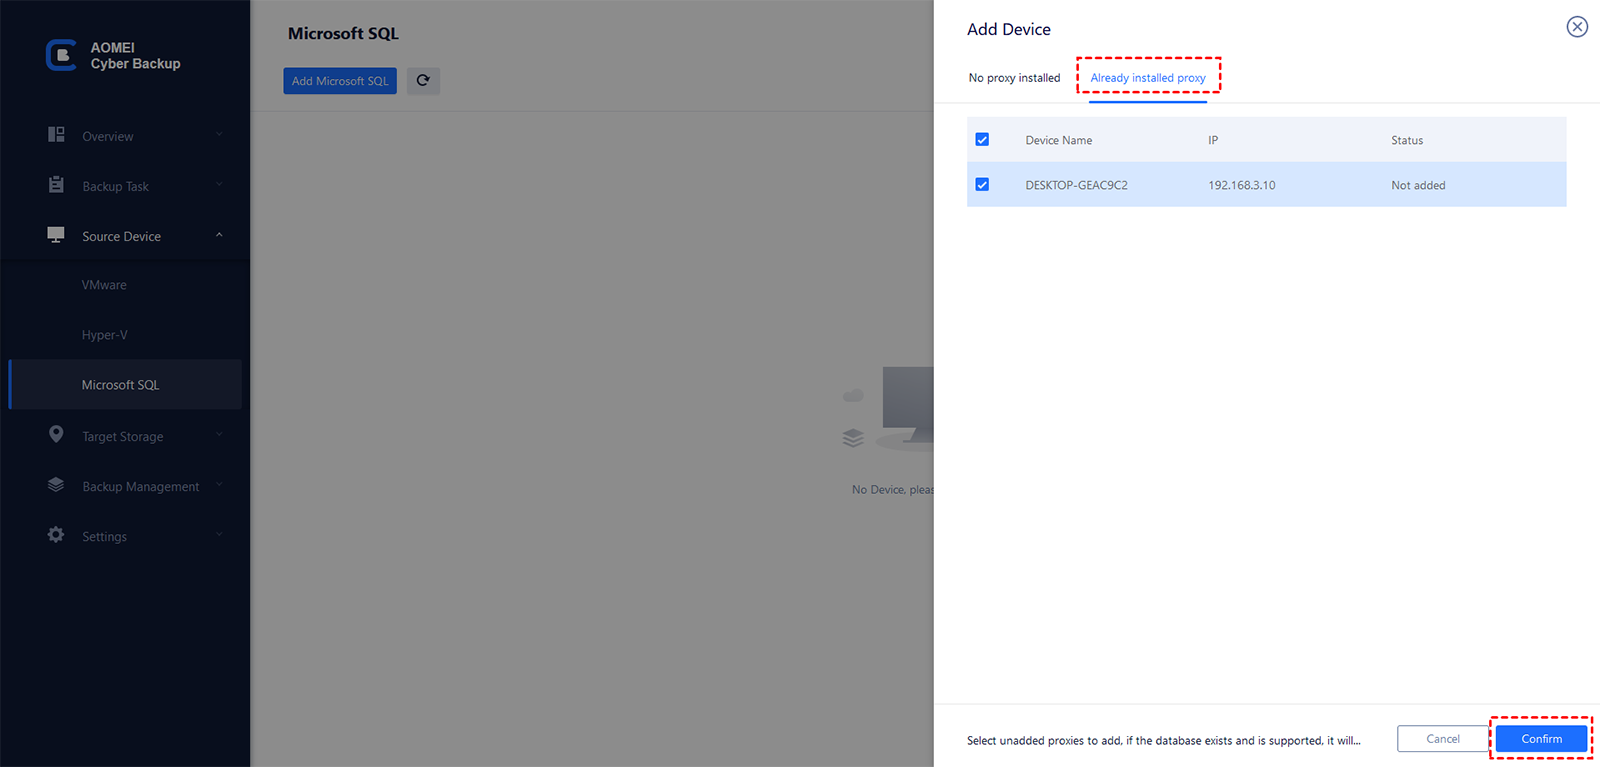
1. Access to "Source Device" > "Add Microsoft SQL". If the database exists and the version is supported, it will appear automatically. Otherwise, you can click "Add Microsoft SQL" > "Download proxy program", and install the program on the device with SQL Server installed. Then click "Already installed proxy" and select the proxies you want to add.
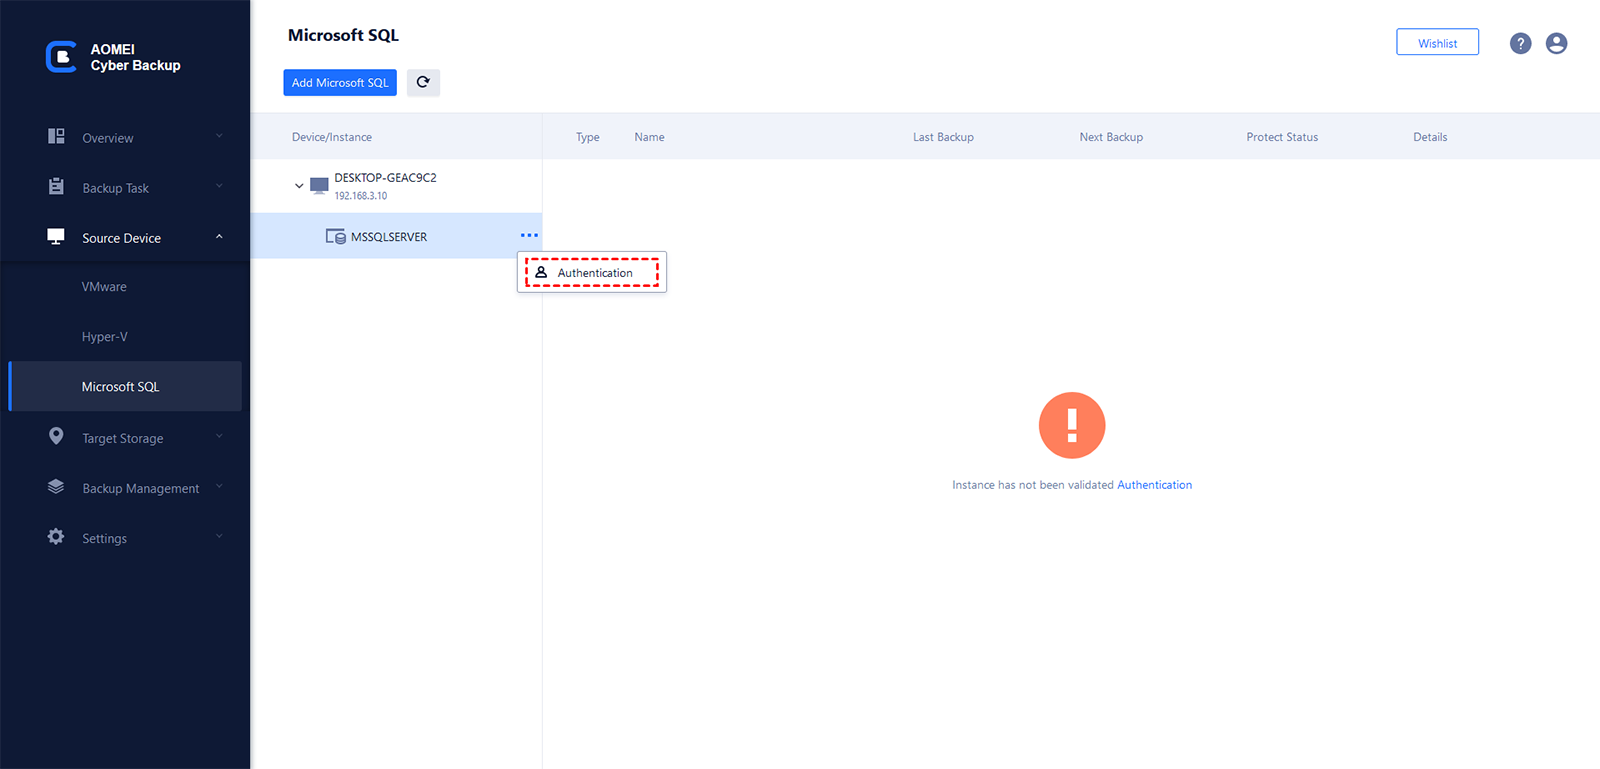
2. Click "..."-->"Authentication" to validate the database instance. You can choose "Windows Authentication" or "SQL Authentication". Enter the credentials and click "Verify".
3. Click "Backup Task" > "Create New Task" to backup your SQL databases.
4. Choose backup type as "Microsoft SQL Backup", and you could also try virtual machine Backup.
5. Enter a name for the backup task, then go to select the databases you want to backup and specify a location as a storage end.
6. Schedule SQL database backups to automate backup tasks:
- Select backup methods as full/incremental/differential and specify the backup time as daily/weekly/monthly. Your SQL databases will be protected automatically and regularly.
7. Enable "Backup Cleanup" to delete old SQL backups automatically.
8. Click "Start Backup" to complete the backup task. It will automate SQL server database backups.
Conclusion
Database synchronization in SQL Server helps you keep data across multiple database instances consistent and up-to-date. This article offers detailed steps to set up SQL data sync, which is vital for businesses aiming to optimize operations and data accuracy.

