


Clone HDD to VMware Image | Easy and Effective Alternative
Since VMware vCenter Converter is unavailable for download now, is there other way you can choose if you want to clone HDD to VMware image or convert VMware image to HDD? In this article, I will introduce you an easy and effective alternative.
By Crystal / Updated on February 13, 2023
Case: Is there a way to clone HDD to VMware image?
I want to take the physical hdd of a dead server and convert it to a vmware virtual machine so that I can run it on a replacement server. How do I do that?
- Question from communities.vmware.com
You may run into the same situation as the above case. When you server fails or you just want to do some testing in other environments, you may want to add physical disk to VMware ESXi, clone HDD to VMware image or from VMware image to HDD. In a broad sense, they are both ways of V2P or P2V in VMware.
You may recall that there is an official tool VMware vCenter Converter that can be used to perform P2V conversion. VMware once announced that vCenter Converter is unavailable for download, but now the renewed version vCenter Converter 6.3.0 makes a comeback, compatible with vSphere 7.0 and ESXi 7.0!
You can click here to download it.

This article will show you how to use the renewed vCenter Converter and an easy and economical alternative to perform P2V or V2P migrations.
How to perform P2V or V2P migration with vCenter Converter
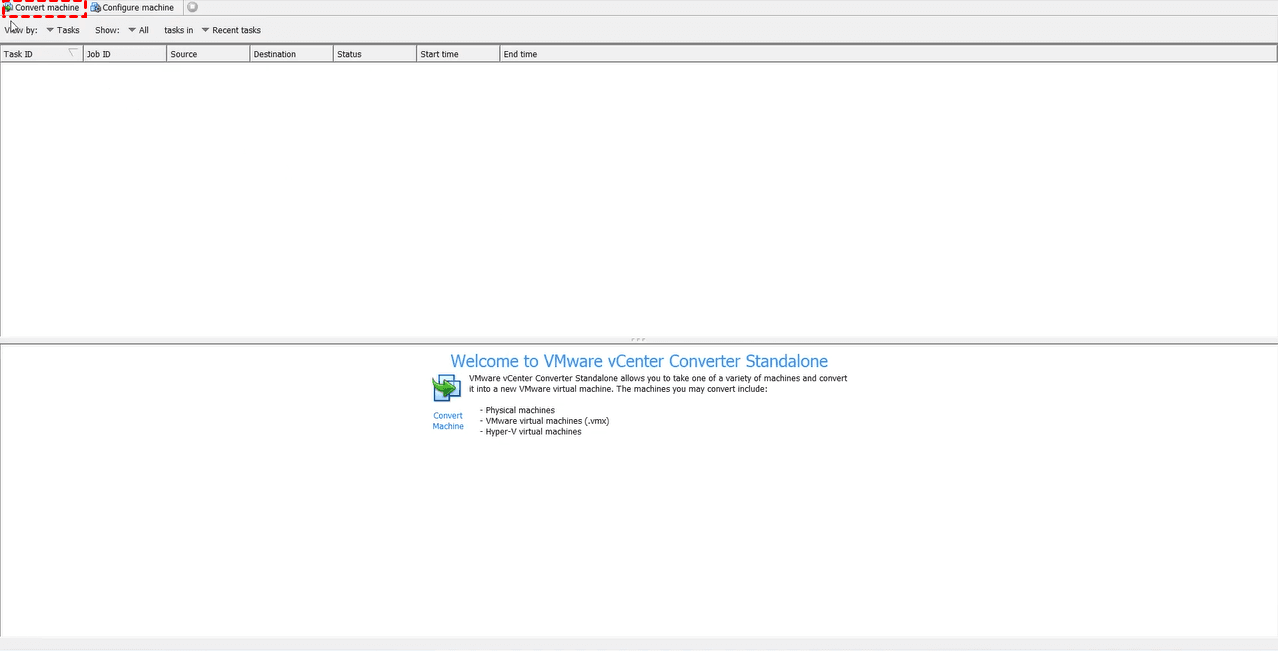
1. Launch VMware vCenter Converter Standalone, click Convert machine button to open the wizard.
2. On Source System tab, select source type as Powered on option, and select Remote Windows machine from the below dropping menu.
Provide relevant connection credentials, and click Next.

3. It will pop up a window to inform you that the Converter agent needs to be temporarily installed on the remote source machine.
Choose whether to automatically uninstall the agent when import succeeds or not. Click Yes to continue.

4. On Destination System page, select VMware Infrastructure virtual machine as the destination type, and provide VMware server connection credentials. Then click Next.

5. On Destination Virtual Machine page, provide an inventory Name for the new VM, and click Next.

6. On Destination Location page, select the ESXi host, Datastore, and Virtual machine version. Click Next.

Tip: If you want to convert to VMware Workstation, Fusion, or Player: On Destination System page, select VMware Workstation or other VMware virtual machine as the destination type, and select VMware product in the dropping menu. Provide a Name and select a location for the virtual machine. You can select a local folder or a network share, with User name and Password to be used when connecting to the network share of the destination virtual machine. Then click Next.
7. On Options page, browse Current settings and optionally Edit the parameters for the conversion task. Then click Next to continue.

8. On Summary page, review the settings and click Finish to start conversion. You can see the progress in Recent Tasks.
For more details, you could refer to VMware vCenter Converter Standalone document.
An easy alternative to perform P2V & V2P: file-based backup
As many speculate that the new VMware P2V product is most likely to be a paid one, or in a subscription model, you may still need to find an affordable alternative after that. In this regard, file-based backup can be a good solution.
In file-based backup way, you can backup virtual machines as physical machines by installing a backup agent on the guest operating system (OS), and restore to another guest OS. It is easy, familiar to everyone, and can be used to perform both P2V and V2P migrations.
Here I recommend you an easy and economical tool AOMEI Centralized Backupper. It is a professional backup software that capable of backing up File, System, Disk, Partition, and SQL Server in simple steps.
Next, I will demonstrate how to perform P2V and V2P migrations via file-based backup. You can click the following button to start a free trial.
How to perform P2V migration via AOMEI Centralized Backupper
1. Launch AOMEI Centralized Backupper, and navigate to Computers > Uncontrolled Computers. Check your physical machine and the virtual machine (with a static IP) from the Computers list, and click Request Control.
It will pop up a request window on both of the machines, once you are authorized you can backup whenever you like.

2. Click Tasks > New Task > Disk Backup to create a backup task. You can change the task name by moving the cursor over the task name and click on it.

3. There are 3 steps to follow. Firstly, click + Add Computers to specify the controlled physical machine as the source, click OK to confirm.

4. Then specify the HDD you want to clone as the source disk to clone HDD to VMware image.

In addition, click on the inverted arrow sign ﹀ you can select to backup All disks, Disks containing system partitions, Disks containing partitions with specified drive letters, or Disks containing partitions with matching labels from the dropping menu.

5. Specify a Share or NAS device to store the backup, and then click Start Backup.

6. The created task will be listed separately in Tasks. Click Advanced > Restore on the right top of the task, and select to Restore to another computer. Specify the VMware virtual machine you want to restore to, and click Next to continue.

7. You can Edit Disk, or Align partition to optimize for SSD in this step. Then you can click Start Restore to restore HDD you backed up to the VMware VM.

Except for P2V migration, file-based backup and restore also support V2V migration and V2P migration. If you want to perform V2P migration, for example, convert VMware image to HDD, you can also backup everything on VMware VM and then restore to the HDD with easier steps. Just select the virtual machine as the source and the HDD as the destination.
Summary
Virtual machines are convenient for providing secure sandbox environments for tests and development. Sometimes you may want to convert physical machine to virtual or vice versa, for example, clone HDD to VMware image, convert VM to ISO or VMware image to HDD. As VMware vCenter Converter are no longer available for download, in this article, I introduced an easier way to perform P2V migrations, AOMEI Centralized Backupper.
Using AOMEI Centralized Backupper, you can also centrally control multiple computers within LAN, and perform data migration remotely. It can save effort and promote work efficiency.

