How to Easily Backup iPhone to NAS Drive
One-Stop iPhone Data Backup, Transfer and Management Solution.
By Dylan / Updated on October 25, 2023
Backing up iPhone to NAS is safe for your data
After years of use, your iPhone could carry a lot of information about you. You might have taken a lot of pictures and videos with it. Those files could eat much storage on your device.
So lots of people would like to set Set up a personal NAS storage. NAS is short for Network-attached storage, which is a personal data storage server connecting with multiple devices. You can backup your iPhone data, like photos, videos, music to your NAS drive, and you can view and use these data any time you need.
What’s more, it would be secure to save data to your own server. Indeed, NAS has become more and more popular. You could find how to use your NAS device to backup iPhone data or you could backup iPhone with iCloud.

How to easily backup iPhone to NAS drive
Next, we would like to guide you on how to backup your iPhone data to your NAS drive. Before we do that, you need to click to learn how to map a network drive to your PC, so that you can select it as a local path. Then you could use the professional iPhone backup software to save files on iPhone to NAS.
Step 1. Prepare to map a network location
Map the network drive to your PC, depending on the OS you're using.
For Windows 7:
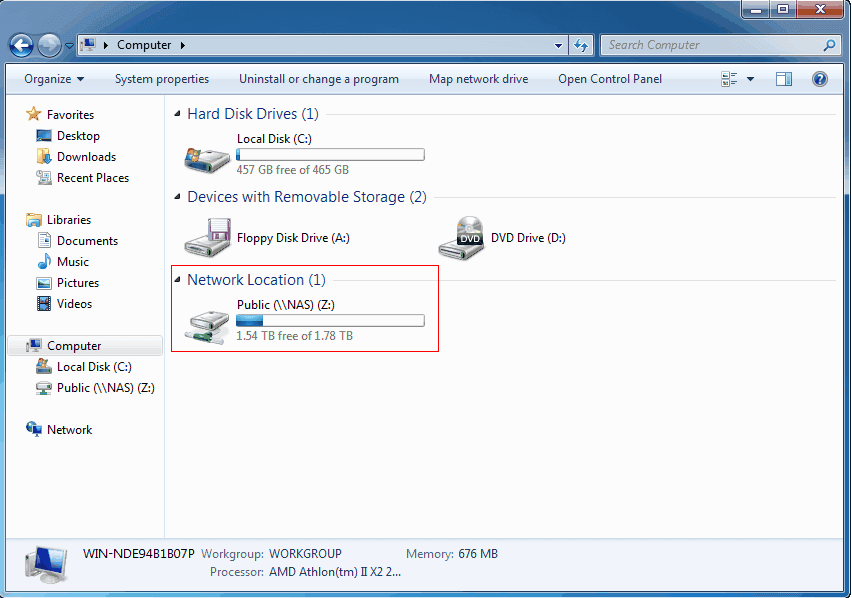
Step 1. Click the Start button to open Windows Explorer and click "Map network drive" in the Tools menu.
Step 2. Choose the drive letter you like. The default drive letter would be “Z”. Click the "Browse" button to choose the path from your NAS. Username and password would be required.
Step 3. Check “Reconnect at logon” to save the location or you need to connect it next time. Click Finish and the Internet location would be mapped to your computer.
For Windows 8/10:
The general process of mapping a network drive to computer on Windows 8 or 10 is similar to that on Windows 7. The major difference is how to start it. On Windows 8, you should click the Start button to enter File Explorer and then right-click the "Network" from the left navigation bar. On Windows 10, you should enter File Explorer and then click Map network drive in the Tools menu.
After mapping the Internet position, you could set about backing up iPhone to NAS.
Step 2. Download FoneTool for free to backup iPhone to NAS drive without Wi-Fi
To backup iPhone to NAS, you need FoneTool, which is one of the best professional iPhone backup tool. With it, you could backup your iPhone to Nas or anywhere on your computer over Wifi. FoneTool could save all the photos, videos, music, messages, and contacts to a NAS drive, as well as a USB drive, external disk, and local drive.
It owns several advantages in satisfying various demands for backup
◆ Preview and Select: You could preview and select the files on your iPhone and extract the needed ones to NAS. It is also allowed when you restore iPhone.
◆ Change Path: It would be very easy to change the path to save everything to NAS.
◆ Completely and partially backup iPhone: You can decide if you Nas to backup specific items or backup all data on iPhone.
◆ Widely Compatible: It supports most iPhone models from iPhone 4 to iPhone 15 and would be perfectly compatible with the latest iOS 17.
Step 3. Connect iPhone to computer with USB cable and tap “Trust” on it.
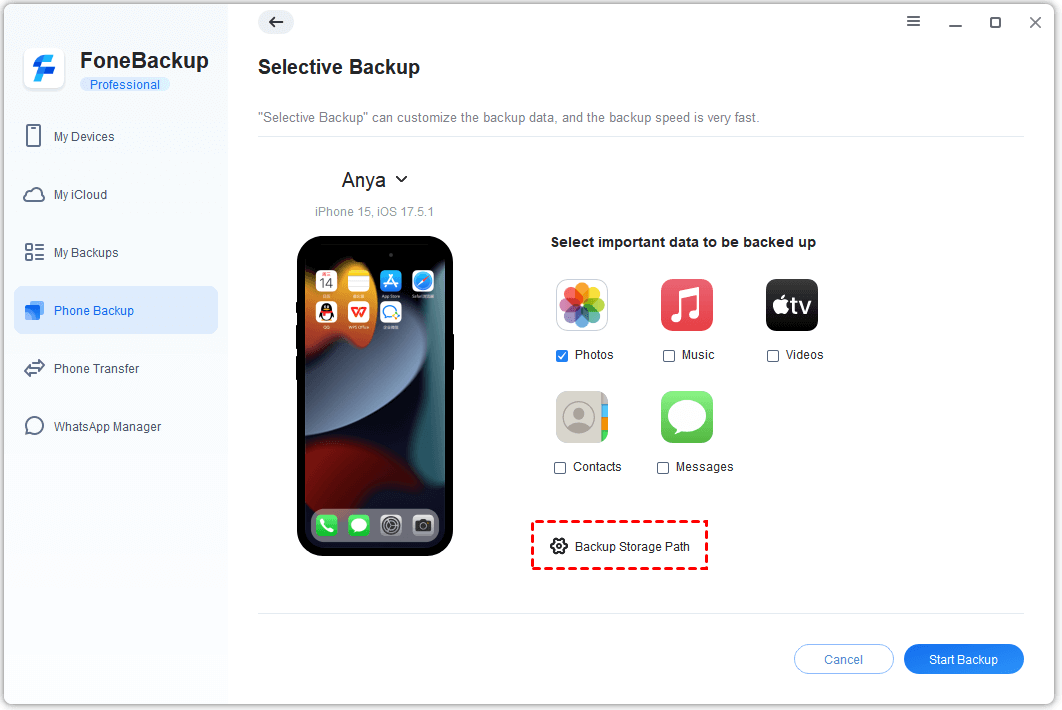
Step 4. Choose Phone Transfer > Selective Backup > Get Started to run this feature.

- ★Note:
- Your data will be stored as backup image. You can also click "Transfer to Computer" to save the original data on the target location.
- To fully backup your iPhone, you can click "Full Backup" on the main interface.
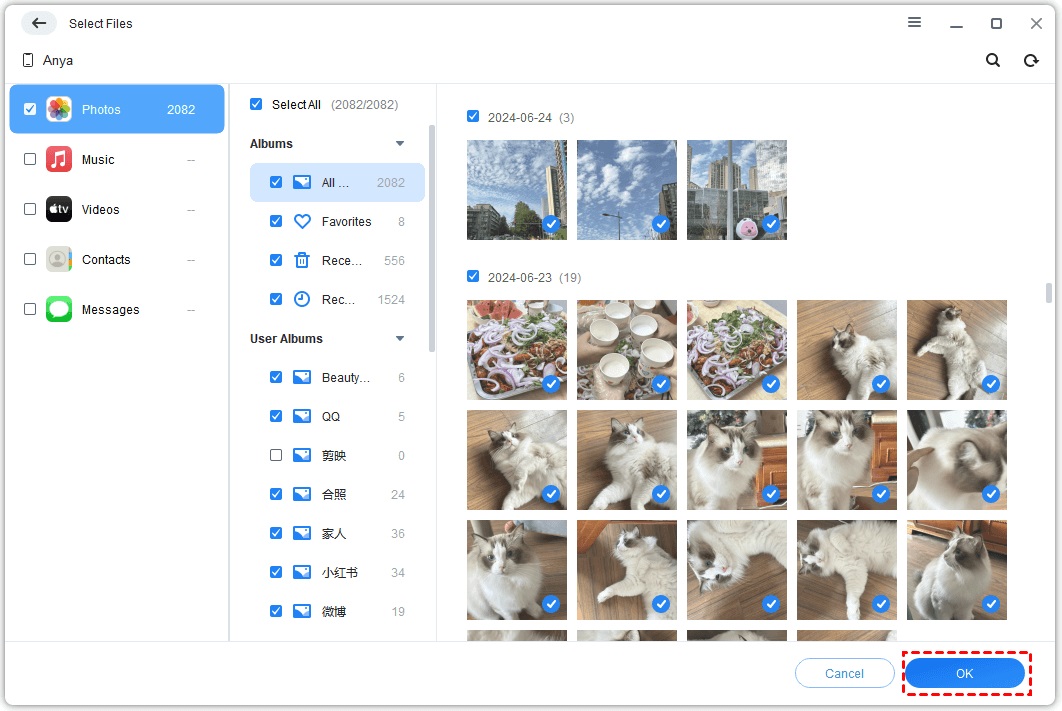
Step 5. Click an icon to preview and select files. And click "OK" to return.
Step 6. Click Backup Storage Path and choose the Nas as the storage path. Tap Start Backup to complete.
☛ To restore iPhone from that backup, you just connect your iPhone, select the task in Backup History, and select Restore. You could also export files from iPhone backup to iPad or iPod Touch.
☛ You might hear of iTunes. It is not suggested to use iTunes to back up iPhone to NAS for restoration with iTunes is very likely to fail. If you insist, try backing up iPhone to an external drive with iTunes
☛ This method can be used to backup iPhone to Synology/WD/qnap NAS drive.
Conclusion
This is how to backup iPhone to Synology/WD/qnap NAS drive. SNAS makes storing a number of files possible. If you want to backup iPhone to NAS, you should map the Internet location to computer, and then use Backup History to backup iPhone photos, videos, messages, contacts to your NAS. It would be very simple.
backing up iPhone to an external drive with iTunes" Share this passage and it would help more people.