How to Perform SSD Secure Erase and Restore SSD Performance?
This article covers how to do SSD secure erase in Windows in simple steps. AOMEI Partition Assistant could permanently wipe data from SSD to improve SSD performance or protect your privacy data from being recovered by others.
What is SSD Secure Erase?
The way to write data on an SSD is entirely different from that on an HDD (hard disk drive), so you cannot use the same method to wipe HDD to erase SSD. As you may know, intensively writing data on SSD will reduce its performance and shorten its lifespan.
Secure Erase is a feature for SSDs (solid state drive) that ensures all data stored on the SSD storage device will be completely cleaned and then the SSD will achieve at its original ideal performance level.
Secure Erase only takes a few seconds to complete. Based on different connection ports you use, the specific time varies. It performs better when connected directly from a SATA port. You cannot perform a Secure Erase via USB port because it may arise problems.
3 situations that you need to do Secure Erase
Restore SSD to original performance (factory state)
You may notice your SSD slowing down and SSD performance drops a lot after using it for several months or longer. If you want to restore it to the original performance, you can backup data on the SSD and then do an SSD Secure Erase.
Give SSD a start fresh without hurting it
If you want to do a start fresh by reinstalling Windows 10/8/7, you can do a Secure Erase because regular format cannot really clean your SSD and it will actually hurt your SSD life span.
Protect privacy
When you are upgrading to a larger SSD and planning to donate, sell or even dispose of your old SSD drive, you need to completely delete data from it. Then formatting SSD is not safe enough since that only makes data invisible, but can be recovered easily. So SSD secure erase is necessary to protect your private, sensitive data stored on the SSD from being stolen by others.
Choose a powerful SSD erase software
In order to securely erase SSD, you need a powerful SSD erase utility. Good news is some SSD drive manufacturers developed their own specialized SSD Secure Erase utility to help you clear data on SSD, like Samsung Magician, Intel SSD Toolbox, and SanDisk SSD Toolkit. If you are erasing those SSDs, you can go for them.
What if the SSD drive you need to erase is not from those brands? No worries, you can always use AOMEI Partition Assistant Professional, which is able to erase many popular SSDs securely within Windows 7.
How to perform SSD Secure Erase with AOMEI Partition Assistant
You can follow the step by step guide below to securely erase SSD and then reset it to factory state .
Step 1. Connect your SSD to a Windows 7 computer via SATA port (since SSD Secure Erase is only workable in Windows at present). Install and run AOMEI Partition Assistant Professional.
Step 2. In the top menu of AOMEI Partition Assistant, Click "Wipe"> "SSD Secure Erase" and click "Next".
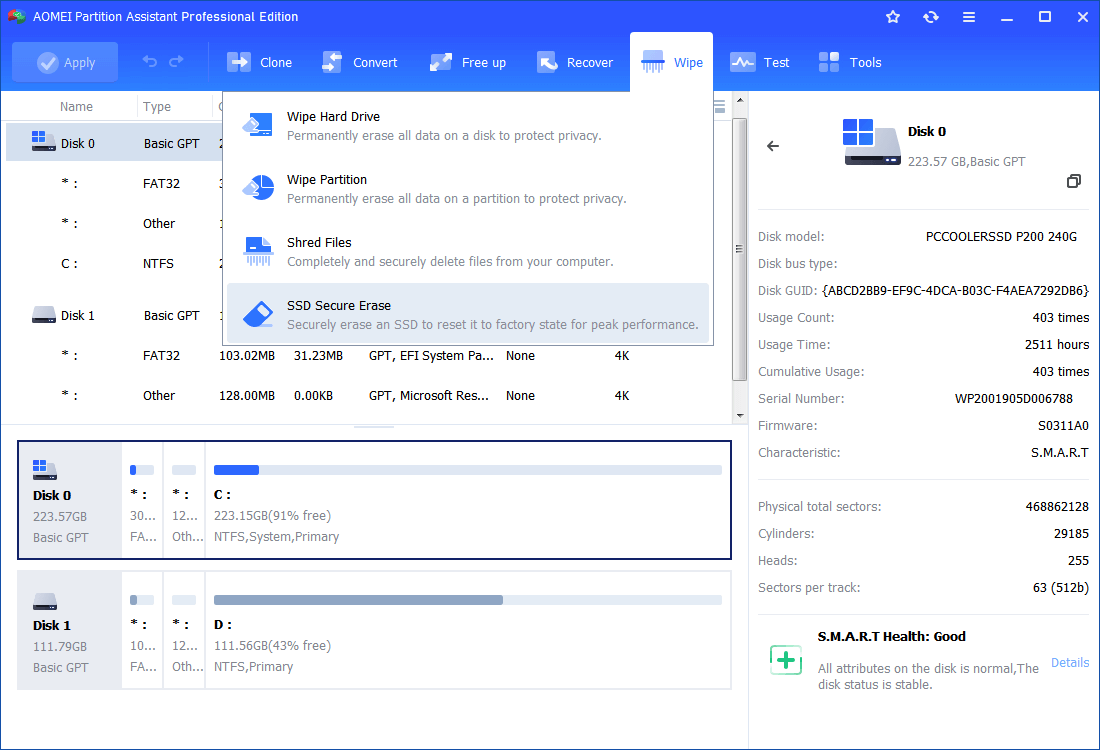
Step 3. Select the SSD that you want to securely erase and click "Next".

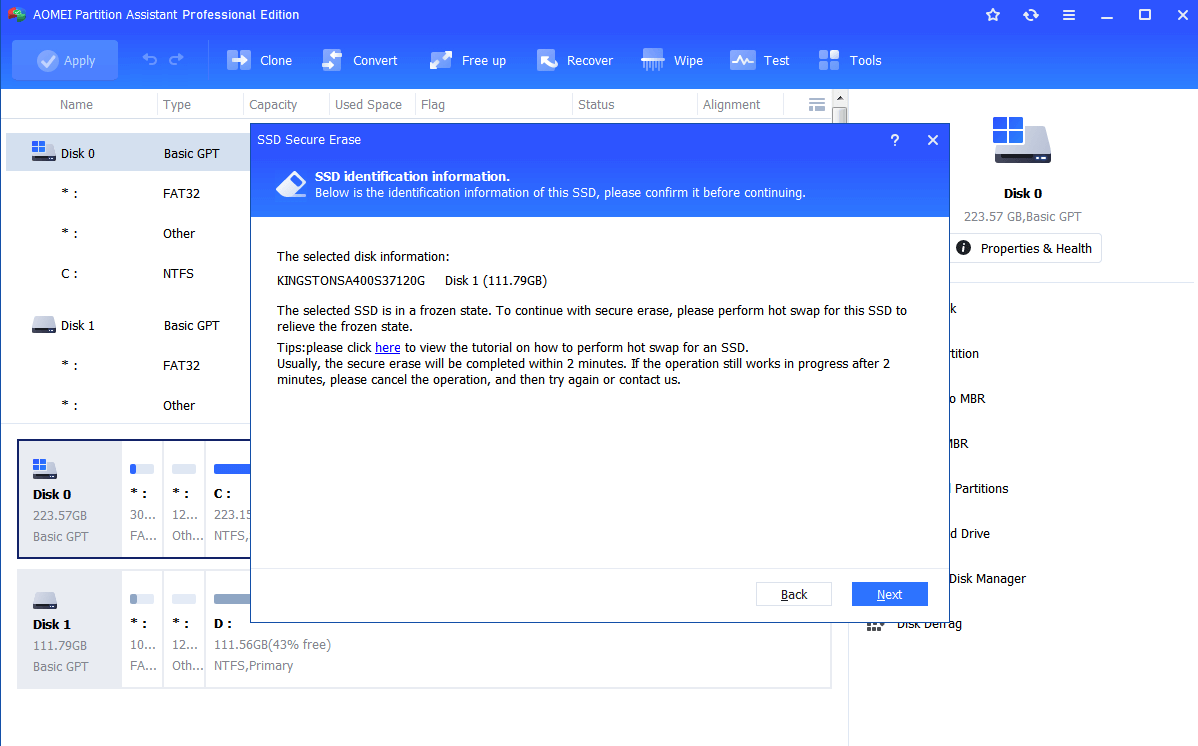
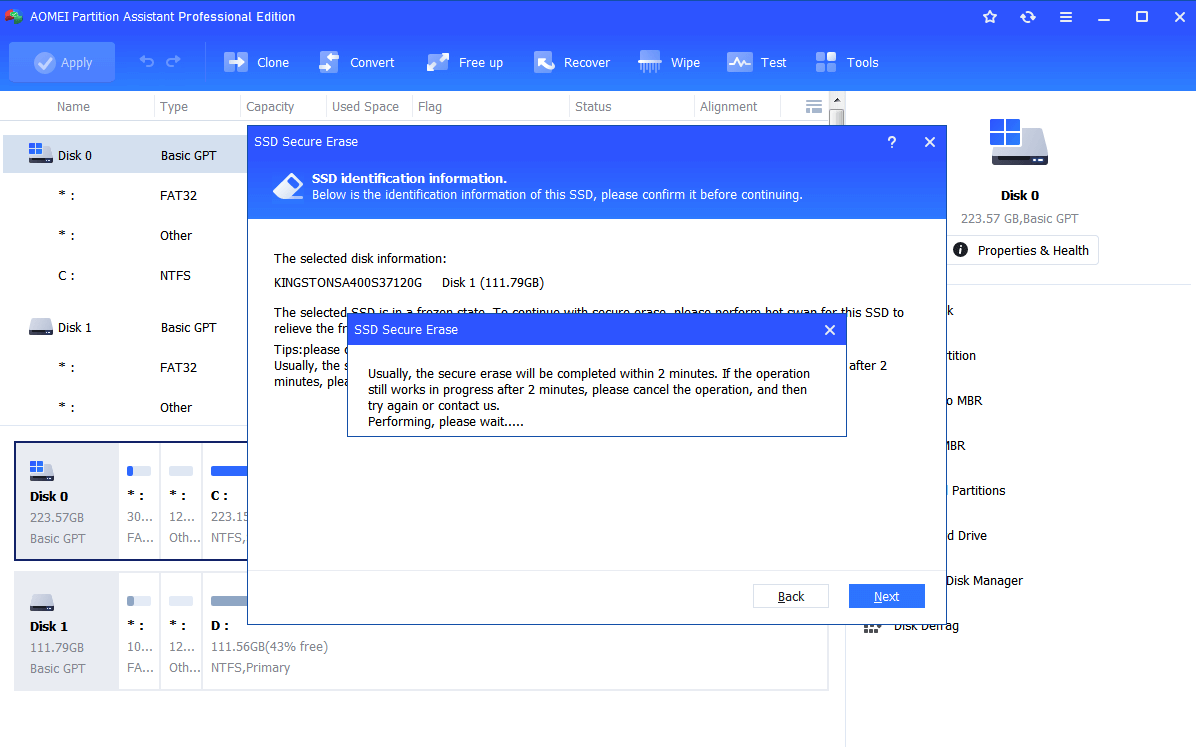
Step 4. Double check the SSD identification information in case of erasing the wrong SSD because the data is unrecoverable after the Erase. Now, you will see the SSD is in a frozen state. To continue, you need to perform a hot swap.
To perform Hot Swap
Sometimes, Secure Erase SSD requires hot-swapping the drive to unlock it from the frozen state. To avoid unexpected issues, follow the steps below:
1. Open your computer case. If it is a laptop, open the computer's rear cover or drive shell.
2. Locate the SSD that needs to be securely erased.
3. Unplug the power cable from the SSD.
4. Disconnect the SATA data cable from the SSD.
5. Then reconnect the SATA cable to the SATA port on the SSD.
6. Finally, plug the power cable back into the SSD's power connector to complete the hot-swap.
Step 5. click "Next" to start the SSD Secure Erase.
Almost instantly, the Secure Erase process is complete and you will see the SSD shown as a block of unallocated space. If you want to wipe your current system disk where Windows is installed. You can connect your SSD to another computer that runs Windows 7 to follow the steps above to securely erase your system SSD.
Summary
In conclusion, with the feature “SSD Secure Erase” provided by AOMEI Partition Assistant, you can securely and permanently wipe all data from your SSD. This operation could restore SSD to the factory peak performance. Besides, this software also offers users another different method to wipe HDD.
Note: If your system is Windows 10, you could contact support for the WinPE ISO, which contains the SSD Secure Erase function.